


To keep your data in ChurchTools up to date, you can use the Sync module to synchronize your database directly with DaviP, the German church’s registration system. If, for example, an address changes there, the change will be transferred to your ChurchTools.
The connection to DaviP is a read-only connection. This means that data is synchronized only to ChurchTools and not in the opposite direction. Changes made in ChurchTools are therefore not synchronized back to DaviP.
You can only sync contact and home information.
Records with lock flags are generally not synchronized.
1. Connect DaviP #
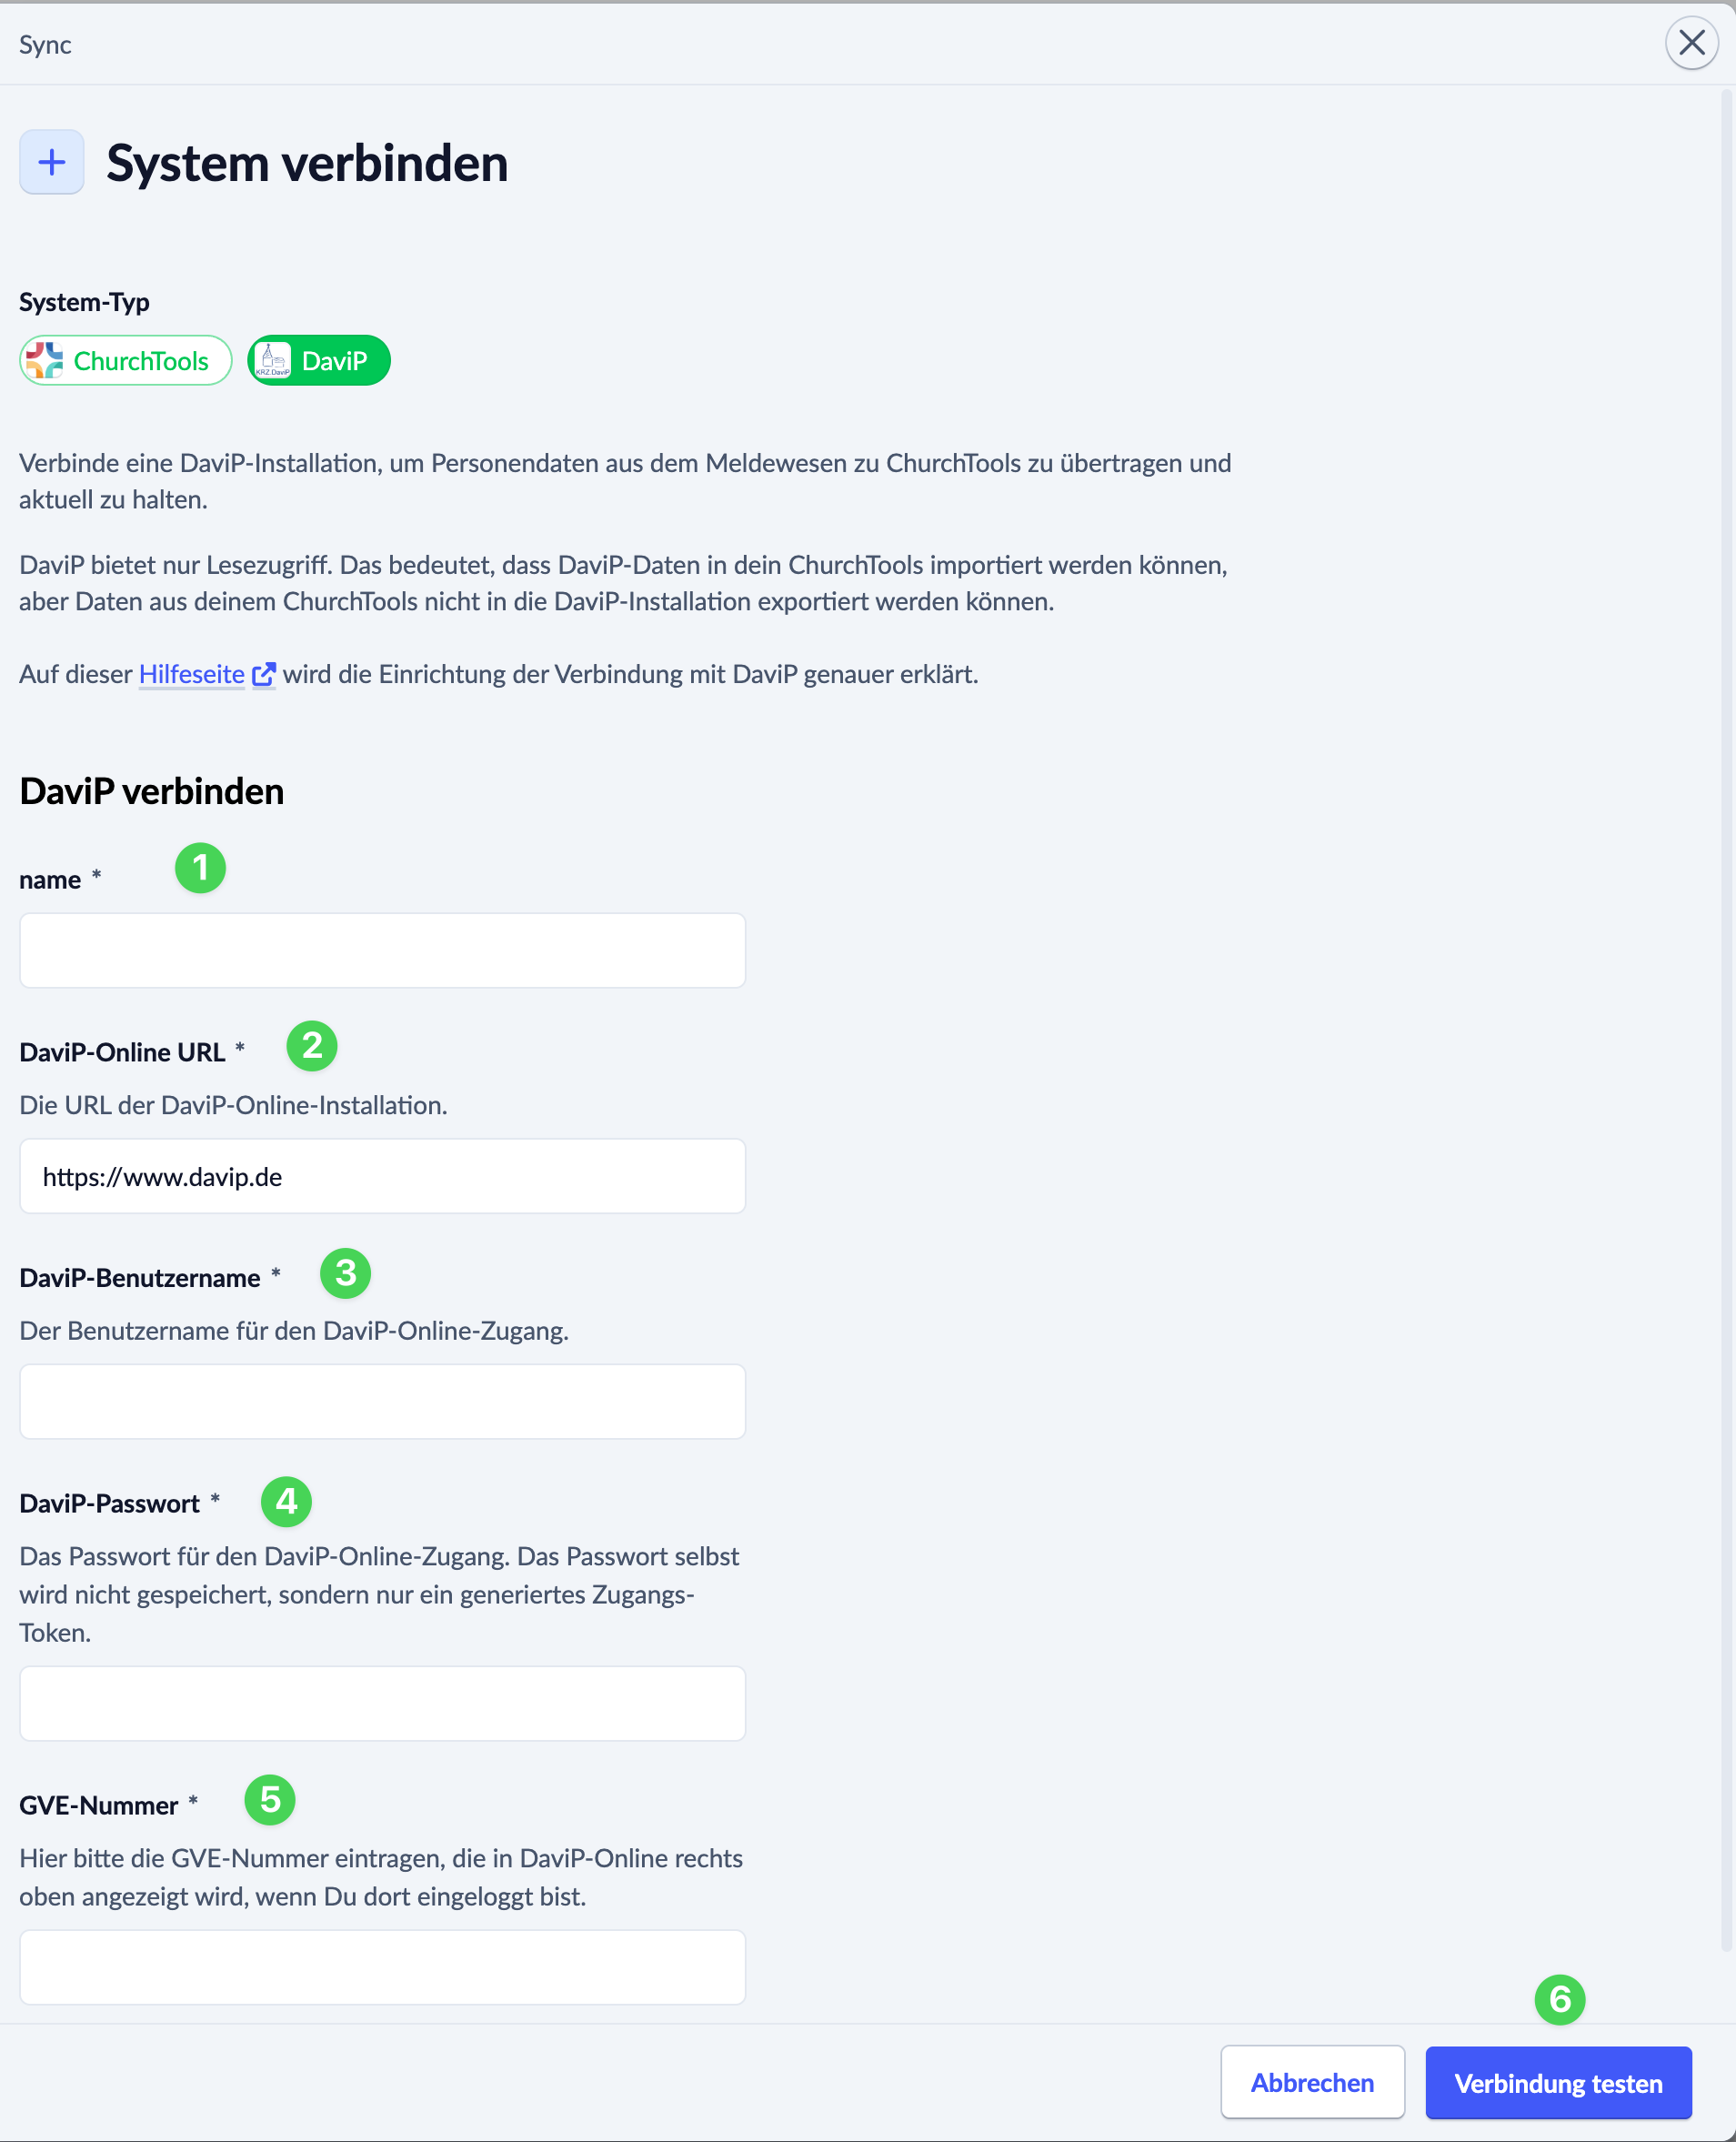
In ChurchTools, go to Sync + System. Here, enter
- a name for the connection (1),
- the URL for your DaviP online installation (typically: “https://www.davip.de”) (2),
- your login credentials for DaviP (3) and (4) and
- enter your GVE number. This is the municipal administrative unit in DaviP. A DaviP user may have permissions for multiple GVEs, so it is important to know which one should be synchronized. The GVE number is displayed in the upper-right corner after logging in to DaviP-Online.
Finally, test the connection by clicking the blue “Test Connection ” button (6). If the test is successful, the blue button will turn green, and you can ” Save ” the connection (6).
2. Configure the connection #
If the connection is working properly, define property pairs for the connection and add the first jobs. The assigned pairs apply to all jobs in the connection.
You can find out how to assign properties to each other here. You can find out how to add tasks here.