

Whether it’s meeting minutes, forms, work materials, or answers to practical questions—you can upload and save all your important files, texts, images, PDFs, videos, links, and more to the wiki.
These are available to users with the appropriate category permissions as soon as you’ve added the elements to a page. However, you can do more than just add them—you can also easily insert them into a page using the editor, placing them directly within the context of the page.
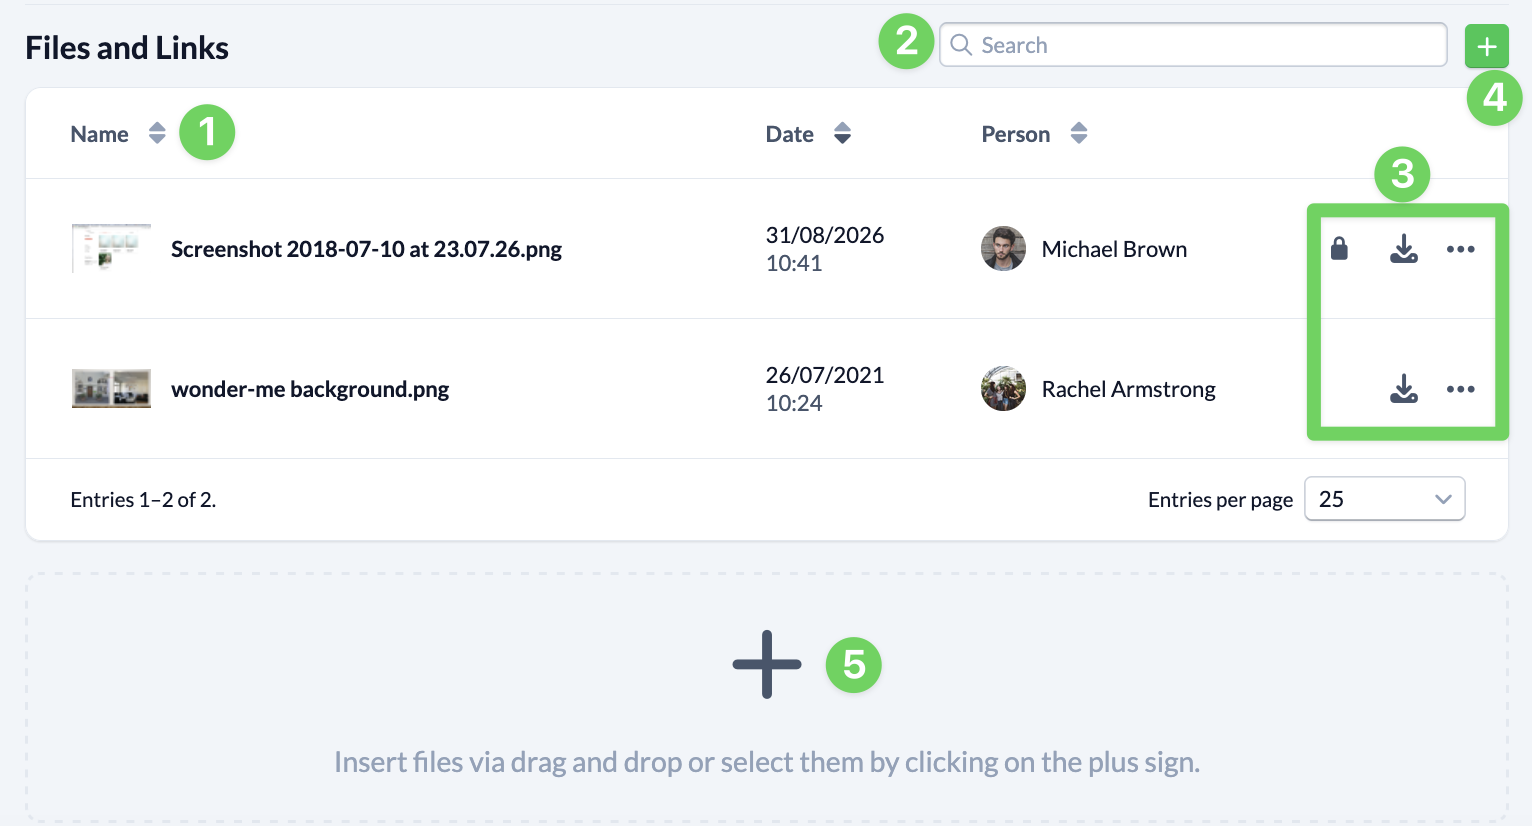
At the end of every wiki page, you’ll find the section Files and Links. Here, manually attached files and links, as well as files embedded directly in the text, are clearly listed (1). Which ones are visible to you depends on whether you are allowed to view or edit the category to which the page is assigned.
You can search through the files and links (2), so you can quickly find what you’re looking for, even when there are many attached items.
Using the buttons and the context menu (3) at the end of each line, you can copy a Markdown snippet, download a file, copy a link, rename a file, delete a file, and more. You can also restrict visibility of attached files and links to users with write permissions. By default, files inserted via the editor are visible only to users with write permissions. However, you can use the menu to extend this visibility to users with read permissions as well.
Use the green plus icon(4) to the right of the search field to add files or links to the list. Alternatively, you can simply add files using the drag-and-drop area (5) below the list.