
Small groups are one of the most important elements within a congregation, because it is important for people to be in community with other Christians and to walk together. Small groups offer a smaller setting for more intensive exchange, greater closeness, deeper support and shared spiritual growth.
In this tutorial, we will introduce you to the many features that ChurchTools offers for organizing your small group. You will learn how to create your group, configure it and how you and the other people in your small group can benefit from the many functions that ChurchTools offers to help you stay connected and be on the move together.
1. Create group #
First, you need a new group to which you can add the participants of your small group.
If you don’t know how to do this yet, you can find step-by-step instructions on how to create a new group in the article How to create a new group?
Below you will find the settings that we think make the most sense for a small group. Of course, you can adjust your settings to suit your group.
Group status #
You can set the group status of your new small group on Active (1) so that it is immediately visible.
If you want to wait until your new group becomes visible, set it to Draft (2) and when you are ready, set it to Active later.
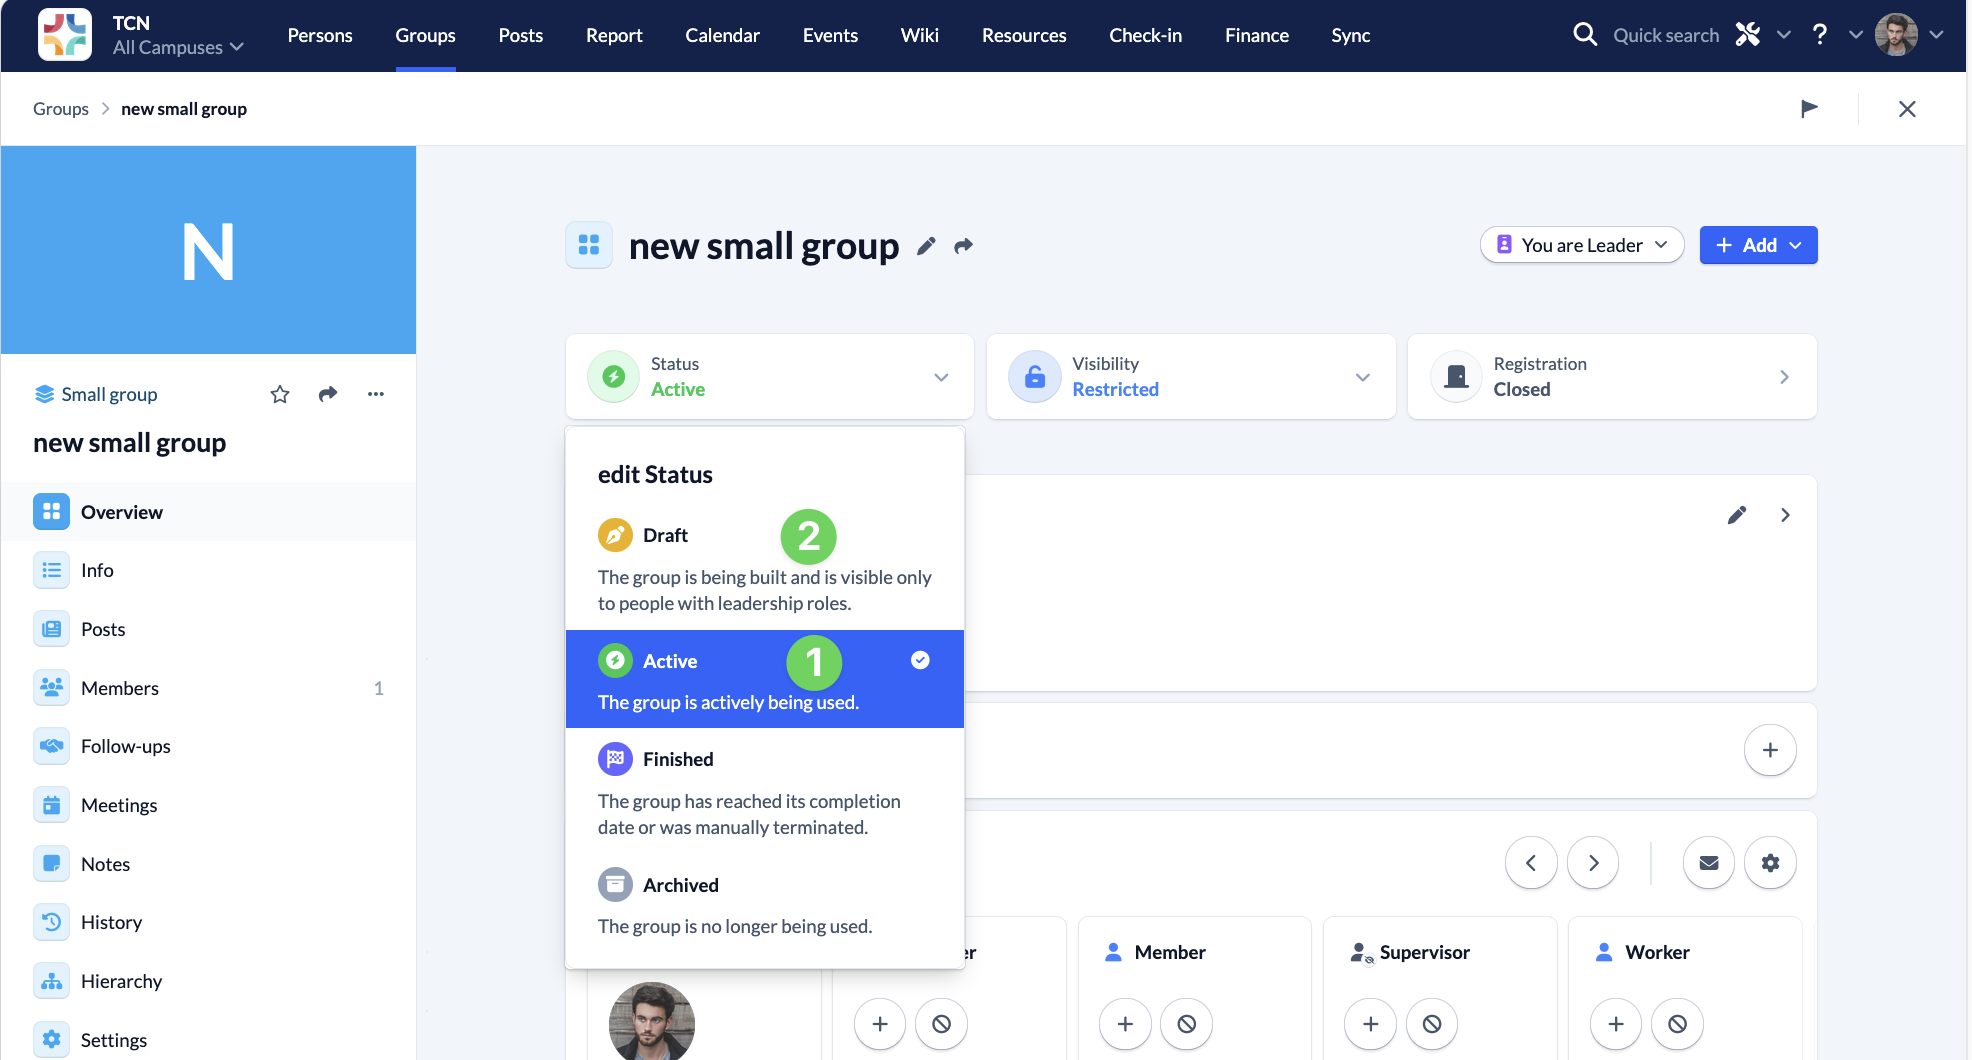
You can find more information in our article on group statuses.
Visibility #
If you would like to enable people who are not yet in your ChurchTools to find your group, e.g. via your website, then you can post here Public (1) here.
Otherwise you set Internal (2). This makes sense, for example, if you have a small group with a specific group of people or if the registration for the small groups in your congregation is handled by a central office.
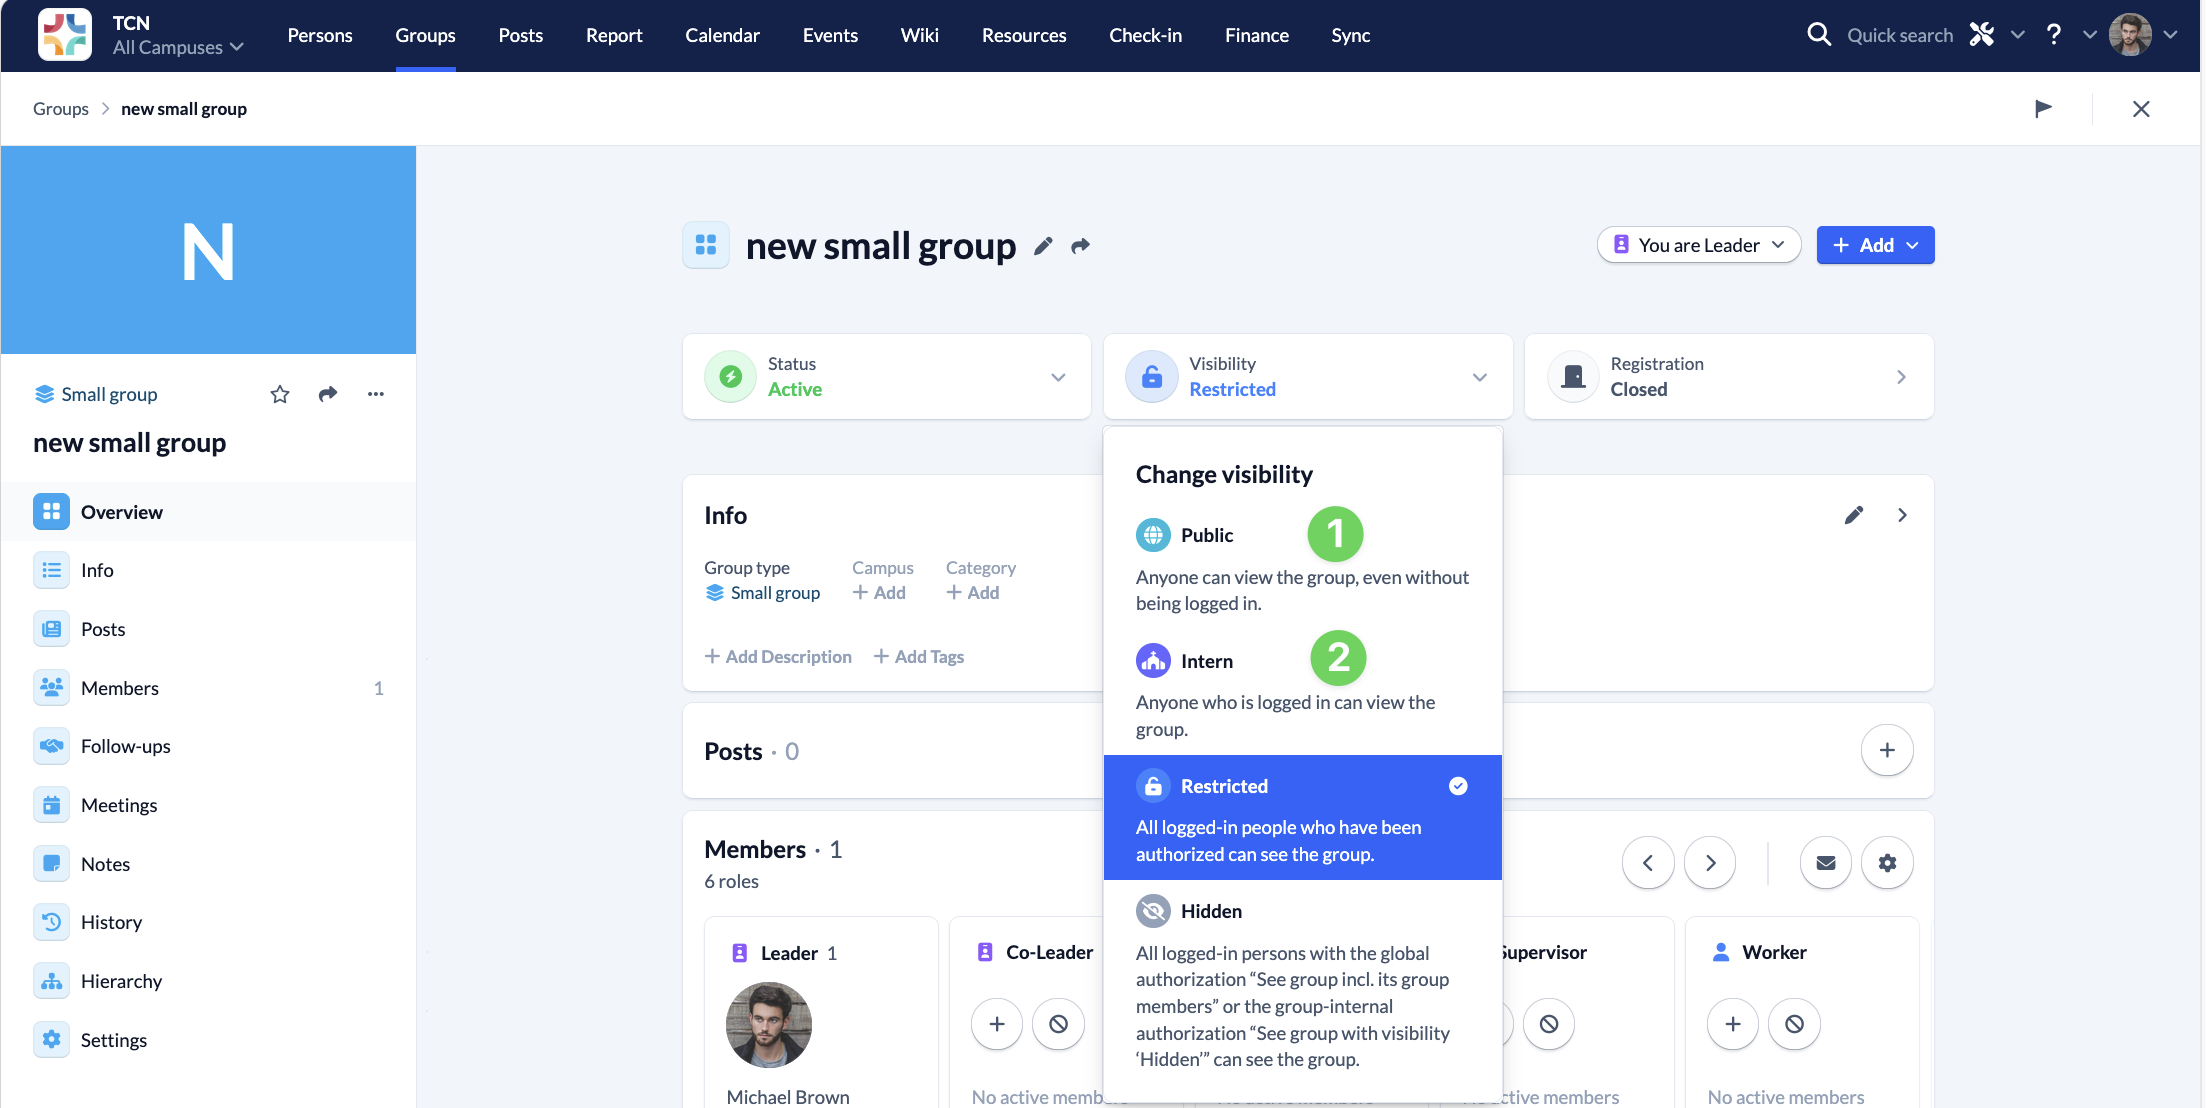
You can find more detailed information in our article on group visibility.
Registration #
To ensure that anyone who is interested can register with you as a leader, you should complete the registration (1) for your group open (2).
However, not everyone is suited to every small group, as the focus here is on closeness, trust and growing spiritually together. When signing up for your small group, it therefore makes sense for you as the leader to receive a message if someone is interested in joining your small group. You can then make contact and talk to the person in advance before you manually give approval (3) and invite them to a meeting of your group.
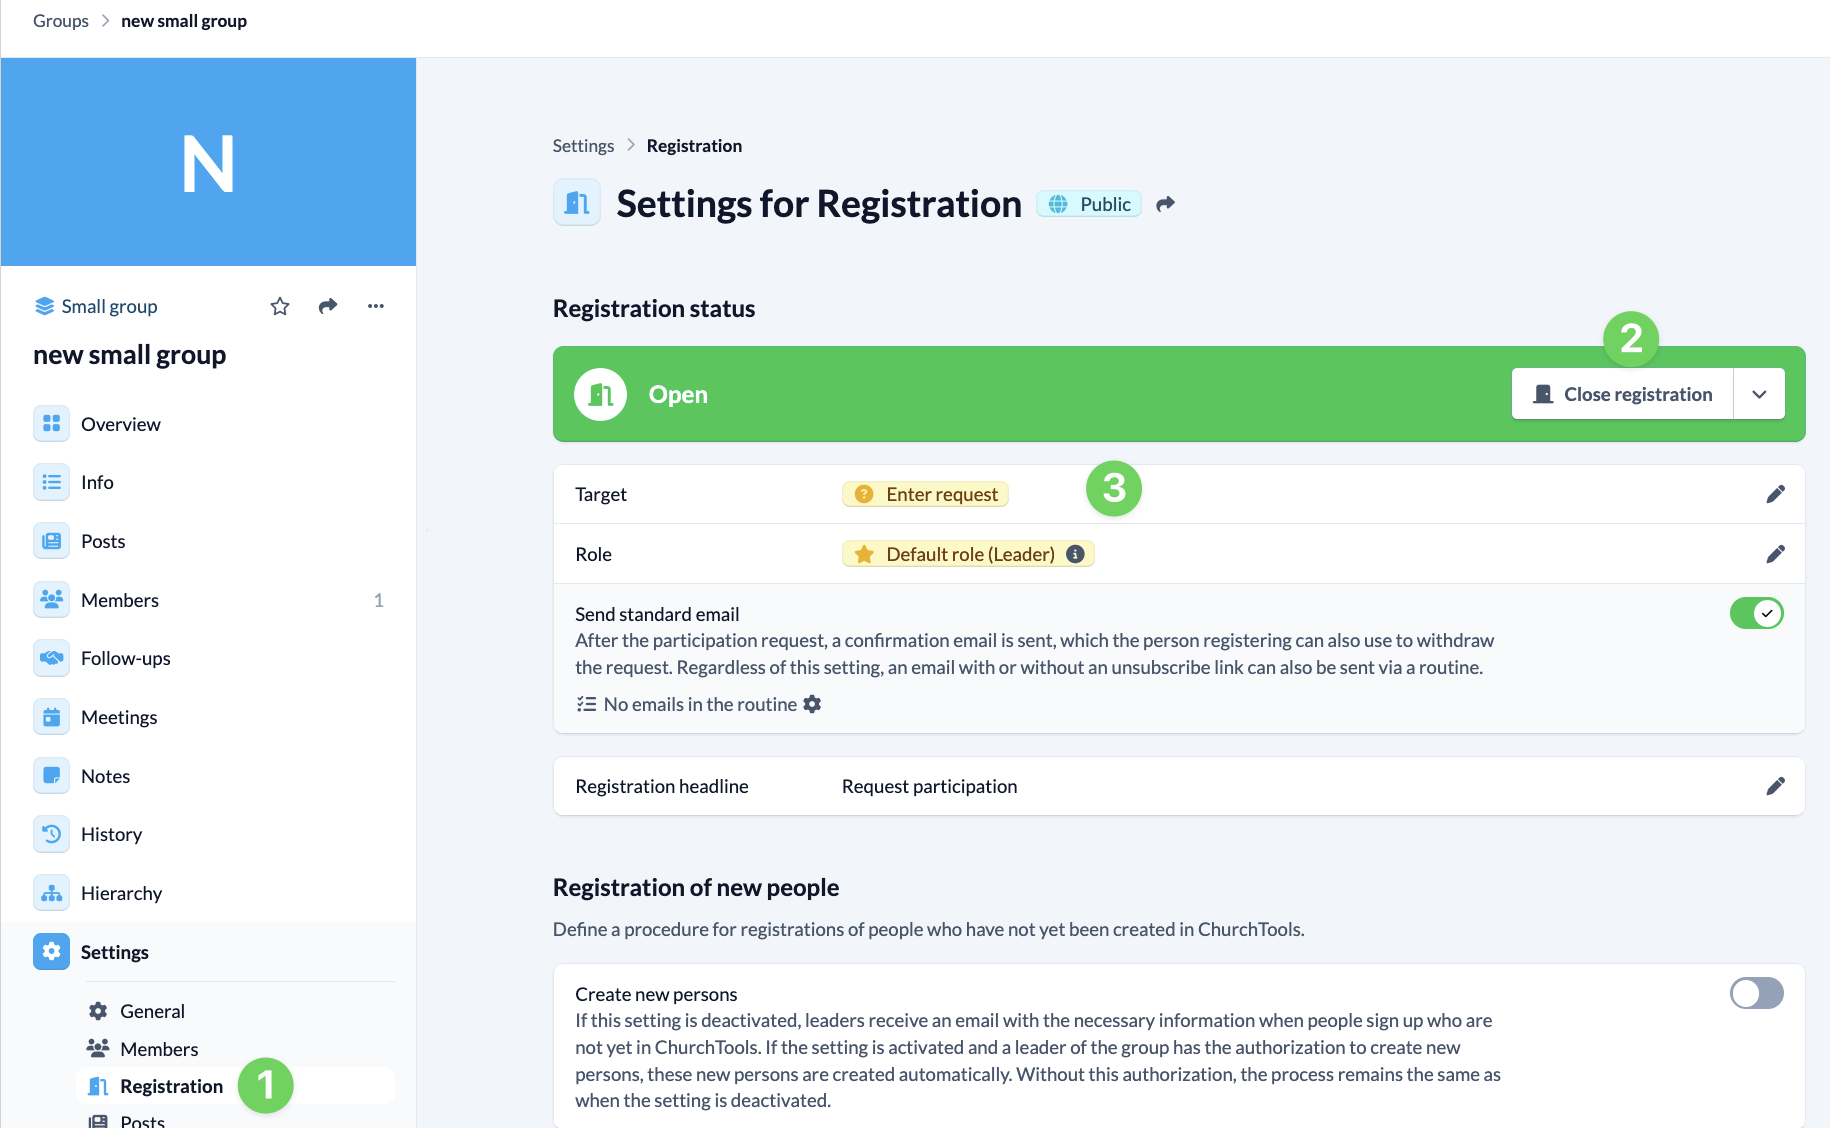
It also makes sense to think about what information you would like from the person you are interested in and add the desired group membership fields to the registration form.
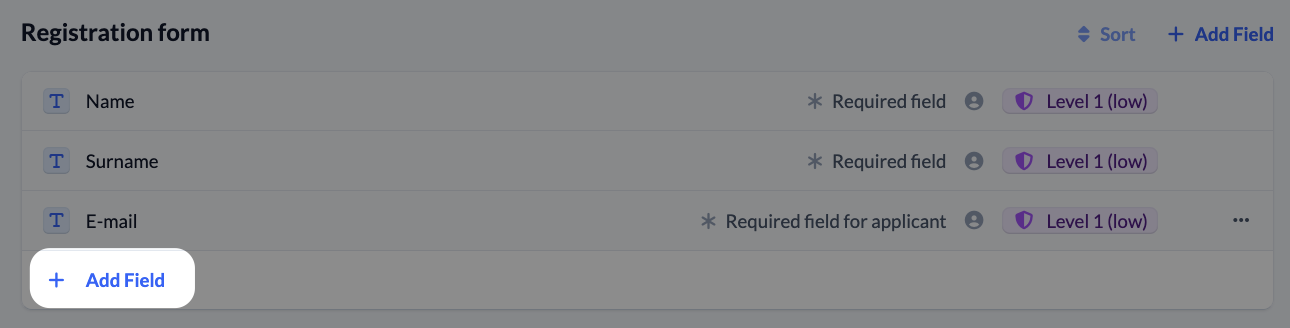
If you are missing a field here, you can find out how to create new group membership fields for your group in the article How to create group membership fields?.
You can find out which options you can also set for registration for your group in our article How to make settings for signing up to my groups?
Info #
The group information is there to record relevant information such as the day and time of meetings, meeting point, target or age group for your group.
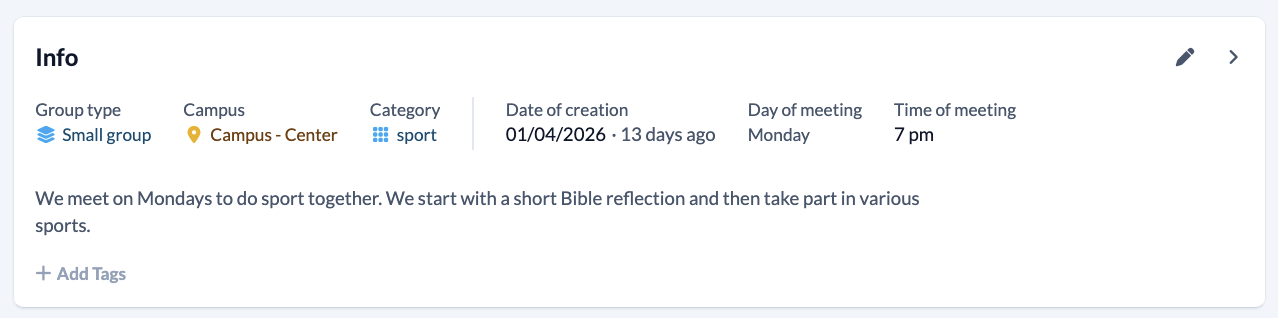
They are also used to give outsiders an overview of your group, e.g. on your website, so that they have clues to decide whether they want to join.
You can find out exactly how to set this information in our article on group information.
Members #
Clicking on Members in the overview takes you to the members page where you can add people to your small group using the + Add member button. For each member, you select the corresponding Role they have in your group and have the option to save a comment and other data.
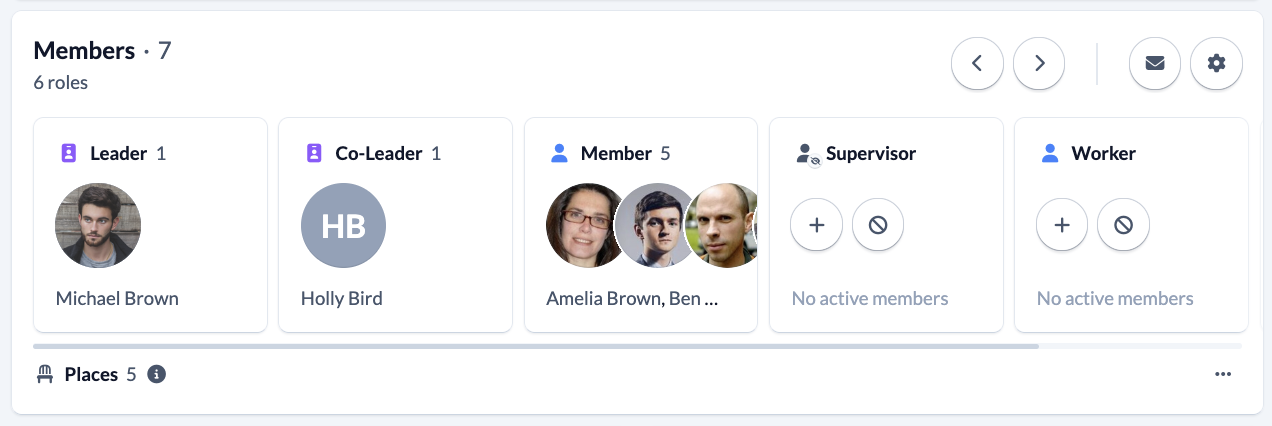
You can find out how to define settings for the members of your group, such as participation in a group chat or limiting the number of places available in your group, in the article How to make settings for members of my Groups?
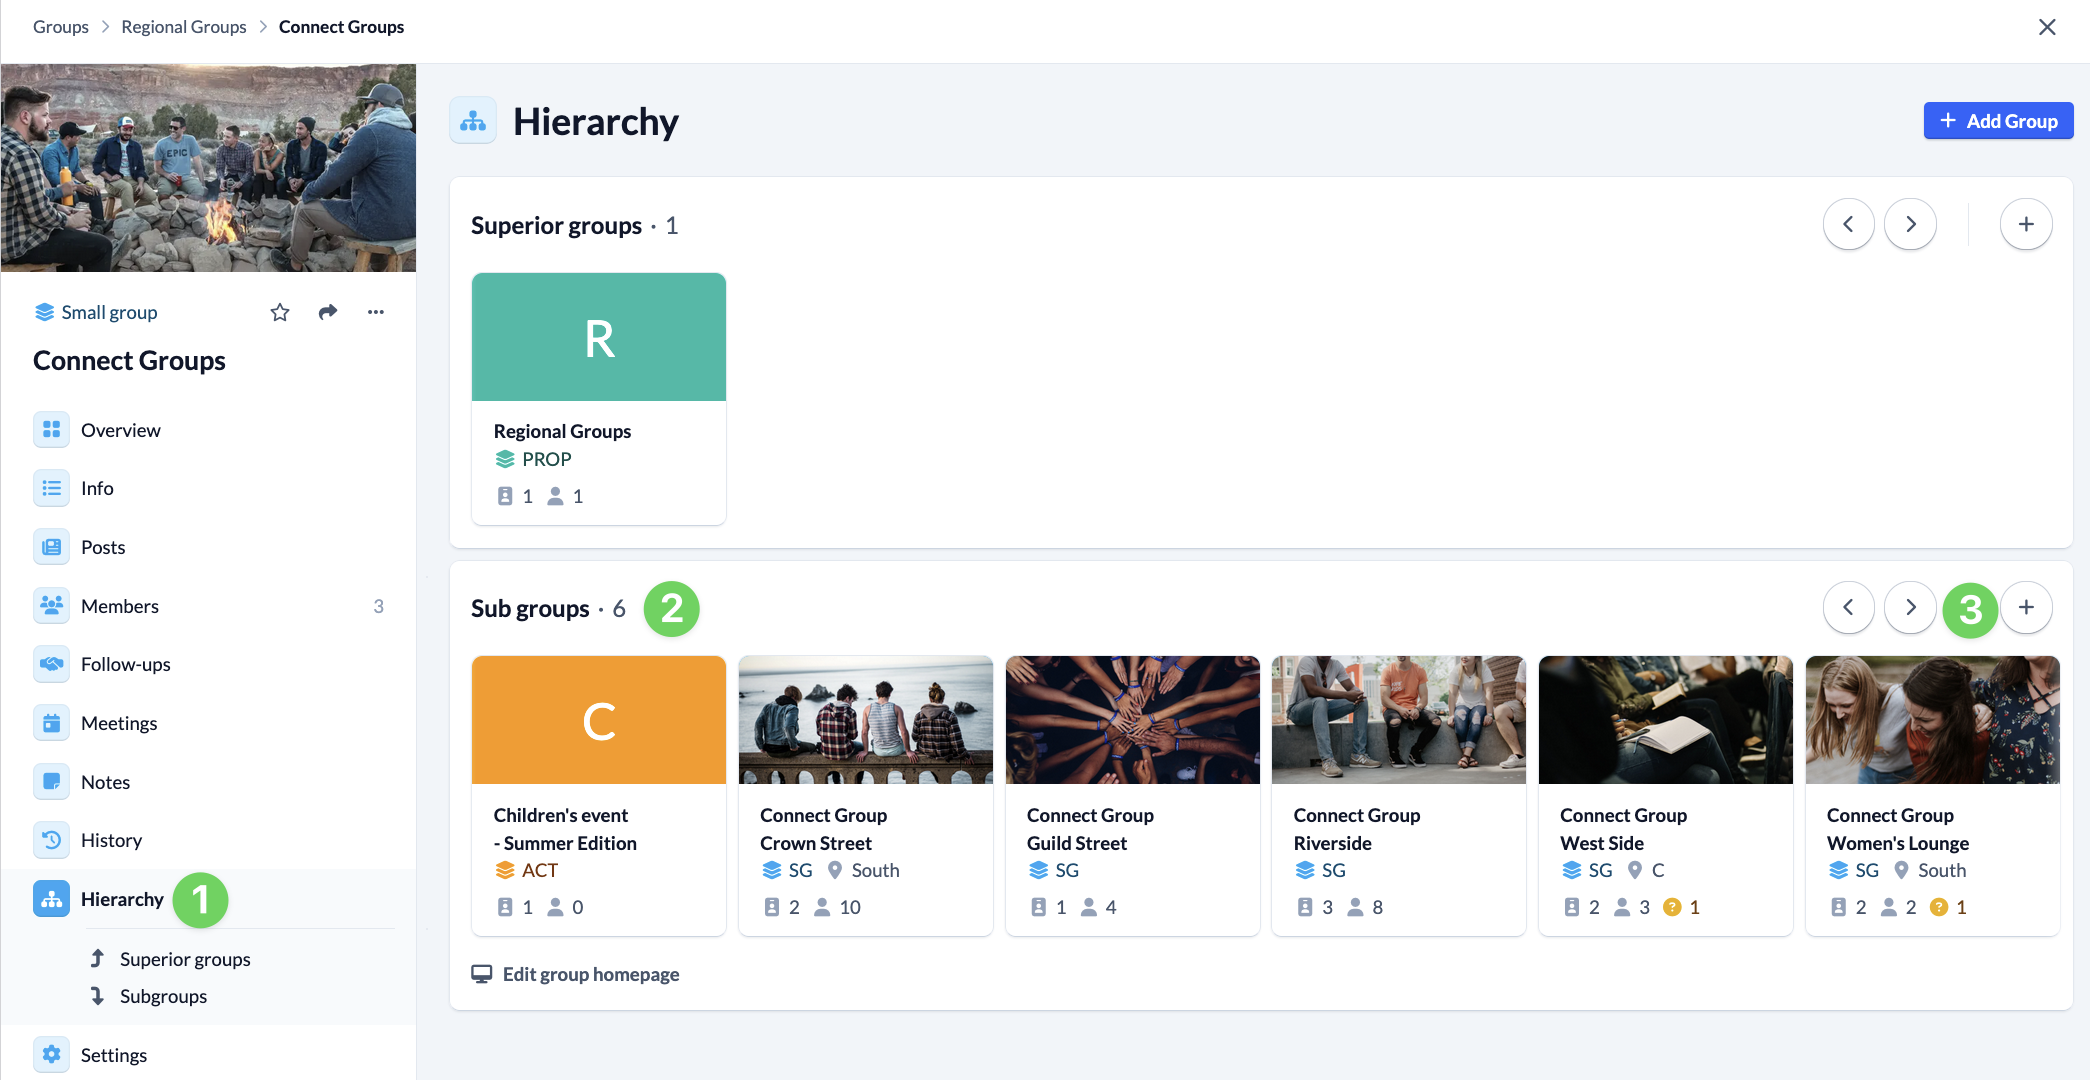
Hierarchy #
In many church communities, the small groups are networked with each other and have area leaders or coaches who look after the groups in certain areas. If this is also the case for you, you have the option of embedding your small group in the existing structure of your congregation. To do this, select the relevant groups under Hierarchy and add them. You can find out exactly how to do this in our guide to adding super- and subgroups.
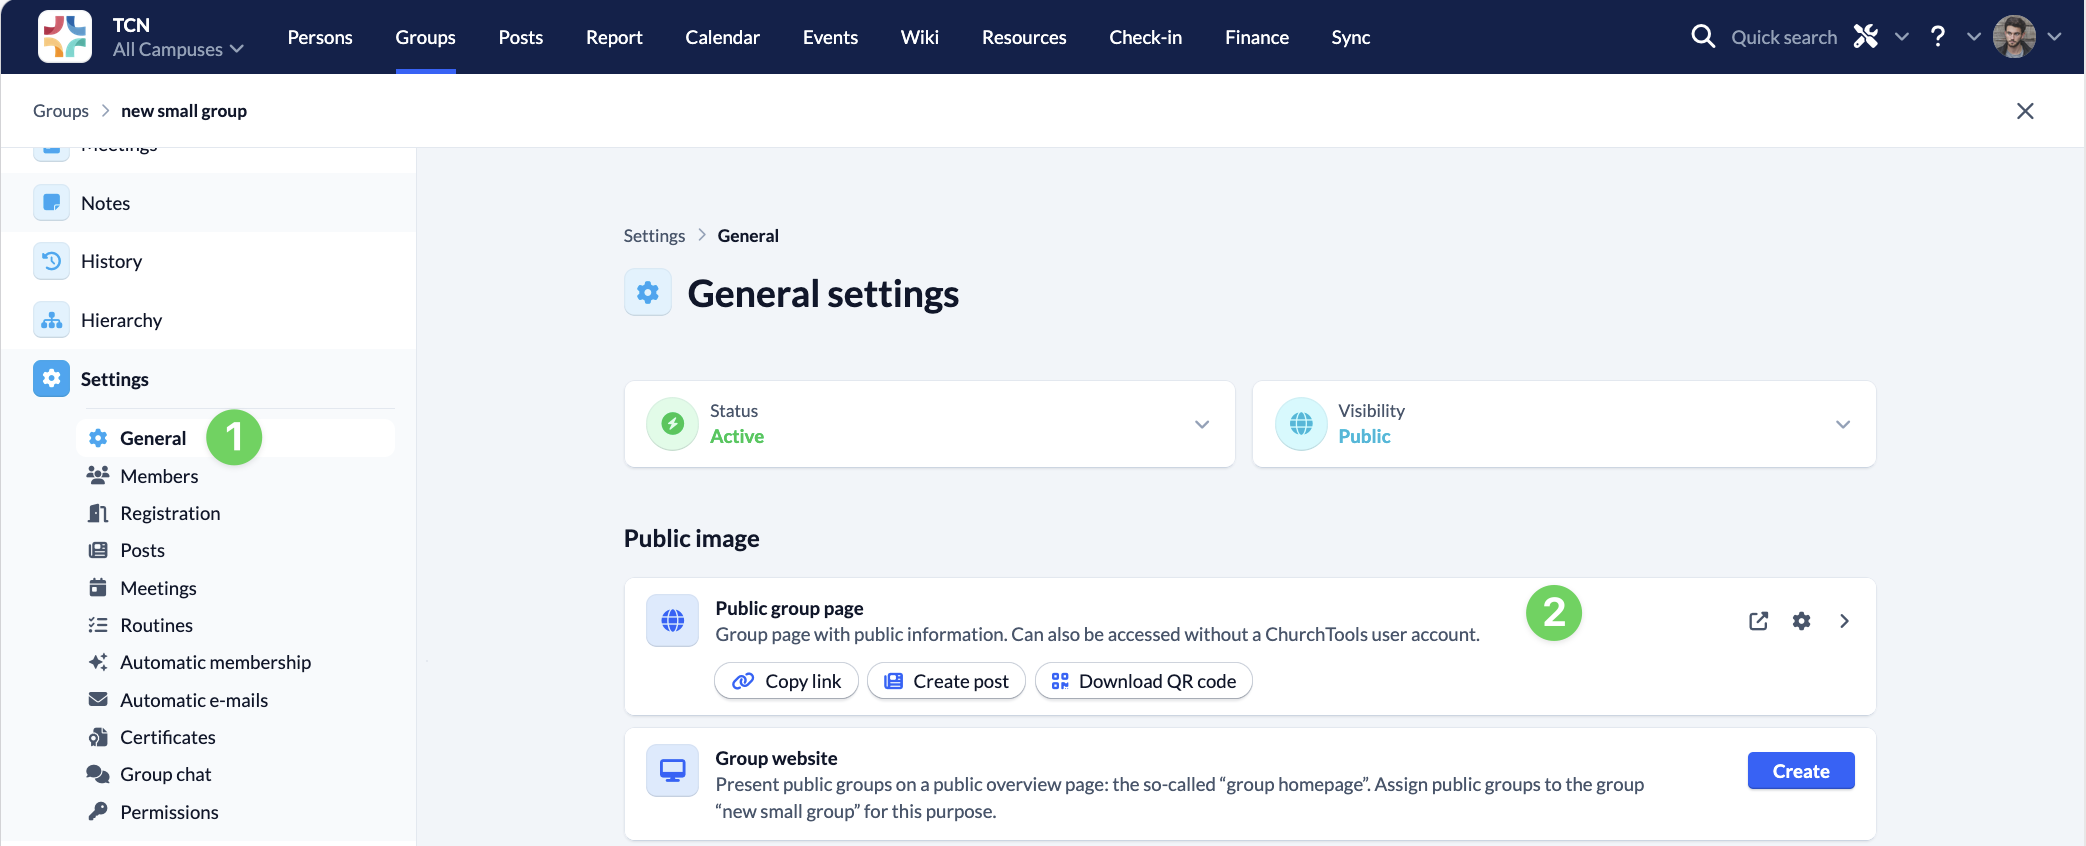
2. Customize public page #
You can embed your group’s public page directly on your own church website, for example, so that visitors to your website can find it and contact you as the leader.
Of course, you can also simply share them by passing on a link, e.g. in the newsletter.
Under Settings > General>, in the Public Groups page section, you can copy the link or save the QR code locally. You can also adjust the settings for the public page via the cog wheel icon in the top right-hand corner. You can find our instructions in How to customize the public group page of my subgroup?
3. Plan and conduct small group meetings #
In small groups, members accompany each other spiritually, share in each other’s lives and pray for each other. Your group in ChurchTools offers you the opportunity to plan the meetings of your group and supports you in keeping an eye on the members of your group.
Plan a meeting #
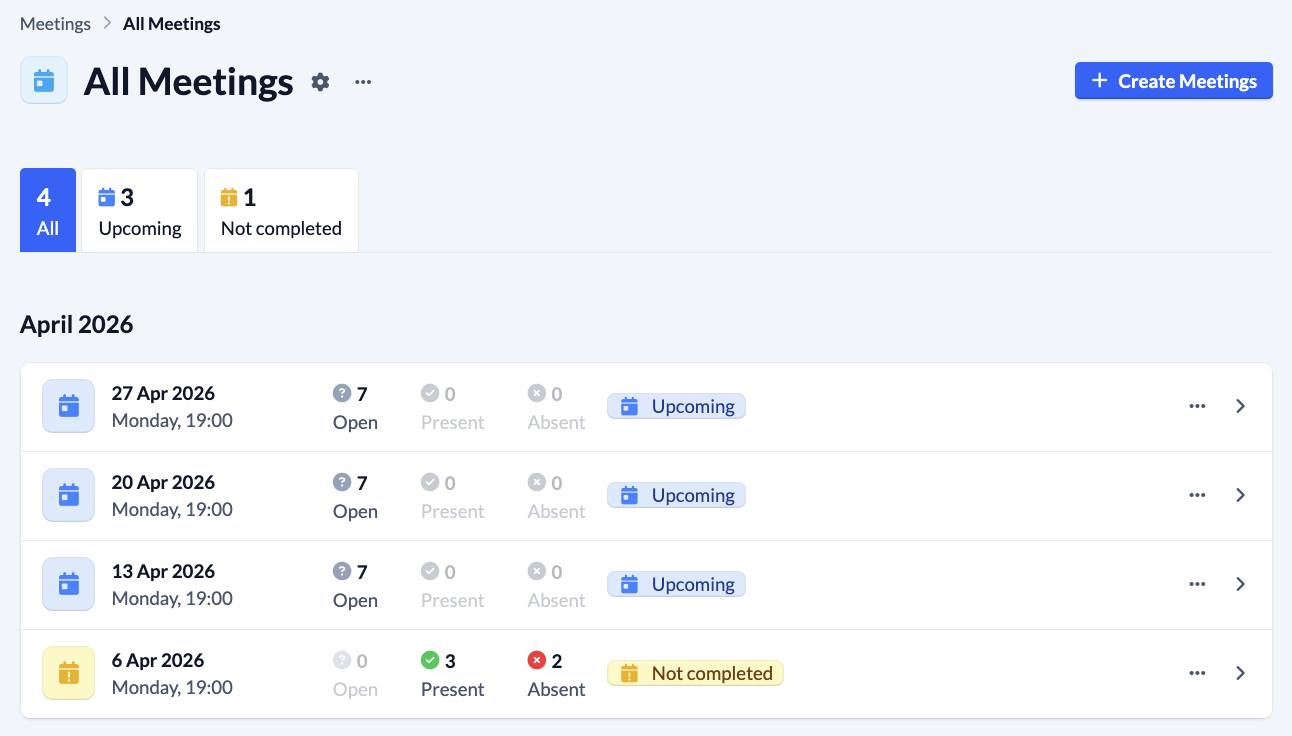
Under Meetings, you can add group meetings manually at any time. In the settings for the meetings, you can optionally activate that weekly group meetings are always created automatically seven days before regular meetings, which you can then edit.
Record participation #
You can keep a record of who was there and who wasn’t at each group meeting. This way, you’ll quickly notice if a group member hasn’t been there for a while and can follow up on them. You can either record this here in the group, via the Check-in module or, of course, most quickly in the app.
Review the time spent together or record prayer requests #
You can also record information to keep an eye on the development of your group. To make things easier for you, you can add individual templates for your group that you can use to record important things about your group meetings. The number of guests and a comment are always requested.
You can find out more details about setting up group meetings in the article How to configure settings for my group meetings?
4. Stay in contact with each other #
ChurchTools offers you different ways to get or stay in contact with your group members – automated and customized. You can find more detailed information on all the options in our article on how to contact your group members.
On the one hand, you can individual or predefined e-mails in routines.
Secondly, you have the option of enabling your group to have a shared group chat, for which you as the group leader can individually set which Roles in your group can participate and whether they are allowed to read and/or write. You can find out exactly how to do this in our guide to managing group chats. Group members can also talk to each other in One-on-one chats.
If your small group is a little larger, posts may be more suitable for direct communication than chat. They allow your group to exchange information on specific topics at any time and from anywhere. In addition to reading or viewing posts, group members can interact with each other on different posts. You can find out more about how to set up posts for your group in the article How to configure posts for my groups?
5. Excursion: Planning small group leisure time or excursions #
Time spent together is always valuable for a small group of people to continue growing together. Whether it’s an excursion or a leisure activity over several days, ChurchTools will support you in planning and implementing it.
You can find a tutorial on which functions you can use for registration and communication for a free time in our article on organizing a free time registration.
You can use the Events module with duty roster, Agenda and event chats for topic-related communication to plan and carry out the leisure time or excursion.