
Church camps are a great thing. However, it can be very time-consuming to organize the registration process, store all the important information and bring it together in a meaningful place.
With ChurchTools, you can make this process much easier both for you as the organizer and for all the people in your congregation who would like to sign up for the leisure time.
In this tutorial, we will show you the basic functions for the leisure time registration with ChurchTools and the subsequent communication with the participants.
1. Create group #
First, you need a new group to which the participants will be added after registration. You must activate registration for this group.
Check out the article How to create a new group to learn how to create a new group.
The following settings in your group are useful for a church retreat:
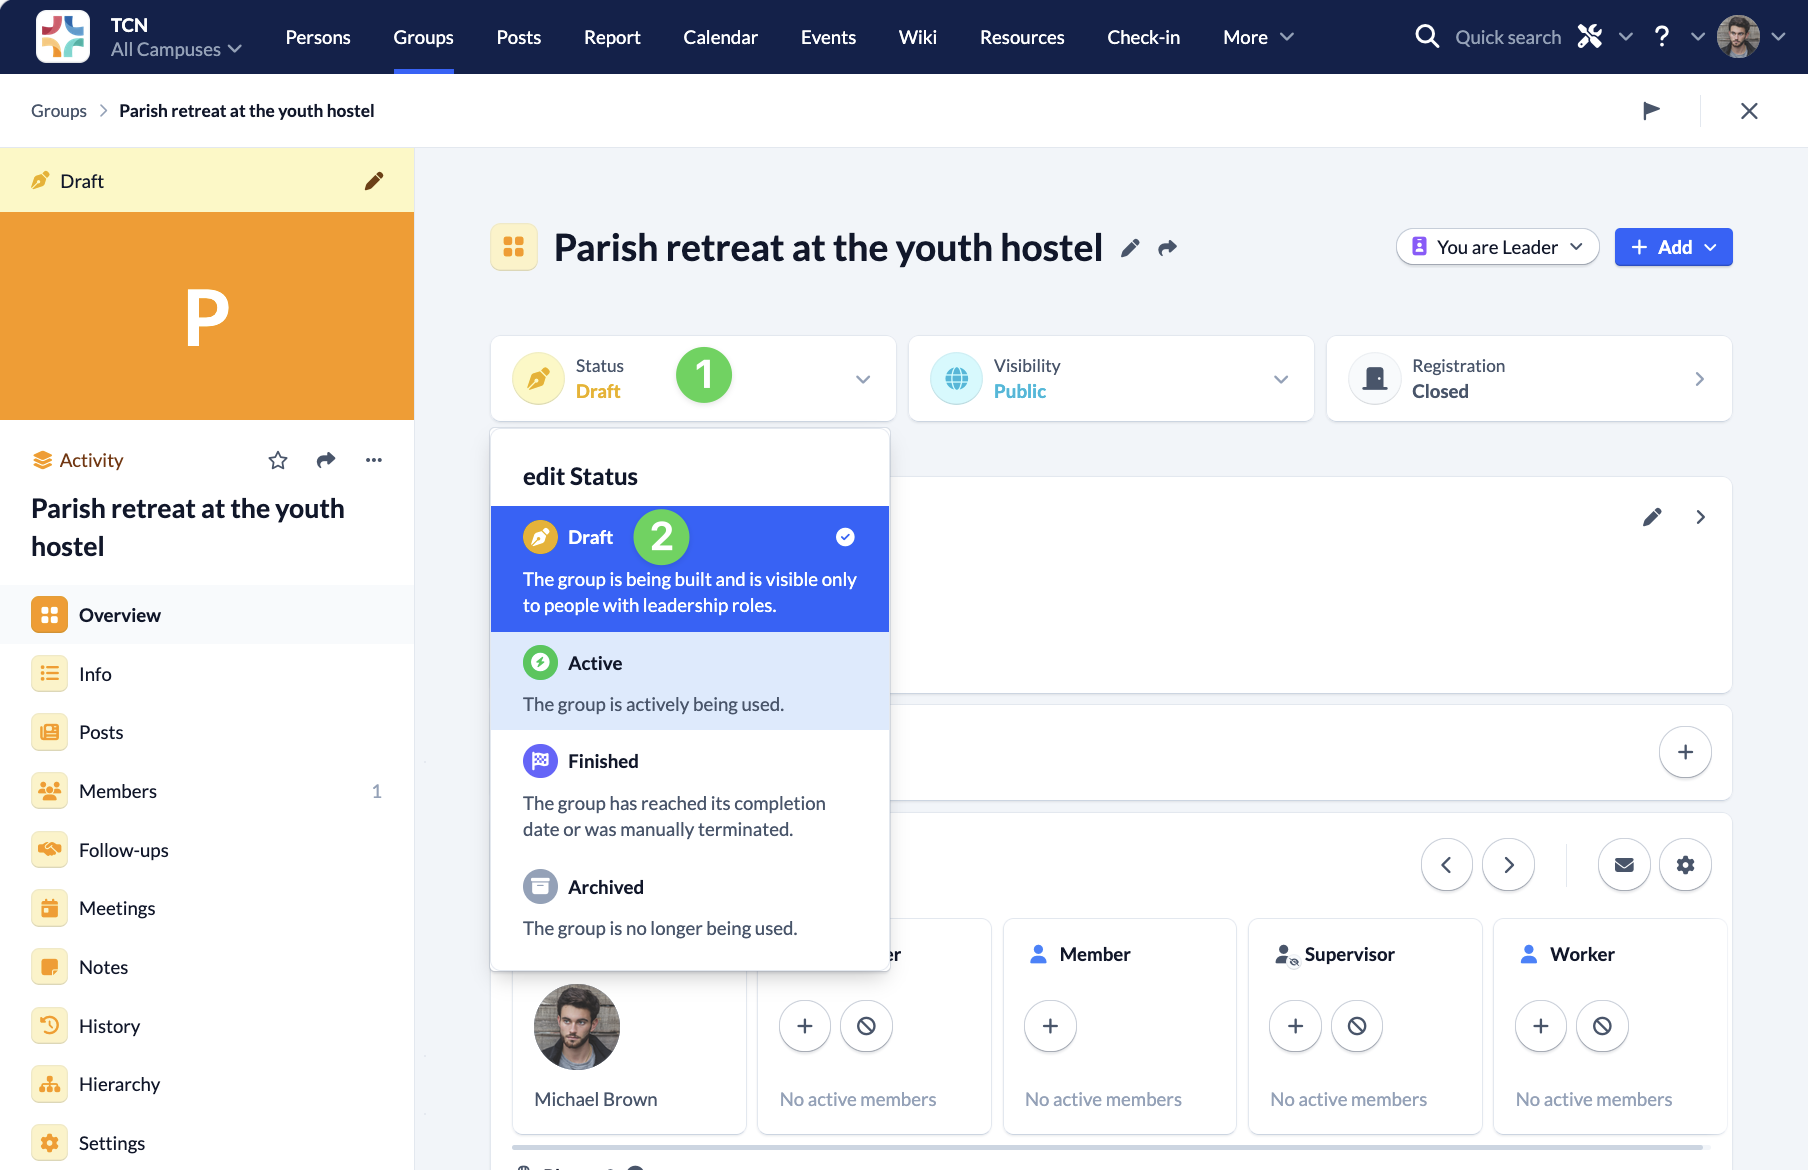
Group status #
To be able to prepare the sign up group in peace and activate the registration for your leisure time at the right time, you should set the status of the group to Draft.
When you have finished with all the settings and want to release the registration for everyone in your congregation, change the group status to Active.
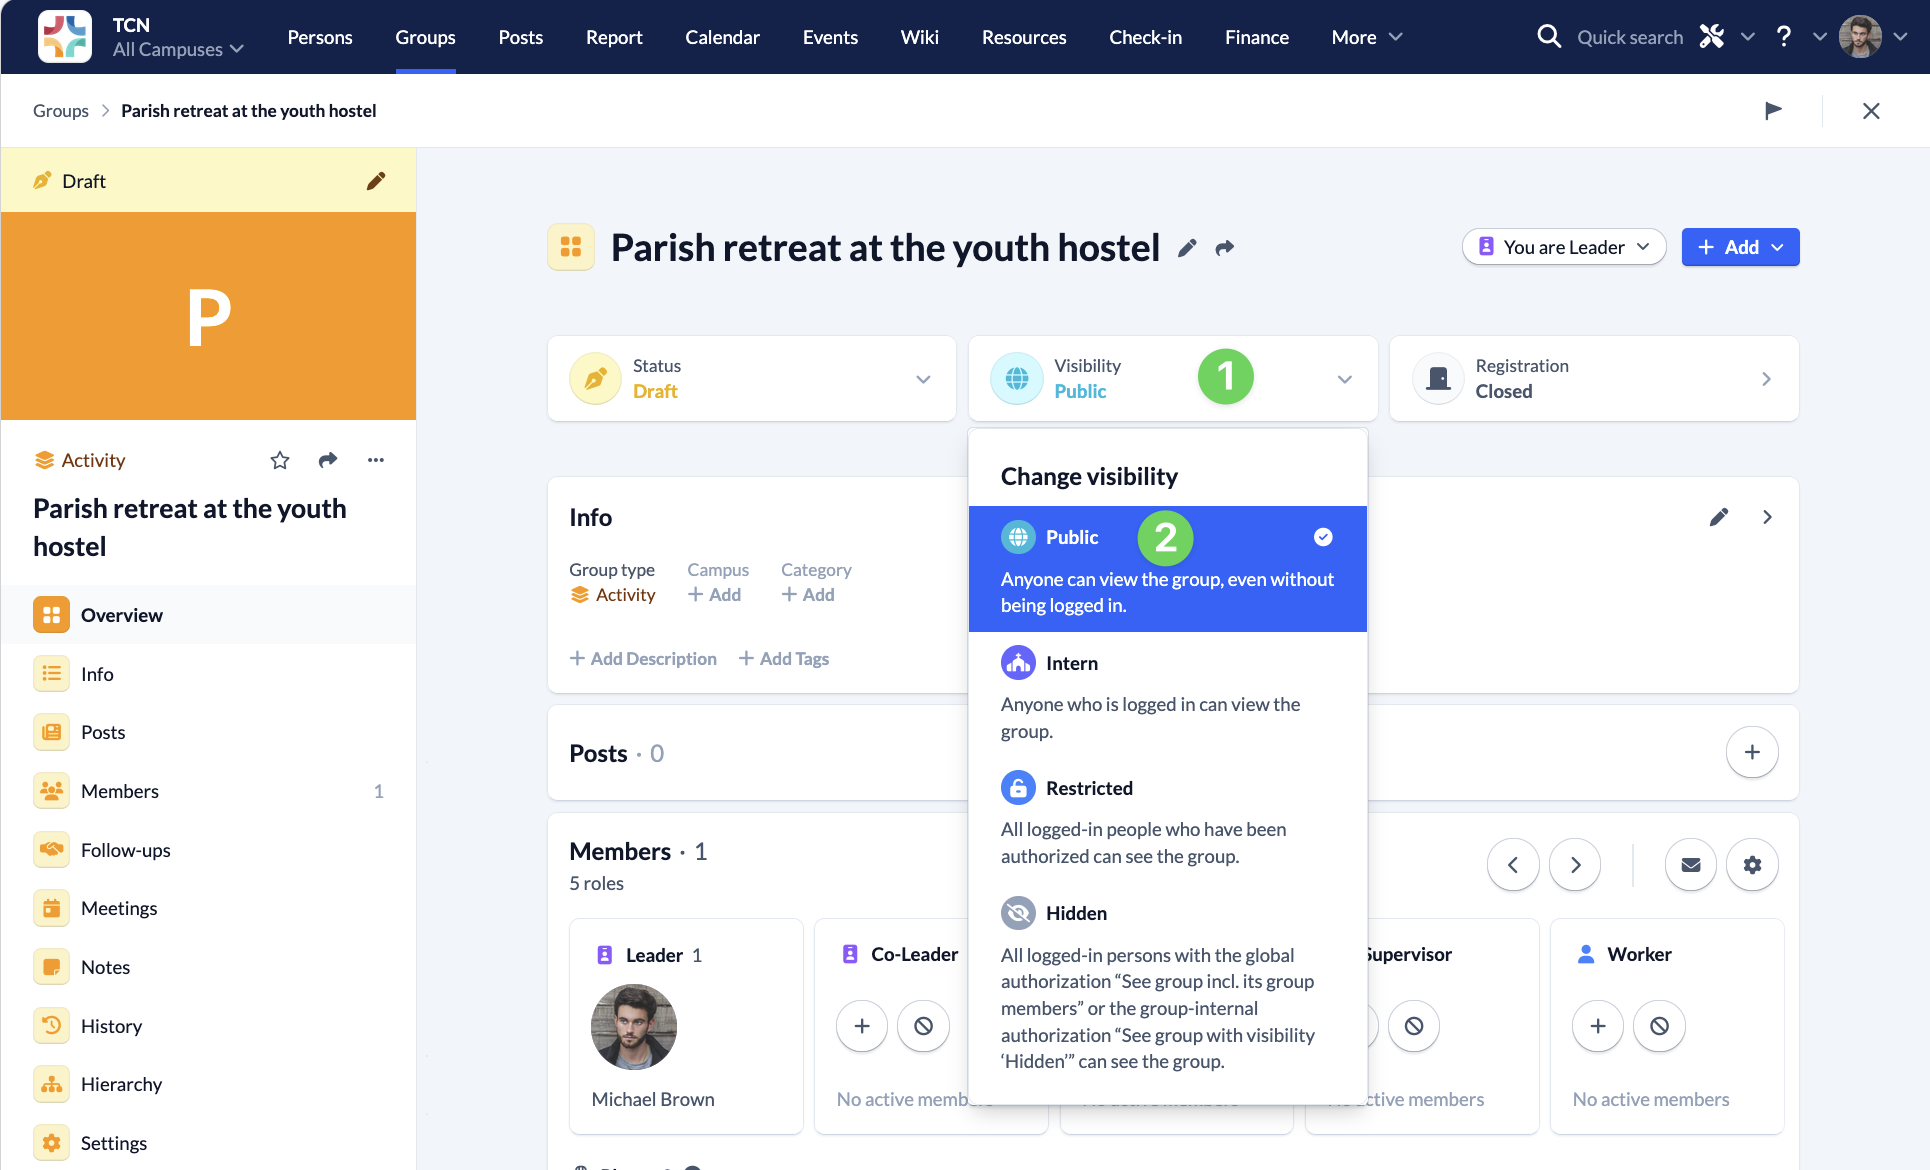
Visibility #
For the registration to work for all people, even if they are not yet entered in your ChurchTools people database, you must set the visibility to Public.
As soon as the registration is complete, you can set the visibility to Internal so that only people who are signed up can see the group.
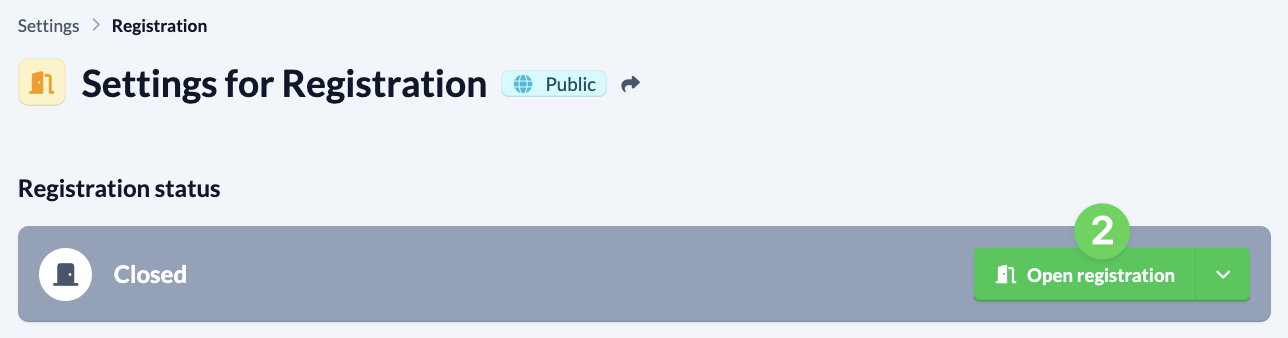
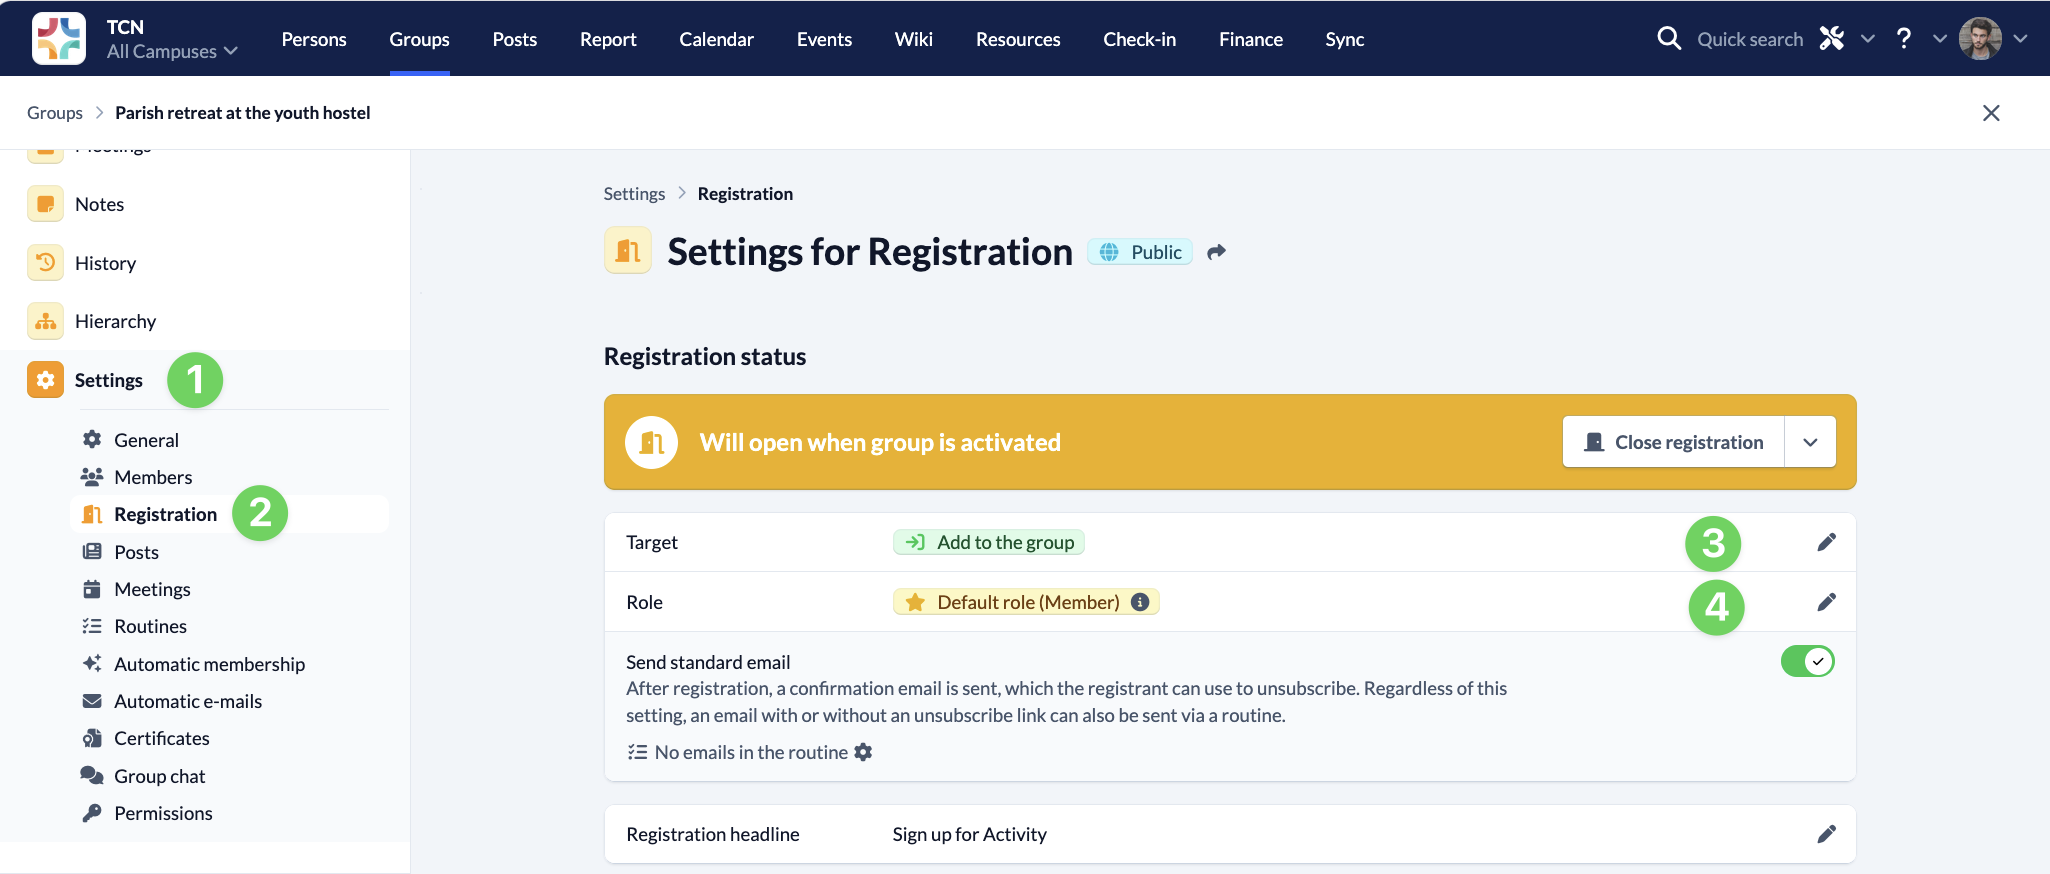
Registration #
As you want to use the group to sign up for your free time, you must open the registration.
The registration will then be given the planning status and will only be properly activated when you set the status of the group to Active.

Info #
You can use the other group information fields to enter everything important that people in your congregation need if they want to sign up for the activity.
An appealing picture, e.g. of your last activity, and a description containing all the information about the location, price, period, etc. are particularly helpful.

You can also add a completion date, which will cause the status of the group to be automatically set to Finished as soon as the date is reached and your free time is over.
2. Configure registration #
Once you have made the general settings and entered all the important information, you should configure the registration in detail.
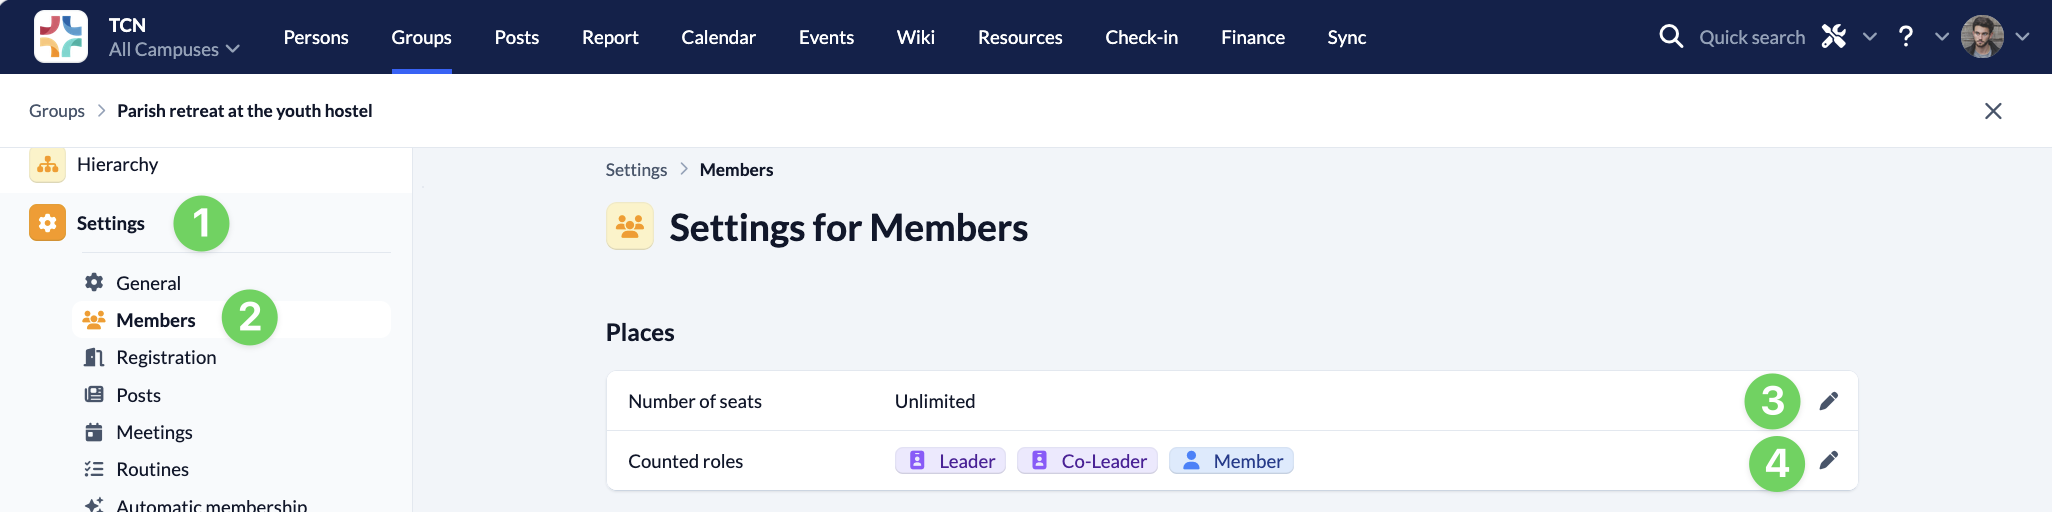
Limit seats #
It is often the case that only a certain number of people can travel to the leisure time, e.g. because the number of beds at your venue is limited.
You can therefore specify how many people can sign up for the leisure time.
With the Counted roles option, you can specify whether all people in the group should be counted or whether people with certain roles should be excluded from the count. For example, you can add organizers to the group who help with the planning of the leisure time and therefore must have access to the group, but who do not go on the leisure time themselves and therefore should not occupy any places.
Joining the group #
You can specify whether a participant who has signed up for the free time can actively join the group directly or whether the group leader still has to approve each participant manually. Our recommendation is to use immediate membership to minimize the effort for the group leader.
It is a good idea to use the Participant role as the default role for all people who sign up and to manually change the role of individual people who should have a different role after registration. Alternatively, you can of course add these people with the desired role to the group manually.
Registration of new persons #
To ensure that people who have not yet been created in your ChurchTools database are added to the group quickly and easily, it is best to activate the Create new person option.
You can find out more about this function here
Registration of additional persons #
You can use this function to set whether a participant can also sign up other people, e.g. family members, for the leisure time or whether each person must sign up independently.
We have explained this function in more detail in the article How to make settings for signing up to my group?
Waiting list #
Here you can set whether there should be a waiting list. This will be used if your previously defined group places are full. If participants who have already confirmed cancel, people will move up from the waiting list until the maximum number is reached again.
We have also explained this function in detail in the article How to make settings for signing up to my group?
Registration form #
Use the registration form to specify what information participants need to provide for their registration. You can use all the personal and group membership fields that have already been created. This means both standard fields such as name and e-mail as well as your own fields that are important for your leisure time, such as allergies, intolerances, desired roommates and anything else that is relevant for your leisure time.
You can also find more details on the registration form in the article How to make settings for signing up to my group?
You can add your own fields either as person information (master data of the Persons module) or as group membership fields.
3. Configure public page #
You need to publish the registration form so that people can sign up for the leisure activities. To do this, you can distribute the link to the form or, even better, embed the registration form on your congregation’s website. This way, participants can sign up directly on your website and the data is automatically saved in your group in ChurchTools. You can find out how to customize the public page of your group in the article How to customize the public group page of my subgroup?

4. Communication with participants #
Last but not least, we will briefly show you which (automated) communication channels you can use to contact your participants after they have signed up for the free time.
E-mail #
For example, you can work with routines to automatically send a predefined e-mail from your ChurchTools to every newly registered participant, confirming their registration, providing further important information and informs them, for example, by when they have to pay the participation fee to which account.
We explain the routines in detail in the article Understanding routines.
Chat #
By enabling chat for your group, you can make it easier for group leaders and organizers, for example, to organize and communicate with each other without having to send an e-mail for every little message or create a new group chat in an external messenger service.
To prevent all participants from being able to see the group chat later, you should limit chat participation to the roles of leader, organizer and employee.
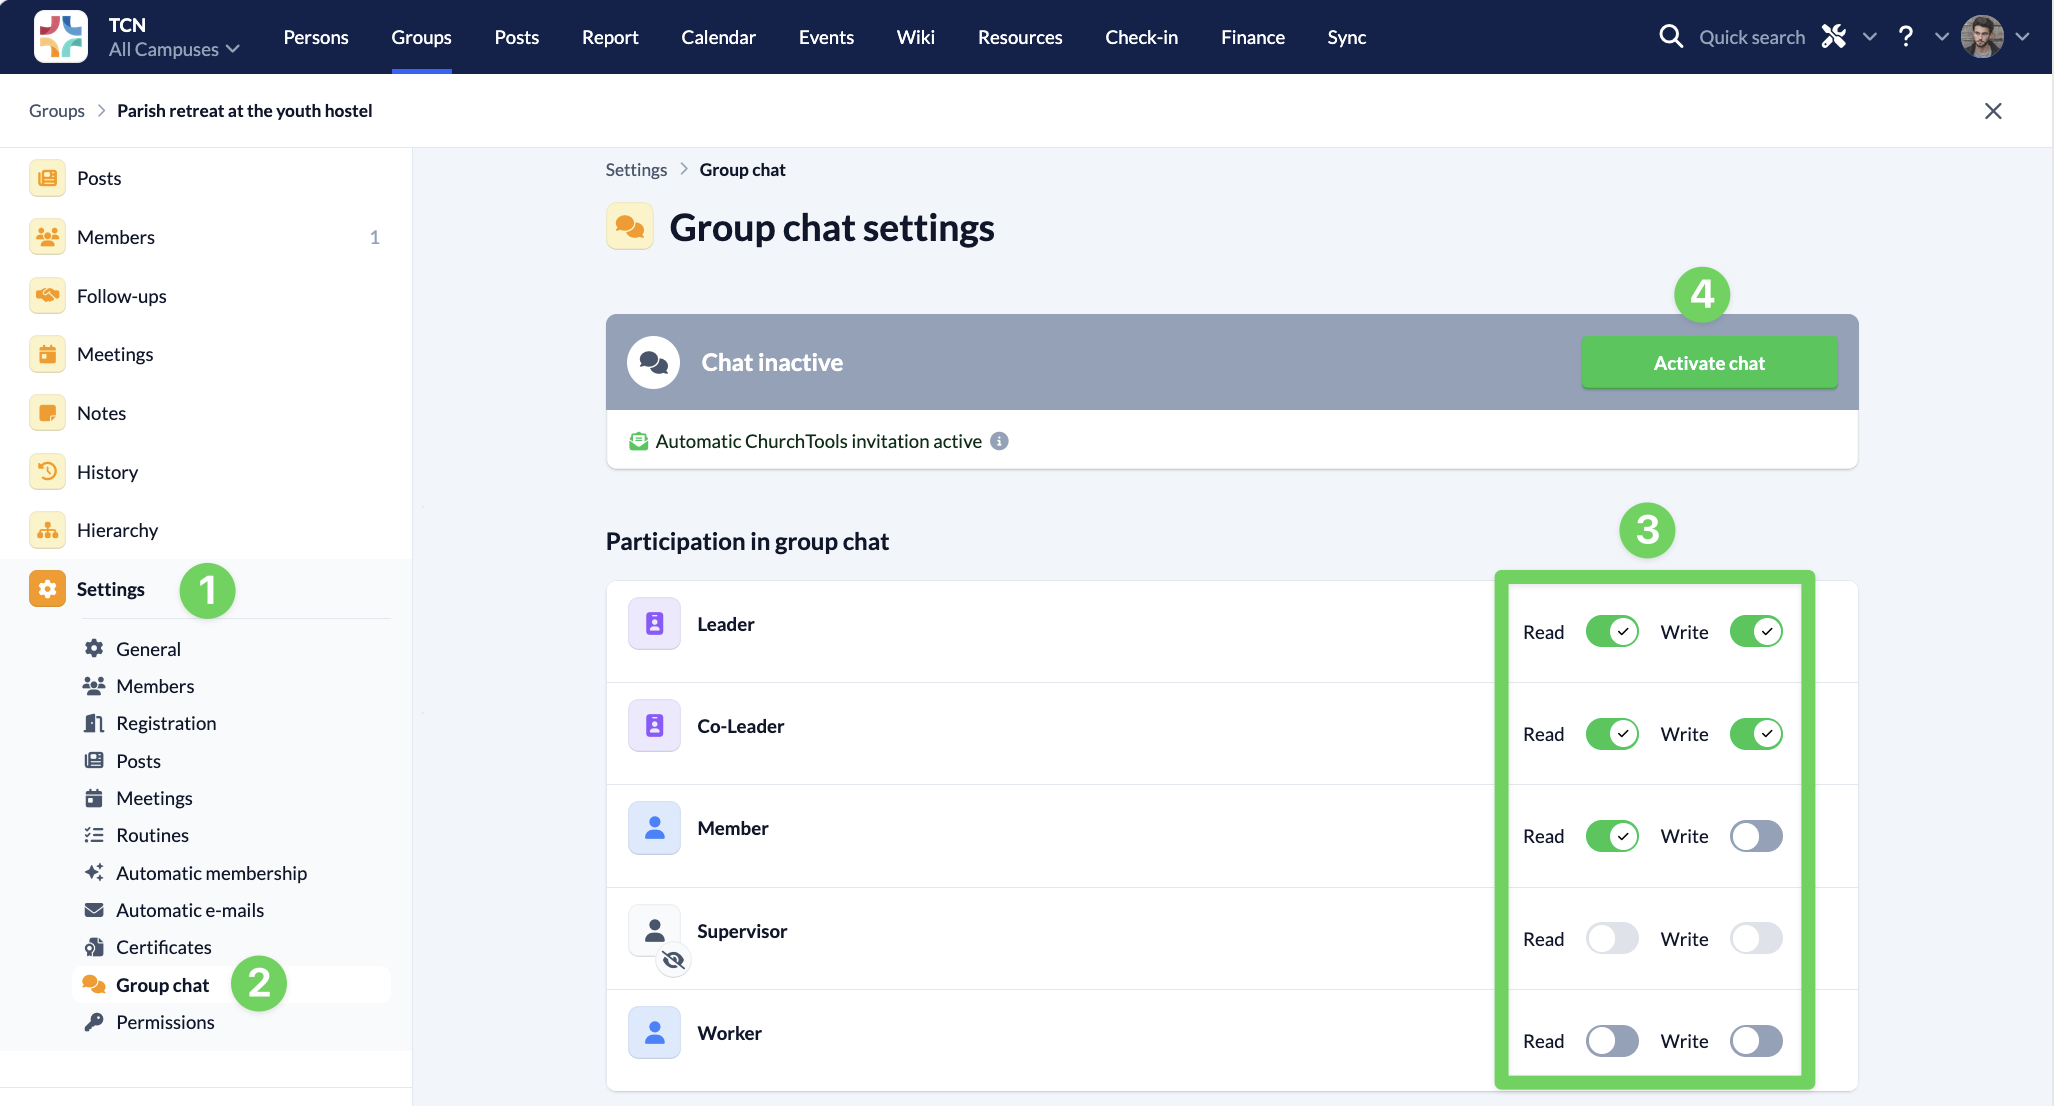
If your participants want to use the chat later, they can write directly to specific participants or create their own small chat rooms with several other participants instead of the large group chat with all the people involved.
If you want to share information with all participants via chat, you can allow participants to join the chat at a later time, but only give them read access. This way they can read your messages and be informed without being able to send their own messages in the chat to avoid filling the group chat with too many irrelevant messages.
You can find out exactly how to do this in our guide to managing group chats.
Posts #
Posts may be more suitable for large groups than chat for direct communication. They allow your group to exchange information on specific topics at any time and from anywhere. In addition to reading or viewing posts, group members can interact with each other on different posts. You can find more information about posts in the article Overview of posts.
5. Activate group #
Once you have made all the settings and can start the registration for the free time via your website, it is time to activate the group.