

With the Info Screen feature, you can create a visual overview of upcoming appointments. To do this, select appointments from specific calendars for a period of up to 14 days to quickly and easily create an attractive Info Screen that updates automatically.
Users for the info screen #
To use the info screen, you must log in as an authorised user.
Steps 1 and 2 of the instructions are not necessary if a user of this type has already been created in your ChurchTools. In this case, please check the permissions that have been assigned by following Step 1, and then continue with Step 3.
- Create a new user for the info screen, e.g. ‘Info Screen User’, and grant them the following permissions:
- If you only want the Info Screen to display appointments from calendars that can also be viewed by a ‘Person not logged in’, you do not need to grant this user any further permissions.
- In order to view additional appointments from calendars that have not been made visible to this person, and any resources booked in connection with them, this user requires the global permissions ‘View individual calendars’ (view category) for the relevant calendar categories and, where applicable, ‘View resources’ (view resource) for the relevant resources.
- Under no circumstances should you grant this user administrative privileges.
- Select the newly created person from th list of people and set a password via Permissions > ‘Set new password’.
- Log in to your ChurchTools account using the Infos-Screen user’s login details and open the settings for the Info-Screen.
Open the settings for the info screen #
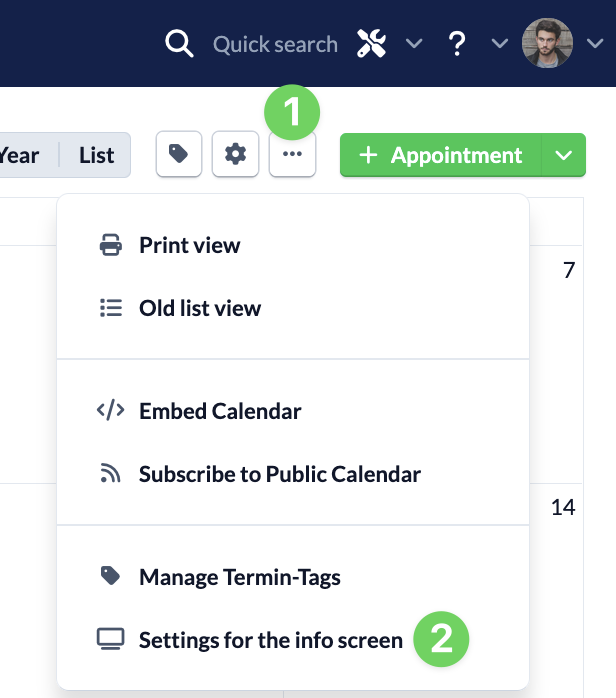
Navigate to the Calendar module and open the Info Screen settings via the context menu (1) of the calendar, next to the cog icon.
Configure display #
Under ‘Display’, you can configure how the info screen is displayed, from the heading right through to the zoom level.
Headline #
This headline appears above the events displayed on the information screen.
Calendar selection #
Here you can select which calendars’ appointments you want to display.
Period #
Select the period from which the appointments are to be displayed.
Show appointments for logged-in users #
For each event in your calendar, you can specify individually whether it should only be visible to people who have a ChurchTools account and are logged in. For the information screen, you can specify whether such events should also be displayed.
Resource selection #
Select whether, and if so, which appointment booking resources should be displayed on the information screen.
Show subtitles and description of the event #
Use the two tick boxes to specify whether the subtitles and descriptions of the events should be displayed on the information screen.
Display addition for appointment title (calendar text) from the services #
In the calendar module, it is possible to display additional information from the events module alongside the title of the event, e.g. details of who will be preaching on Sunday. Here, you can choose whether this additional information should be displayed on the information screen.
You can find out how to set this up in the article ‘How can I have the title of an event automatically completed?’.
Zoom level #
Adjust the zoom level here as required so that your content is clearly legible on the information screen – regardless of screen size, resolution or viewing distance.
Copy and use the Info Screen URL #
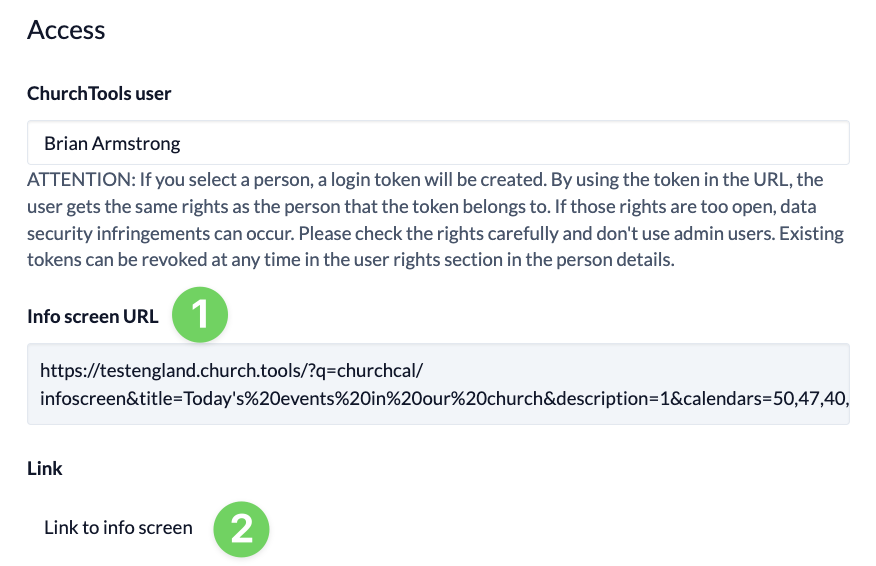
By clicking on the link to the info screen (2), you can access the screen you have configured and adjust the settings if necessary.
Finally, copy the fully configured URL of the info screen (1) and paste it into the browser of the device on which you want to display the info screen.