


The export feature in the People module allows you to export personal data.
Exporting the “People” Data Set #
Using the menu on the left, you can export the data for all or selected people.

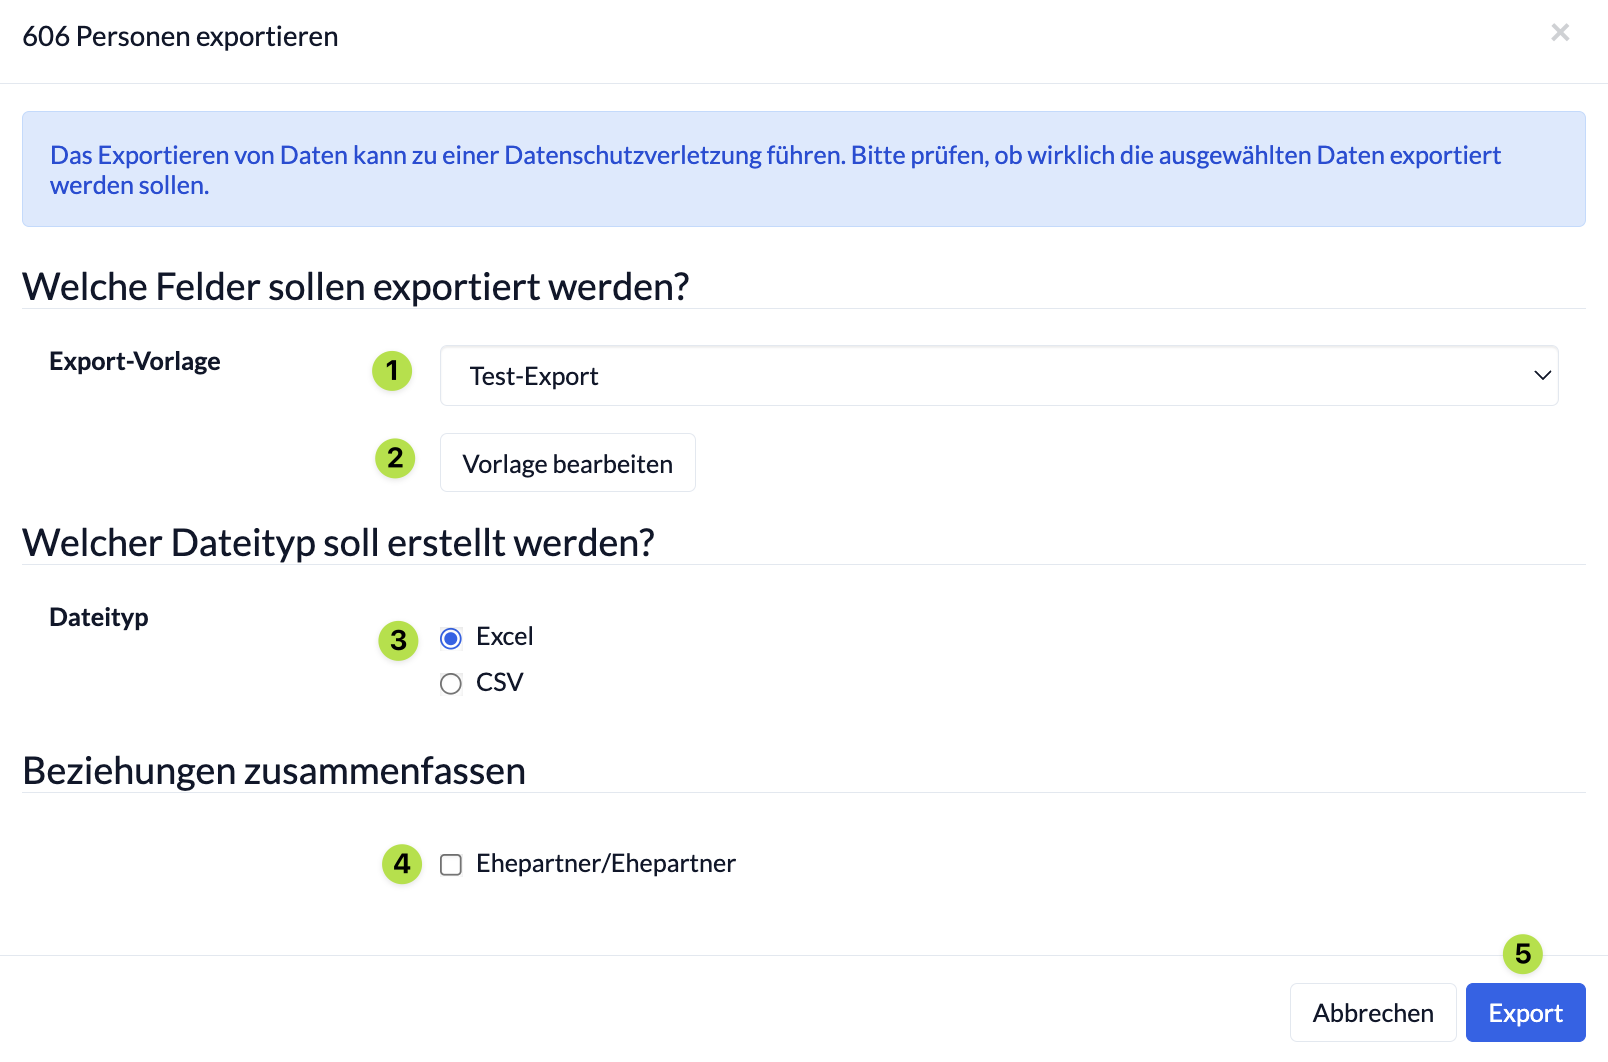
To do this, first specify which data should be exported. You can either select an existing template from the dropdown menu (1) or use the “Edit Template” button (2) to either edit an existing template or create a new one.
In the second step, select the file type you want to create during export (3).
After you’ve selected whether to combine relationships between spouses in the export (4), click “Export” (5) to generate an Excel or CSV file that you can use later.
Required Permissions #
The protection of personal data is of the utmost importance. For this reason, not every user should be able to export data from ChurchTools. As a general rule, users can only export the data that they are authorized to view in ChurchTools.
- In the system settings for the ” People ” module, the export functions must be enabled by default.
- Intra-group Permissions
If a user is to be allowed to export a group’s data, they need the ” Export Group Members” intra-group permission. If the data also includes information about group meetings, please also grant them the ” View and Schedule Group Meetings” permission.
FAQ #
The export isn’t starting for me. Why is that? #
If nothing happens when you click “Export,” you can check to see if your browser is blocking pop-ups. You can usually find these settings on the right side of the browser’s address bar.
I use a Mac. Why isn’t the exported data displaying correctly? #
The download is optimized for Windows devices. To ensure that, for example, umlauts and table columns display correctly on your Mac, please follow these steps:
- Open a new Excel workbook.
- Next, click “Data” in the folder, then select “From Text” from the dropdown menu on the far left under “Get External Data.”
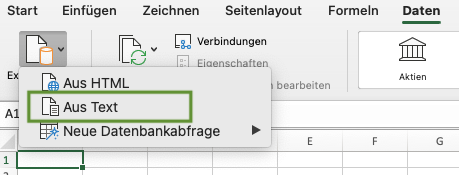
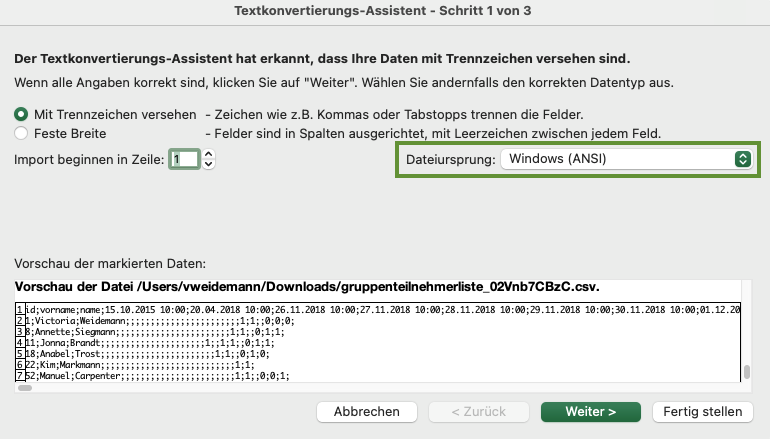
- After you select your file from the Finder, the Text Conversion Assistant opens.
In the first step, please specify that the file origin is Windows (ANSI).
In the second step, you specify the separator—in most cases, it’s a semicolon—and indicate that consecutive separators should be treated as a single character.
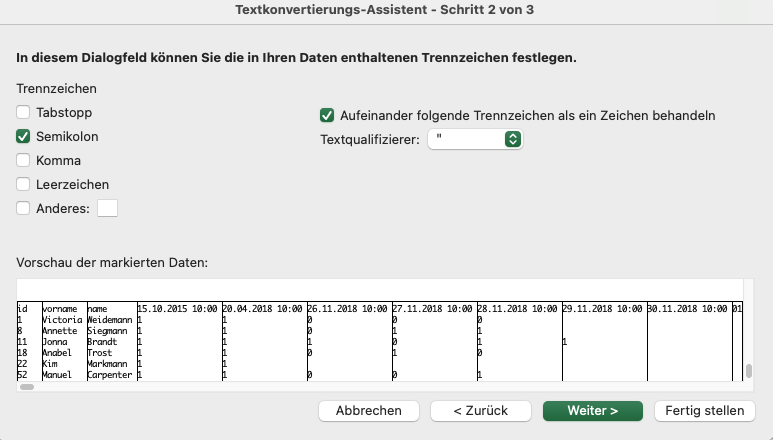
Finally, specify the data format to be used for each column.
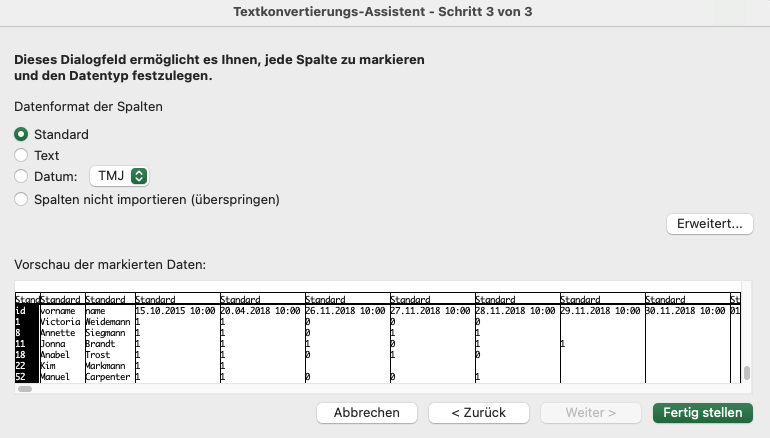
- Click “Finish” and specify the folder into which the data should be imported.
