

These resources help your congregation manage rooms, vehicles, projectors, and anything else you want to make available to them.
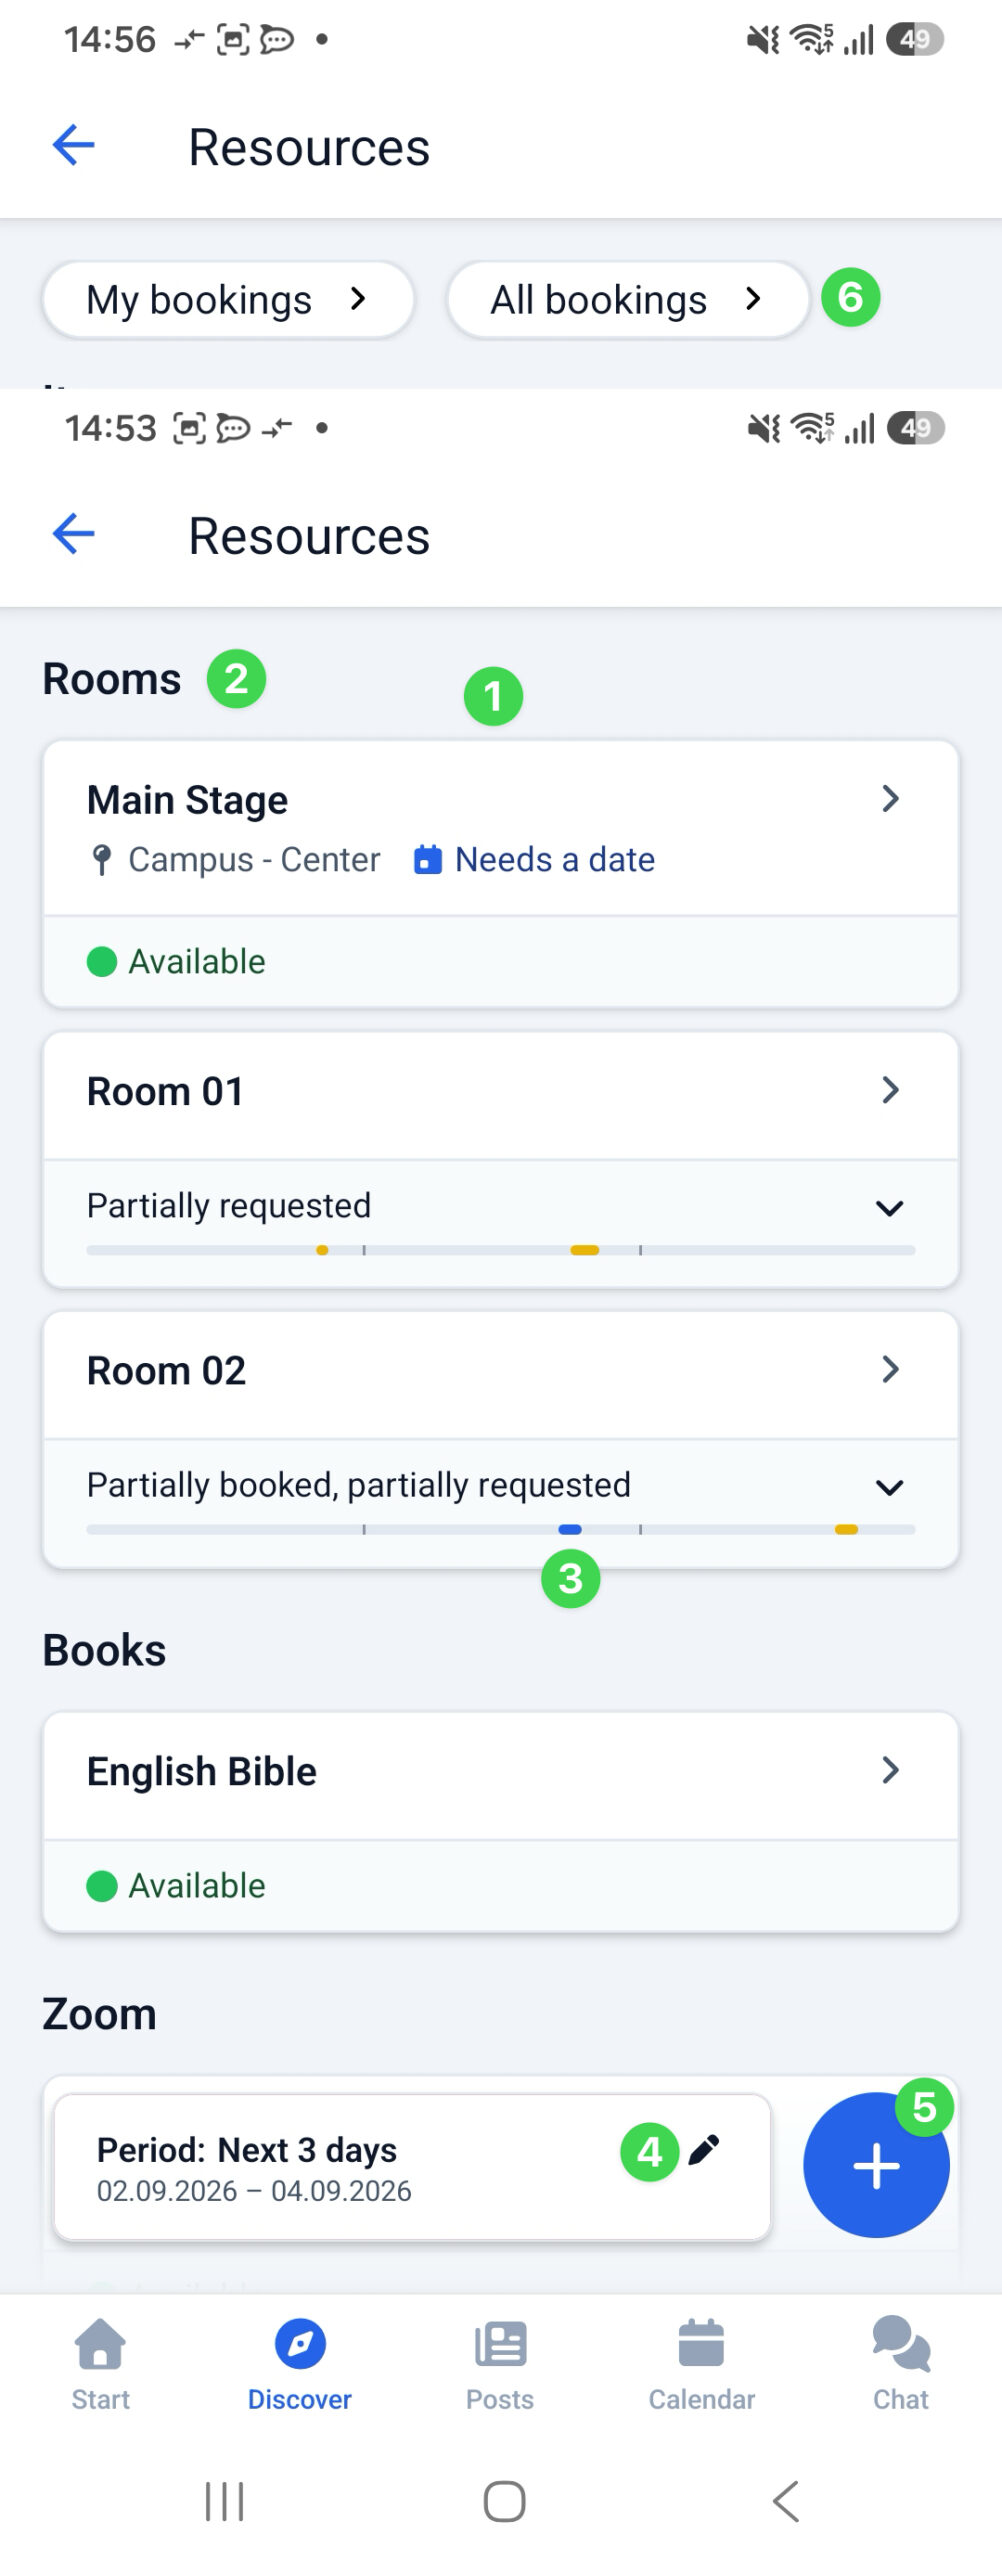
If you access the resources in the app via the ” Discover” tab, all resources will be displayed in a list (1), sorted by resource type (2). Here, you can also see at a glance whether the resource type (and thus all resources assigned to it) is assigned to a campus.
By default, the list shows you for each resource whether it has already been included in a transaction for today (3). It also displays useful details about the resource, such as whether a location has been specified for it and whether the resource is confirmed immediately when you book it.
At the very bottom, you can adjust the display period (4).
To the right of that, you’ll see a blue plus icon (5) that you can use to create a new booking request.
Use the “My Bookings ” or “All Bookings ” buttons (6) to view the corresponding booking overview, where you’ll find various options for filtering the results. We’ll show you the available filtering options in the article “How to filter resource bookings in the app?”