


If you use check-in codes for your group, you can quickly track who is present at a group meeting.
In this article, we’ll show you how to activate check-in codes, select the roles for which they should be created, and—if you’d like—set up automatic delivery.
1. Call up group #
Open the ” Groups ” module and select the group for which you want to enable check-in codes for its meeting.
This setting is always configured for a specific group. If you want multiple groups to use check-in codes, you’ll need to enable them for each group individually.
2. Open Meeting Settings #
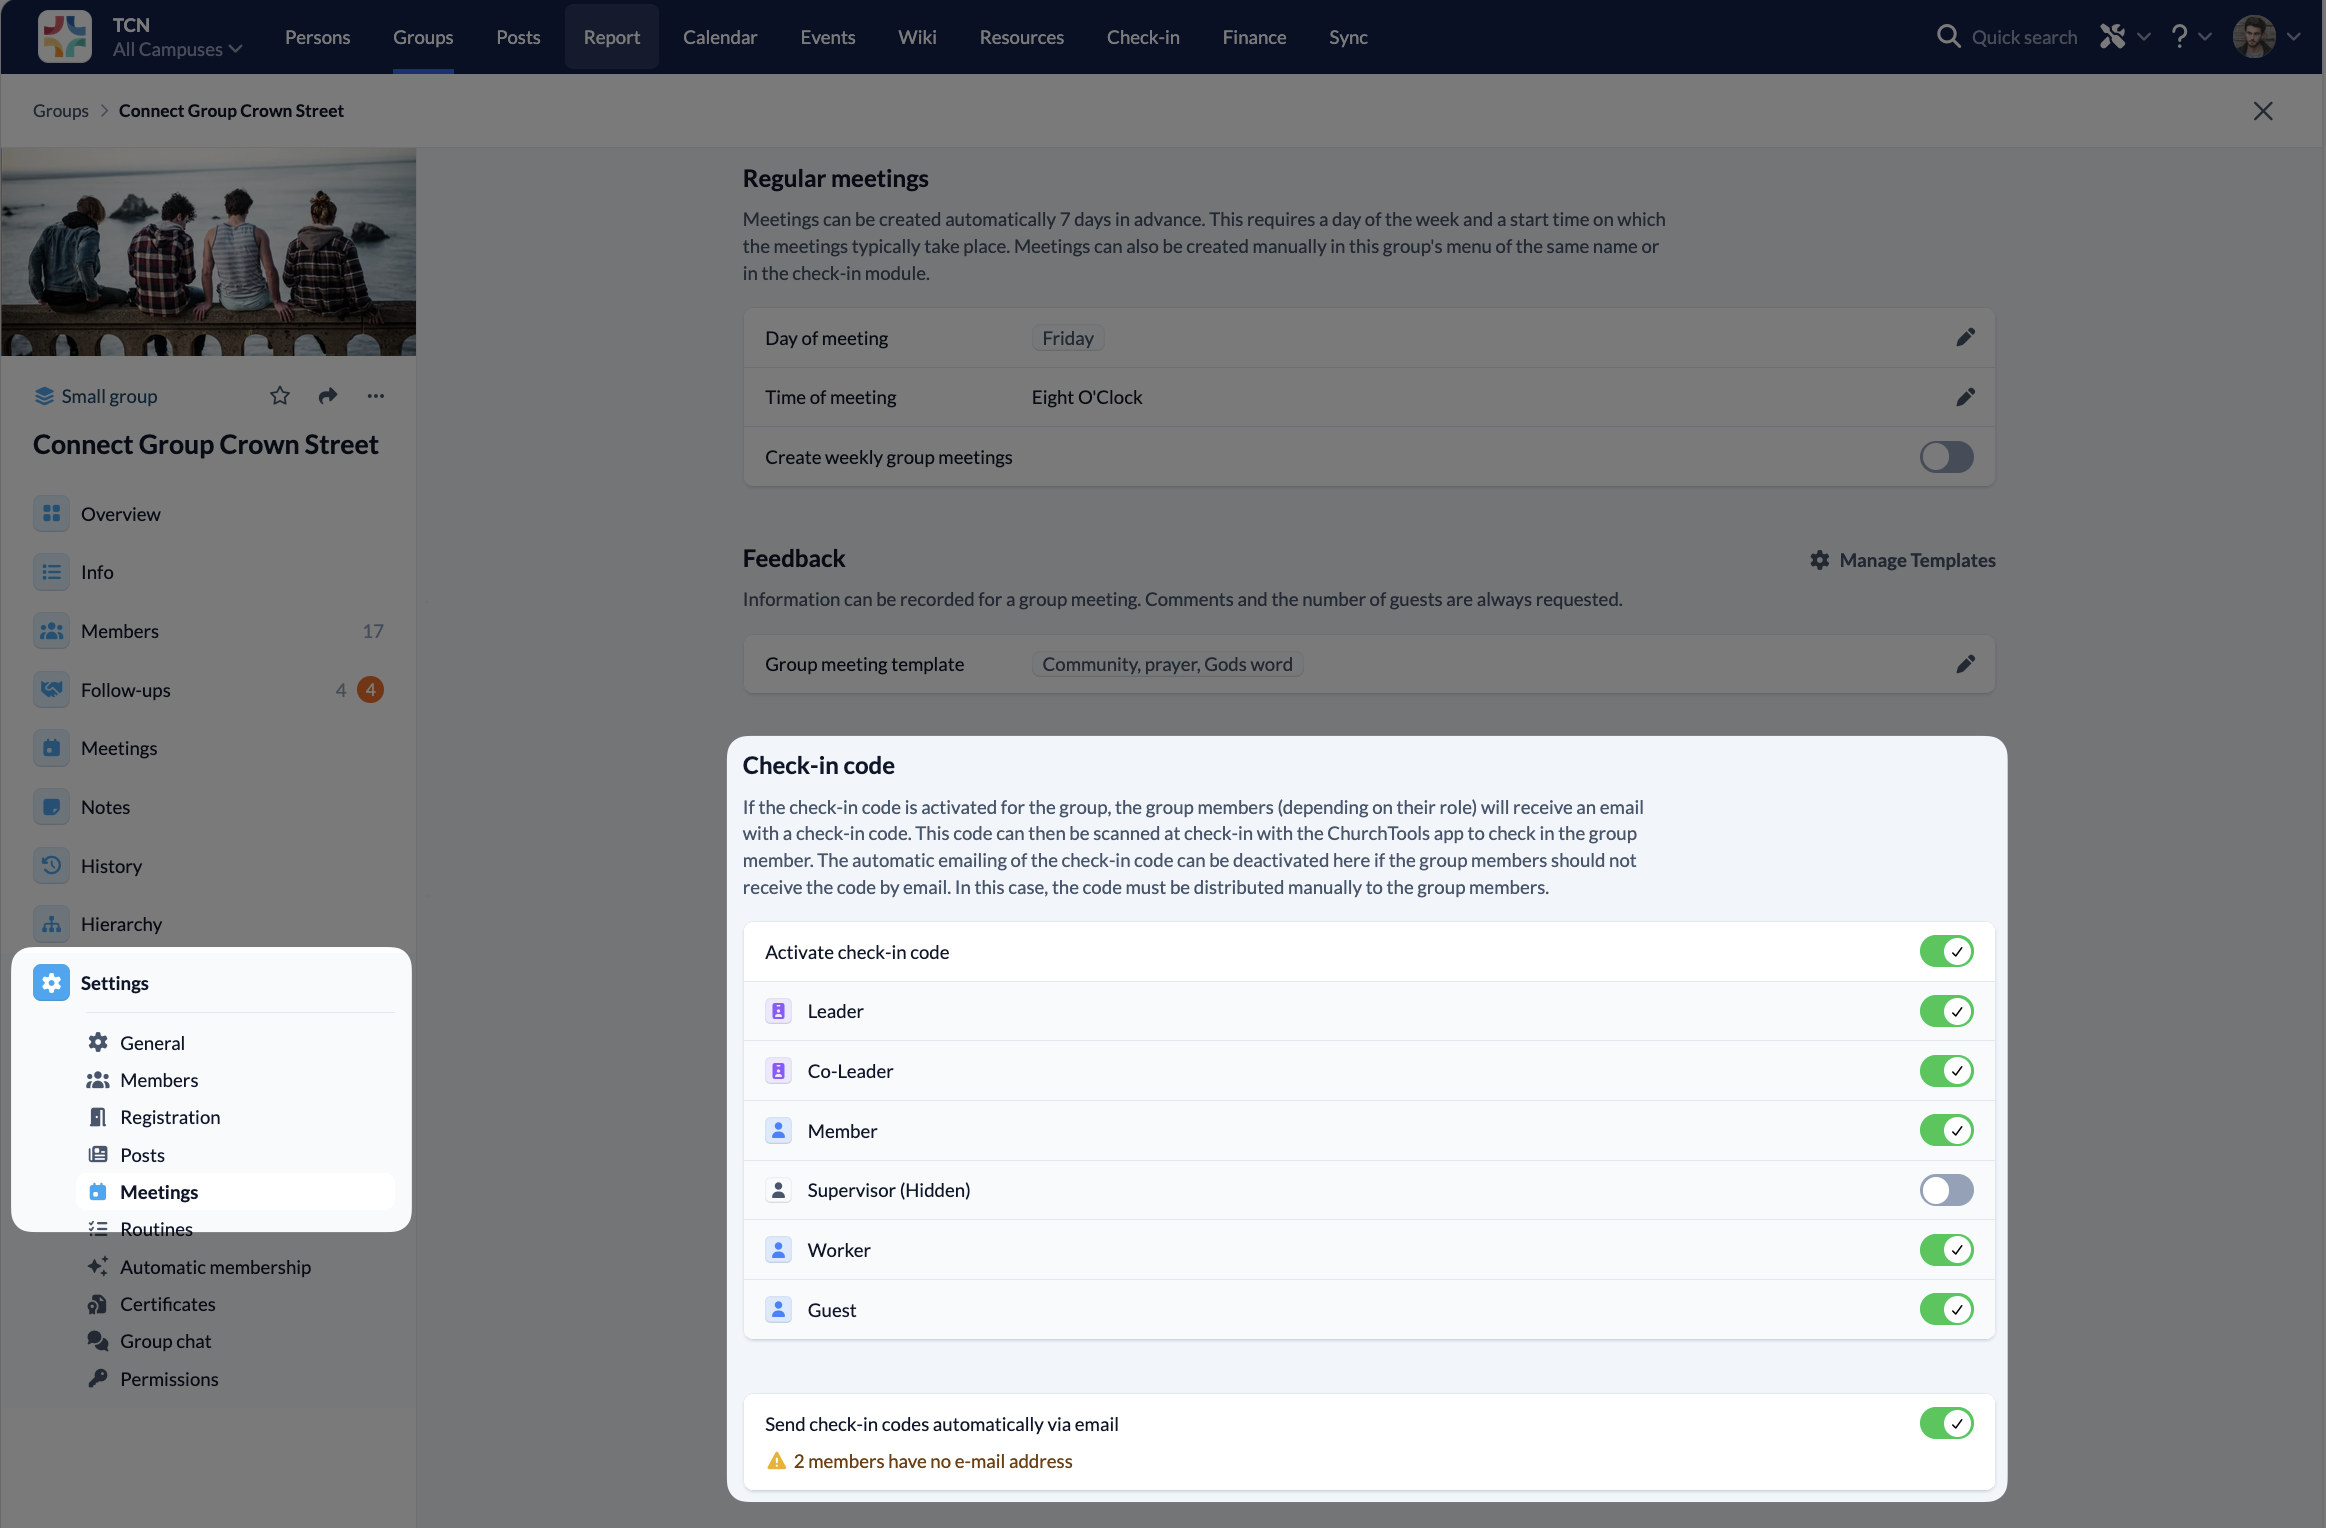
In the group menu, open the Settings section (1) and then select Meetings (2). Here, you can specify how your group’s meetings are generally set up and used. In addition to the settings for regular meetings and feedback, you’ll also find the section for the check-in code here.
3. Activate the check-in code #
In the meeting settings, scroll down to the “Check-in Code” section and enable the feature using the toggle (3). This allows you to generate check-in codes for people in these group, which can then be sent manually or downloaded. Optionally, you can have them sent automatically. These codes can later be presented when recording attendance and scanned using the ChurchTools app.
4. Select Roles #
Next, use the respective switches to specify which group roles (4) should receive a check-in code. For example, if you select only the “Member” role, only people with that role will receive a check-in code. People with roles that are not selected will not receive a code. This is particularly helpful if you do not want to track the attendance of all group members or if certain roles—such as leaders or staff—should be treated differently.
5. Optional: Enable automatic e-mail delivery #
Optionally, use the switch to enable automatic e-mail delivery (5). Only then will ChurchTools automatically send the check-in codes to the selected roles.
If members were selected for roles for whom no e-mail address has been provided, you’ll see a note about it right here.
Check if the code was delivered #
Users of the ChurchTools app can find their code right in the overview of their group.
In the group members table, you can see in the Check-in Code column (1) whether and when the code was sent or downloaded, and whether the code needs to be sent manually because automatic delivery is not enabled or no email address has been entered. There, you can use the envelope icon(2) to resend the code if necessary, or use the download icon to download it. If you hover your mouse over an entry, a small info box (3) opens with the same options.
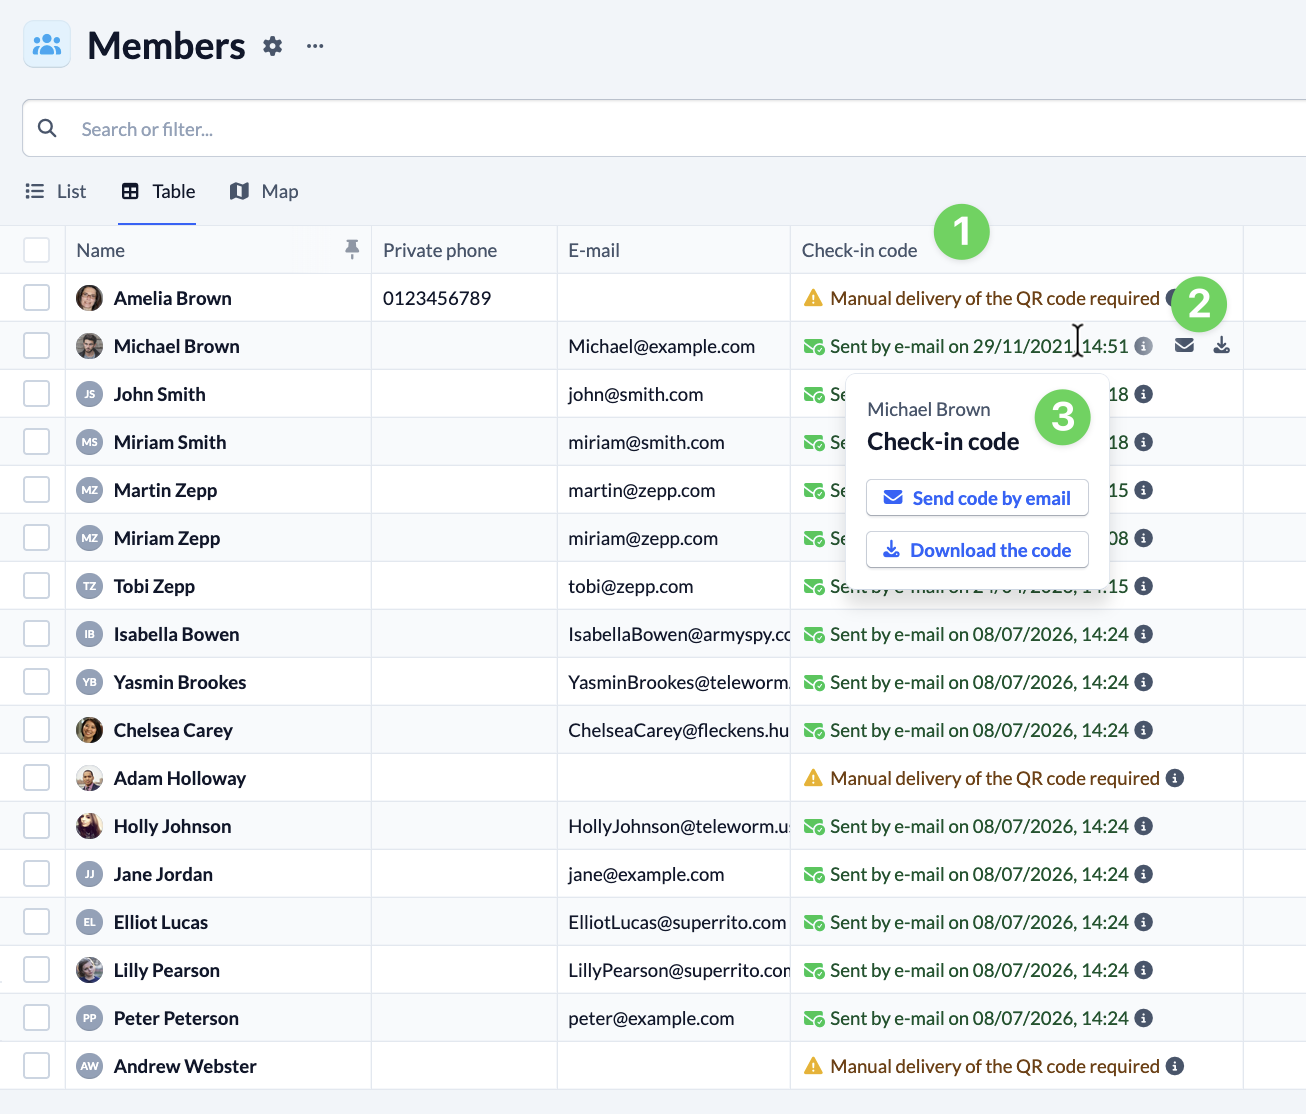
Resend codes #
If automatic sending is already enabled and you want to resend check-in codes to certain roles, you can deactivate and then reactivate the corresponding role. This will trigger the sending process again for all group members with that role.