


One particularly helpful feature for check-in is the automation of printing tasks: This allows you to print name labels or pickup slips for children’s church directly as you record attendance.
In this article, you’ll learn how to configure these features in the System settings. To do so, navigate to the System settings in your ChurchTools system for the Check-in module.
Check-in Settings #
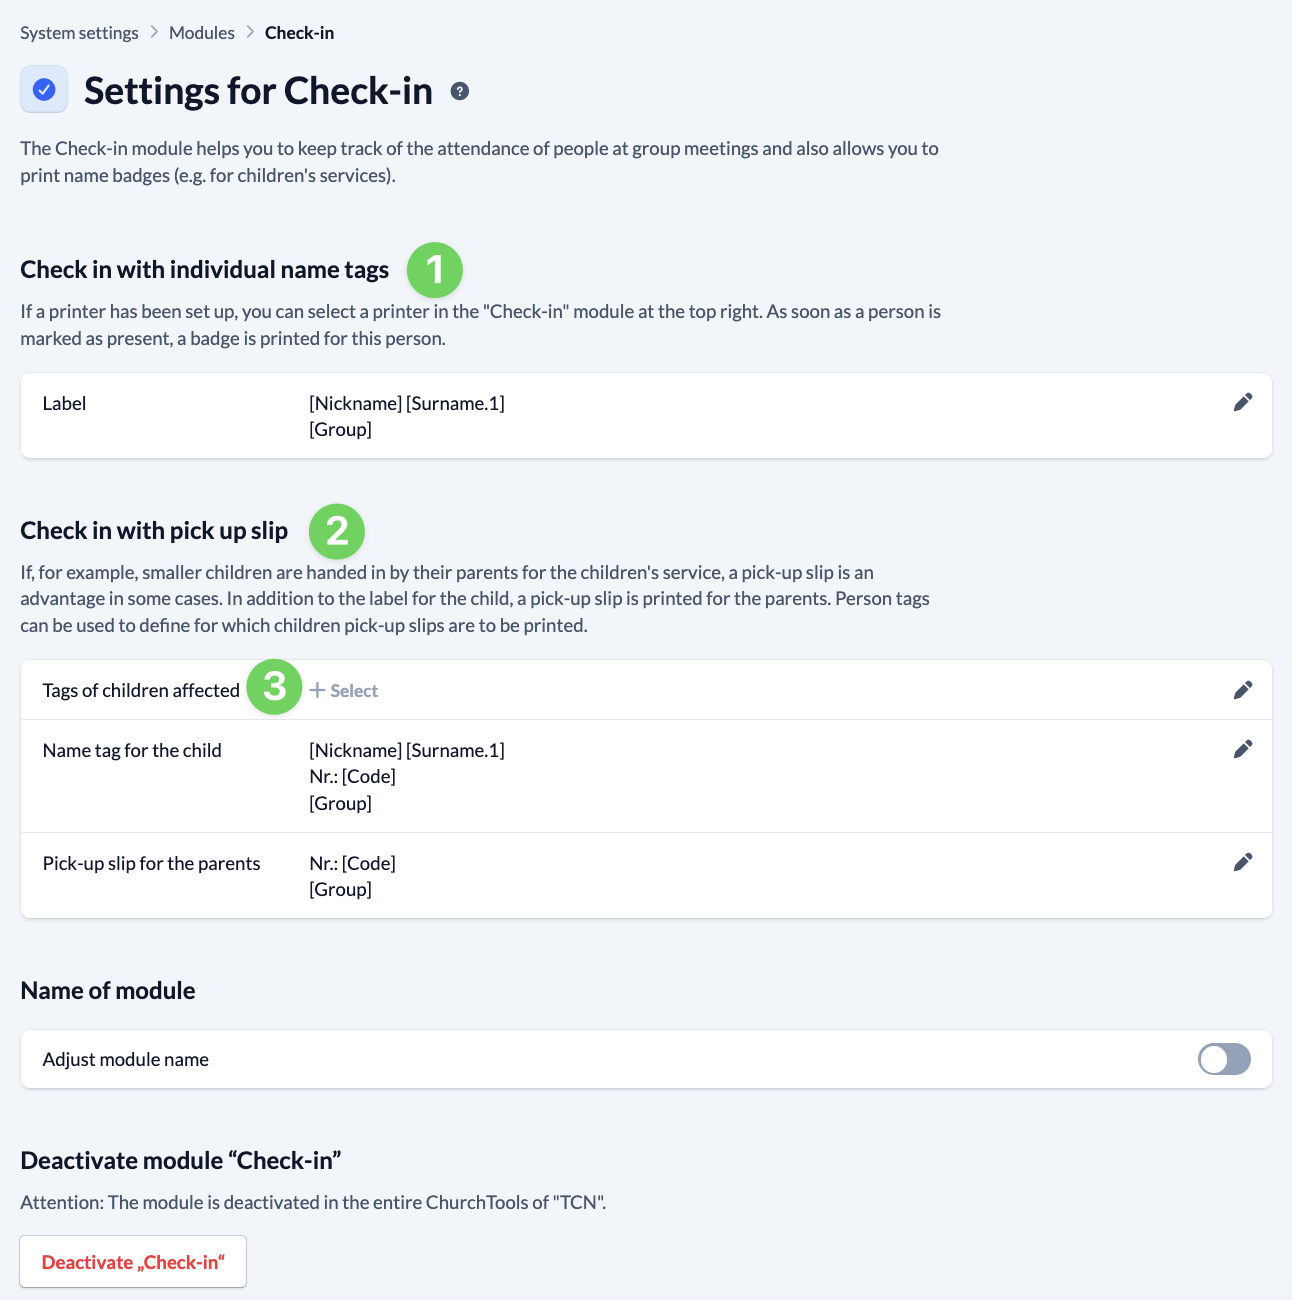
In the ” Check in with individual name tags ” section (1), you can configure what an individual label should look like.
In the ” Check-in with pick up slip ” section (2), you can create a separate pick-up slip for parents in addition to the label for the child. To avoid printing a slip for every child, you can use the tags for the children involved (3) to precisely control which participants this feature should apply to. To do this, specify the participant tags you are using. This allows you to precisely limit printing to only the children involved.
Formatting Content with Placeholders #
The content of the labels and pickup slips can be customized.
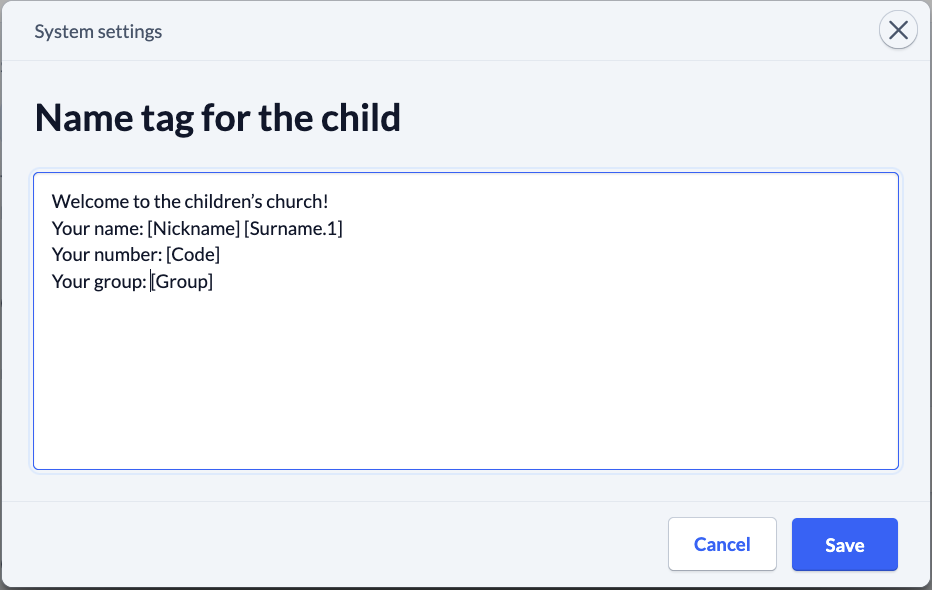
When you click the pencil icon to edit the settings for the label, the child’s label, or the parent pickup slip, a text editor opens. In this editor, you can:
- Enter free-form text (e.g., “Welcome to Children’s Church!”).
- Use placeholders to automatically extract information from the person’s data (e.g., the person’s name or the date).
By using placeholders, you don’t have to manually adjust the templates for each event—the data is automatically populated from the stored personal information when you record attendance.
If you also want to adjust the font and font size, you can find more information in ” How to connect a printer to the Check-in module? “