

1. Access service categories in the Events module #
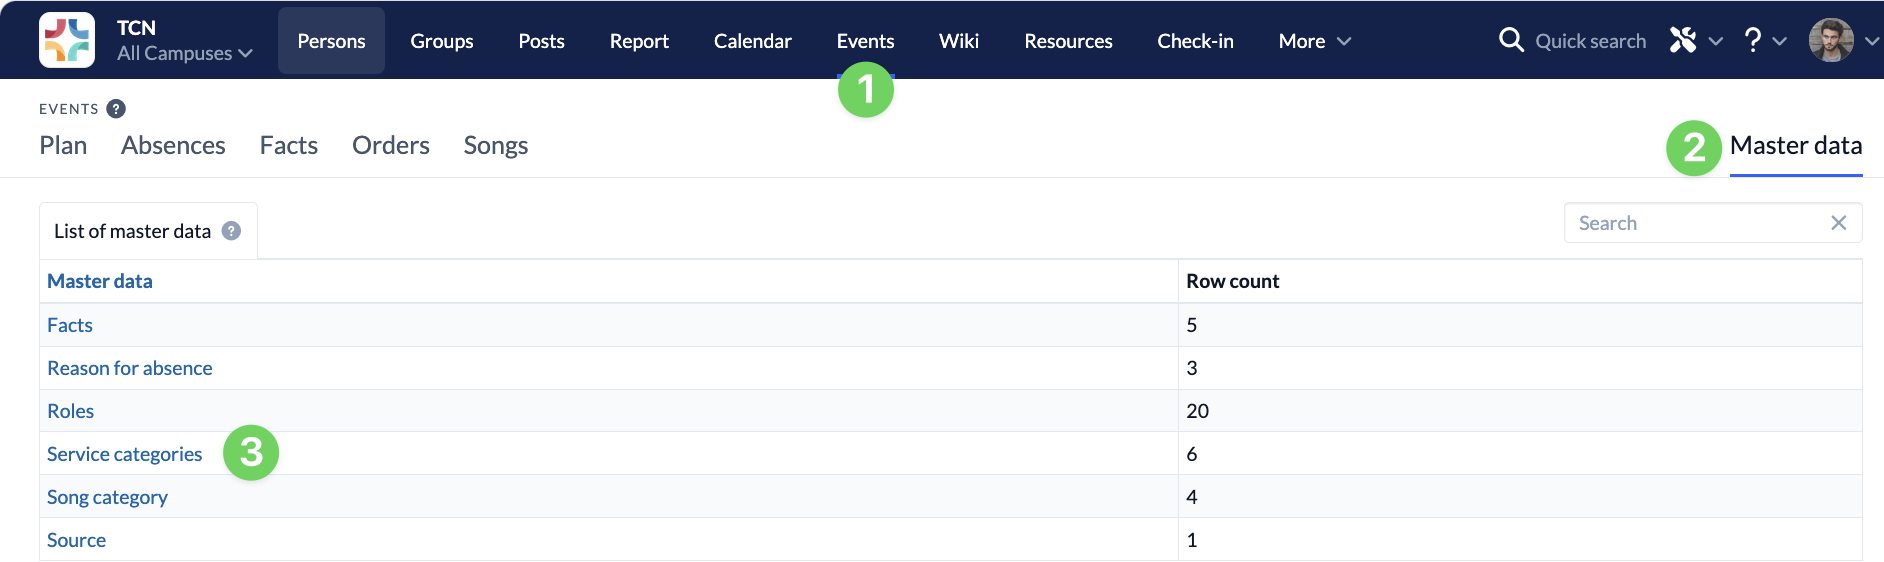
In the Events module (1), open the Master Data (2) on the right-hand side and select the Service categories (3) there.
2. Create a service category #
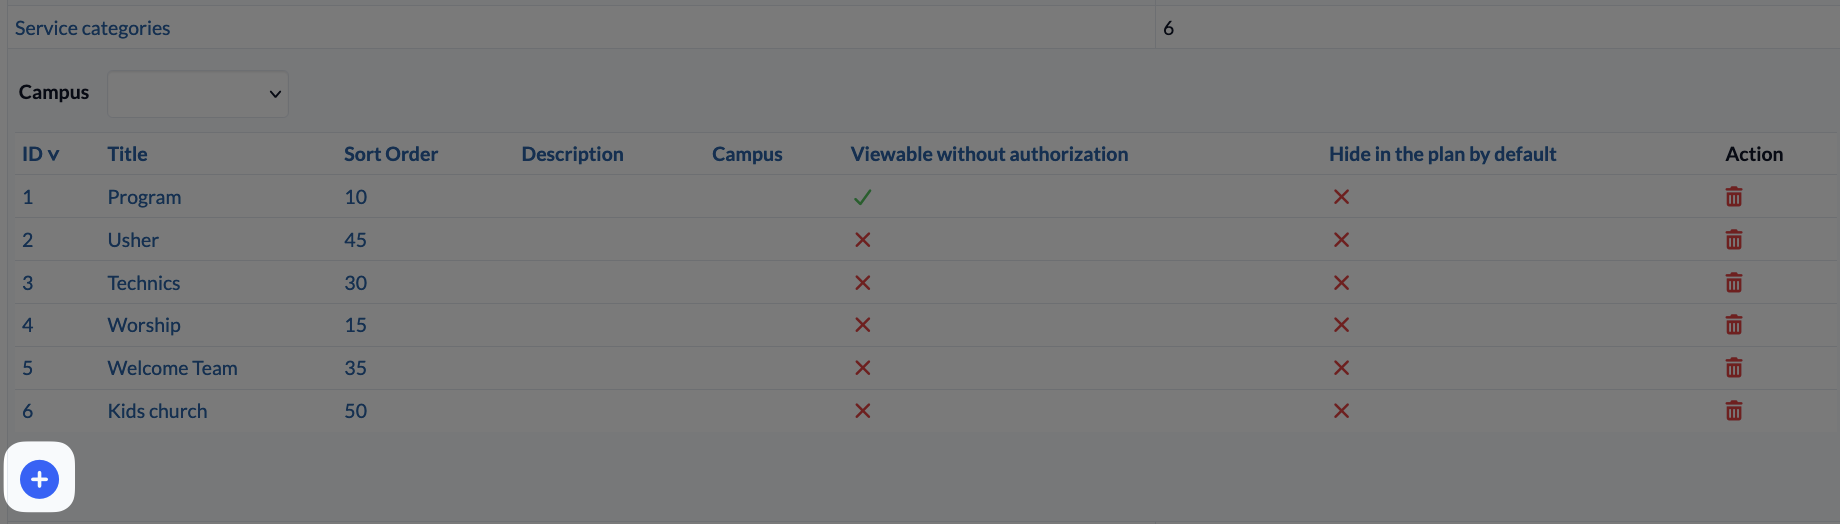
Click the blue plus icon below the list of service categories to create a new service category.
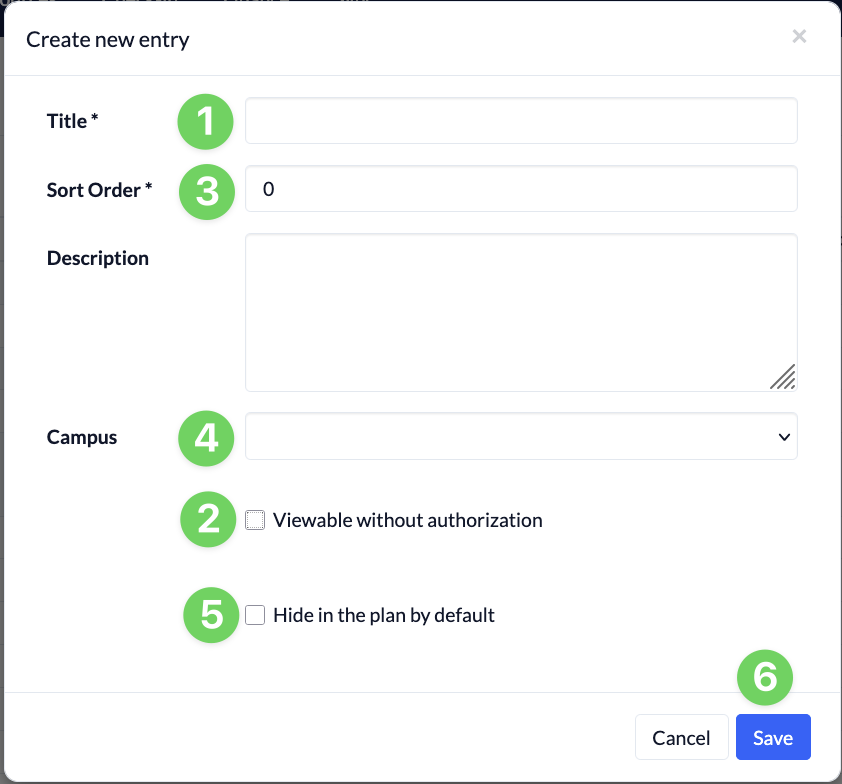
To create a new service category, fill out the following fields:
- Enter the designation (1) of your new service category here.
- If you check the box next to ” Visible without permission (2),” you’ll ensure that everyone can see all the roles in this group and the staff assigned to them. This is useful, for example, for the “Program” role category, to which the preacher and the moderator are assigned. That way, everyone knows who is responsible for the event.
- The sort order (3) determines where the service category is displayed.
- If the service category belongs to a campus (4), you can assign it here.
- If you check the box next to “Hide by default in the overall view ” (5), this service category will be hidden by default in the shift schedule. You can display it manually in your own view.
- When you click ” Save ” (6), you create the new service category and can assign roles to it.