In many churches, groups are networked with each other, have department leaders or coaches who look after the groups in certain departments or areas. If this is also the case for you, you have the option of embedding groups into the existing structure of your congregation. In this tutorial, you will learn how to map this network in ChurchTools.
1. Create superior group #
First of all, you need a group in which the leaders and employees who lead or supervise an department or role are organized. This is the so-called superior group, for example “Small Groups North” or “Divine Service”. The reason for this is that other groups are subordinated to it, in which sub-departments are then organized, e.g. all small groups that belong to the North department and whose members are supervised by an department leader or a coach, or all ministry groups that help to shape a church service.
If this group already exists and is actively used, you can continue with point 3. If you don’t yet know how to create a new group, you can find step-by-step instructions on how to do this here. We also have further links to background information for you there.
2. Add group members #
Once the group has been created, you have the option of adding group members directly in the overview under Members using the plus symbols under the roles. Typically, there are leaders, co-leaders, coaches and employees in a superordinate group. The roles available in your group depend on the group type. You can find detailed information about the roles and how you can use them here.
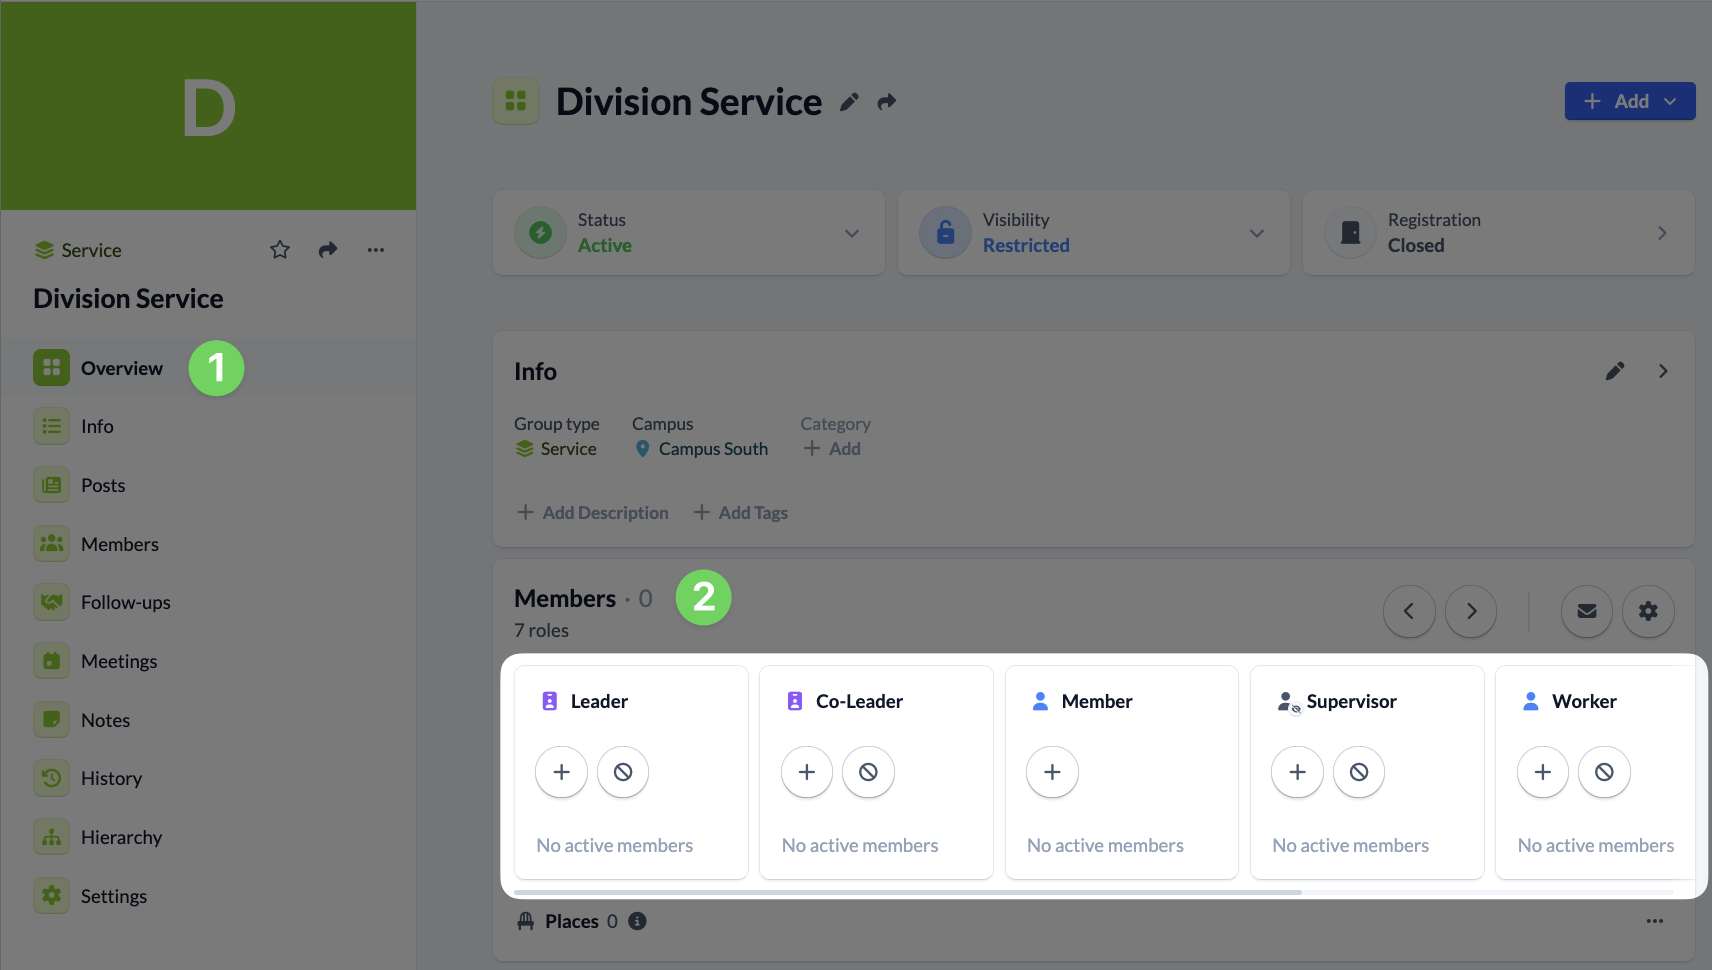
Alternatively, click on Members and then click on the blue + Add member button on the members page to add members to the group. For each member, you select the corresponding role that they should have in your group and have the option of saving a comment and other data.

You can find out how to define further settings for the members of your group, such as participation in group chats, here.
3. Create sub group(s) #
Now it is about the groups that are to be assigned to the superior group, i.e. in which the sub-departments are organized, such as individual small groups, musicians, welcoming service, etc.
If you have already created these group(s), you can continue with point 4. If not, create it and add the group members here too.
4. Set up group hierarchy #
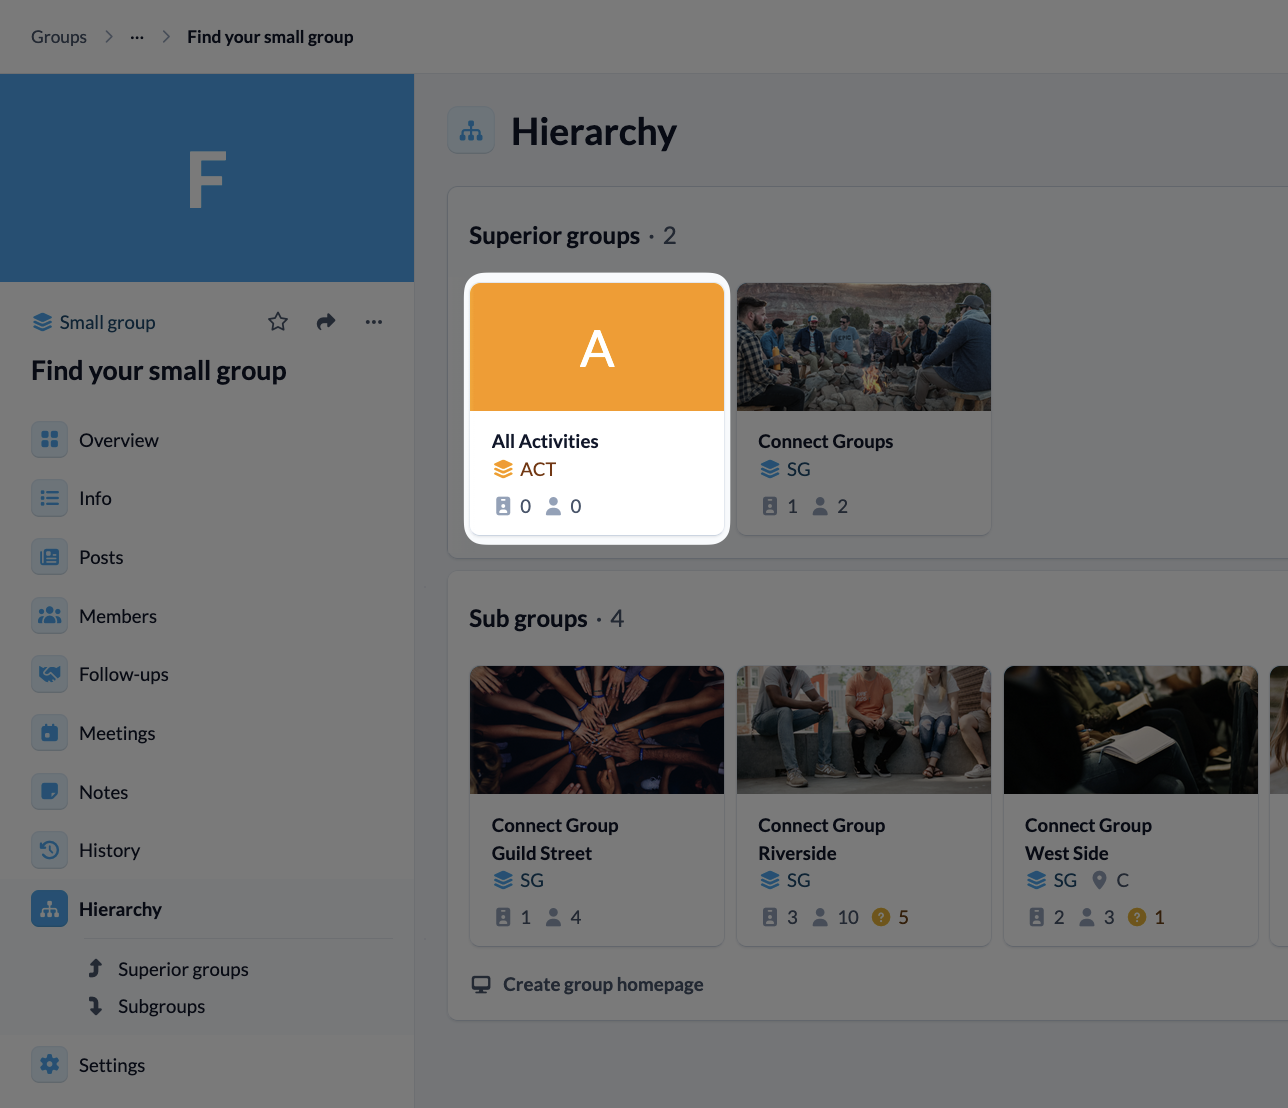
Now go back to the superior group that you created at the beginning. Under Hierarchy (1) and Sub groups (2), use the plus symbol to select the groups you want to link and add them. You can find out exactly how to do this in our instructions for adding super- and subgroups.
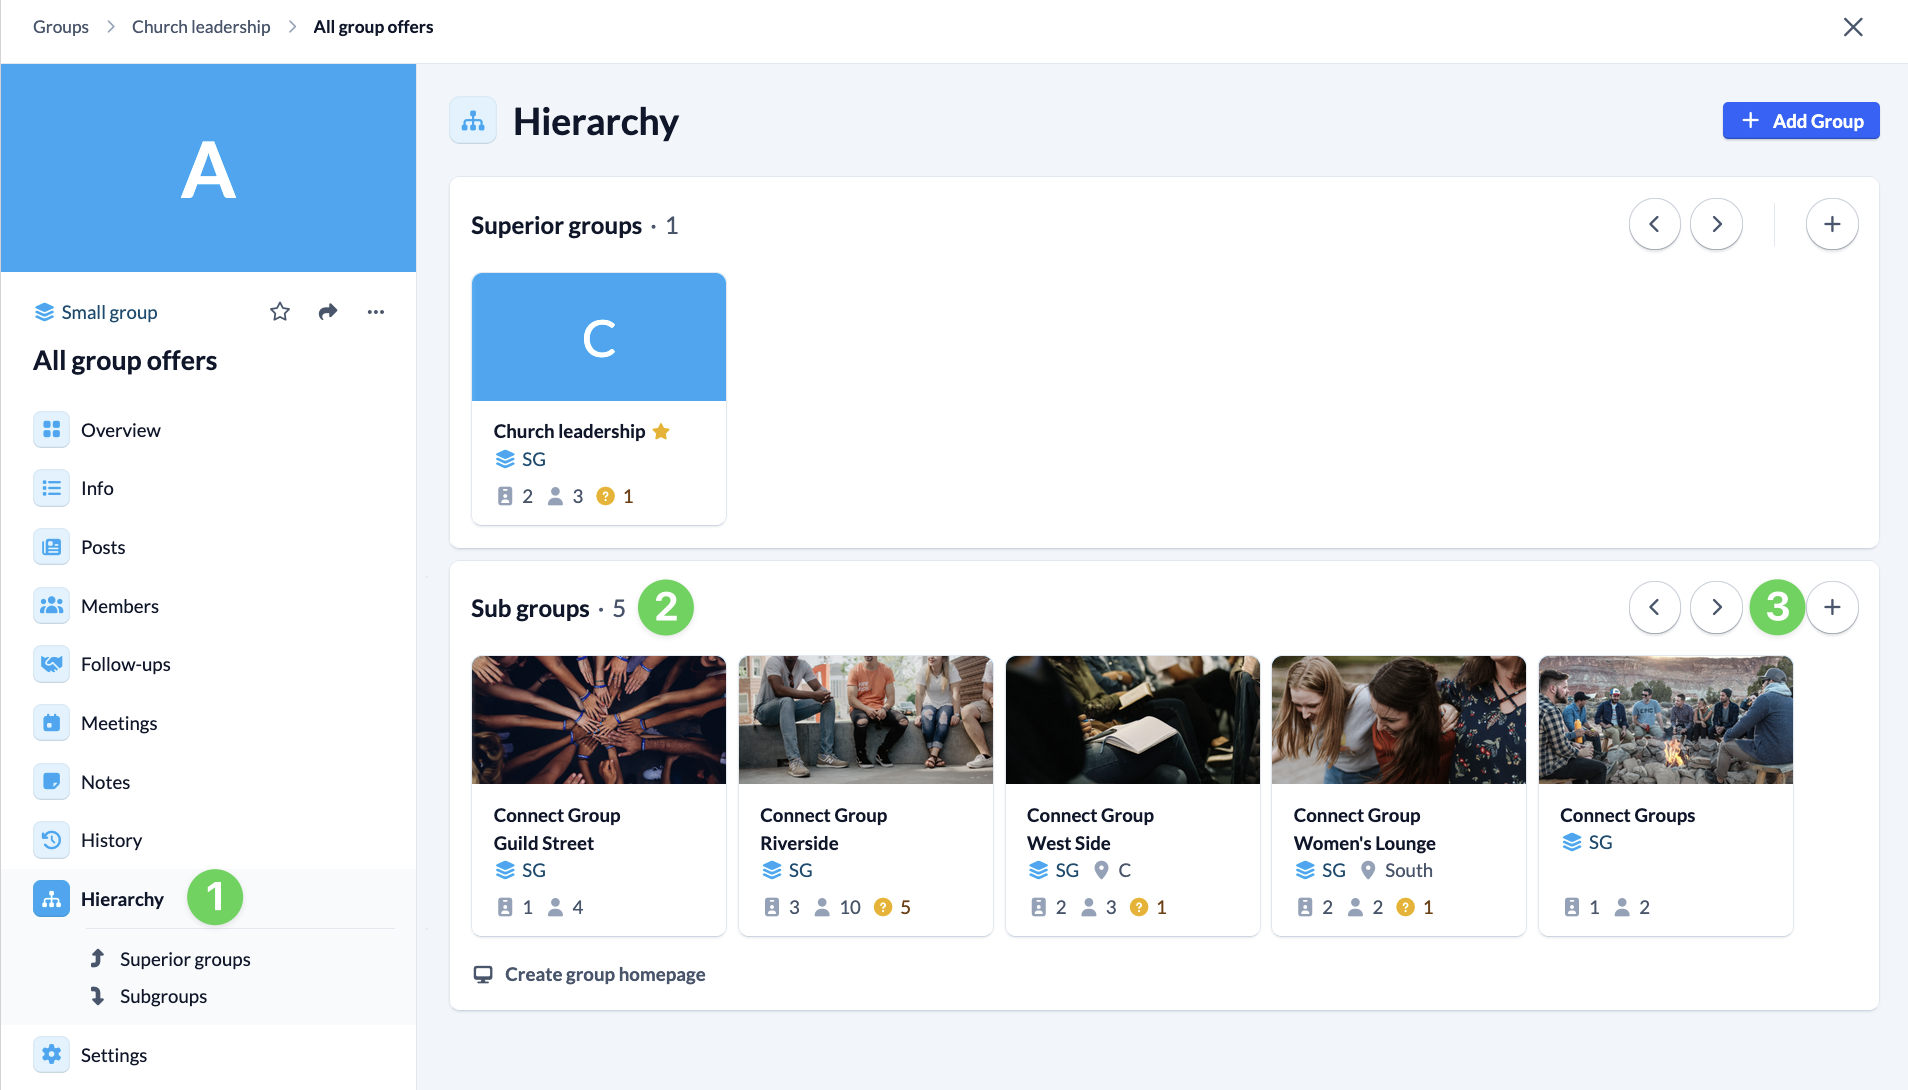
Once you have linked the groups, the superior- and subgroups are clearly displayed in each group and you can easily navigate back and forth.
Example:
Supergroup “All offers” with subgroup “Find your small group”:
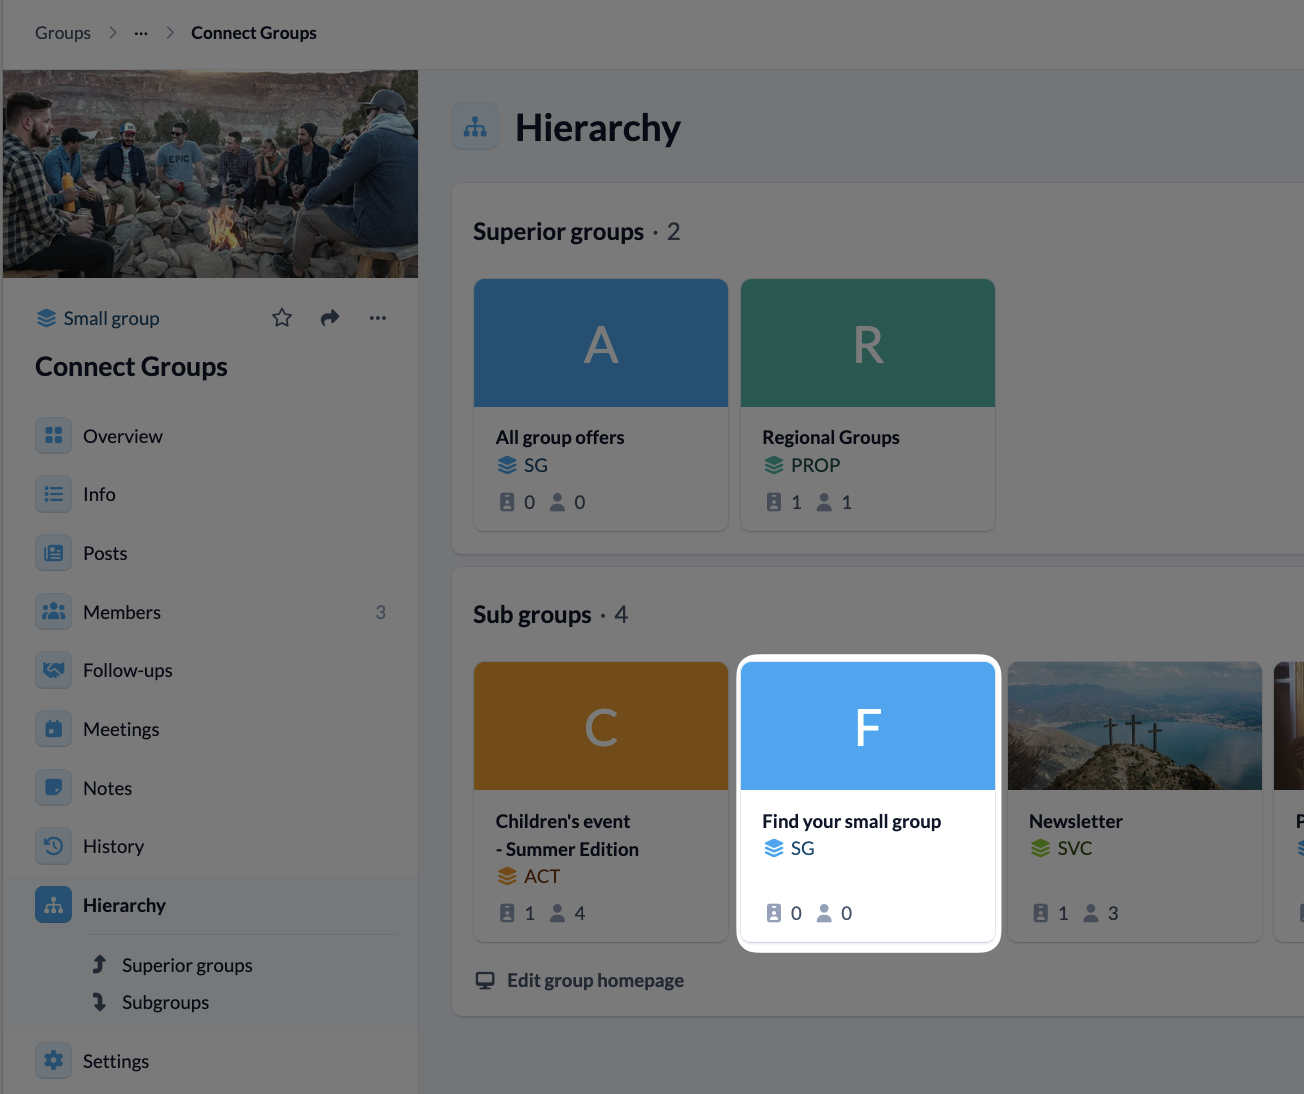
Subgroup “Find your small group” with supergroup “All offers”:
5. Assign permissions for subgroups #
If you have linked groups with each other, this opens up the possibility of assigning global and group-internal permissions to individual roles in a superior group that are valid for the subgroup(s).
You can find out what this means and exactly how to do this in our article on permissions for subgroups.
6. Use the superior group homepage #
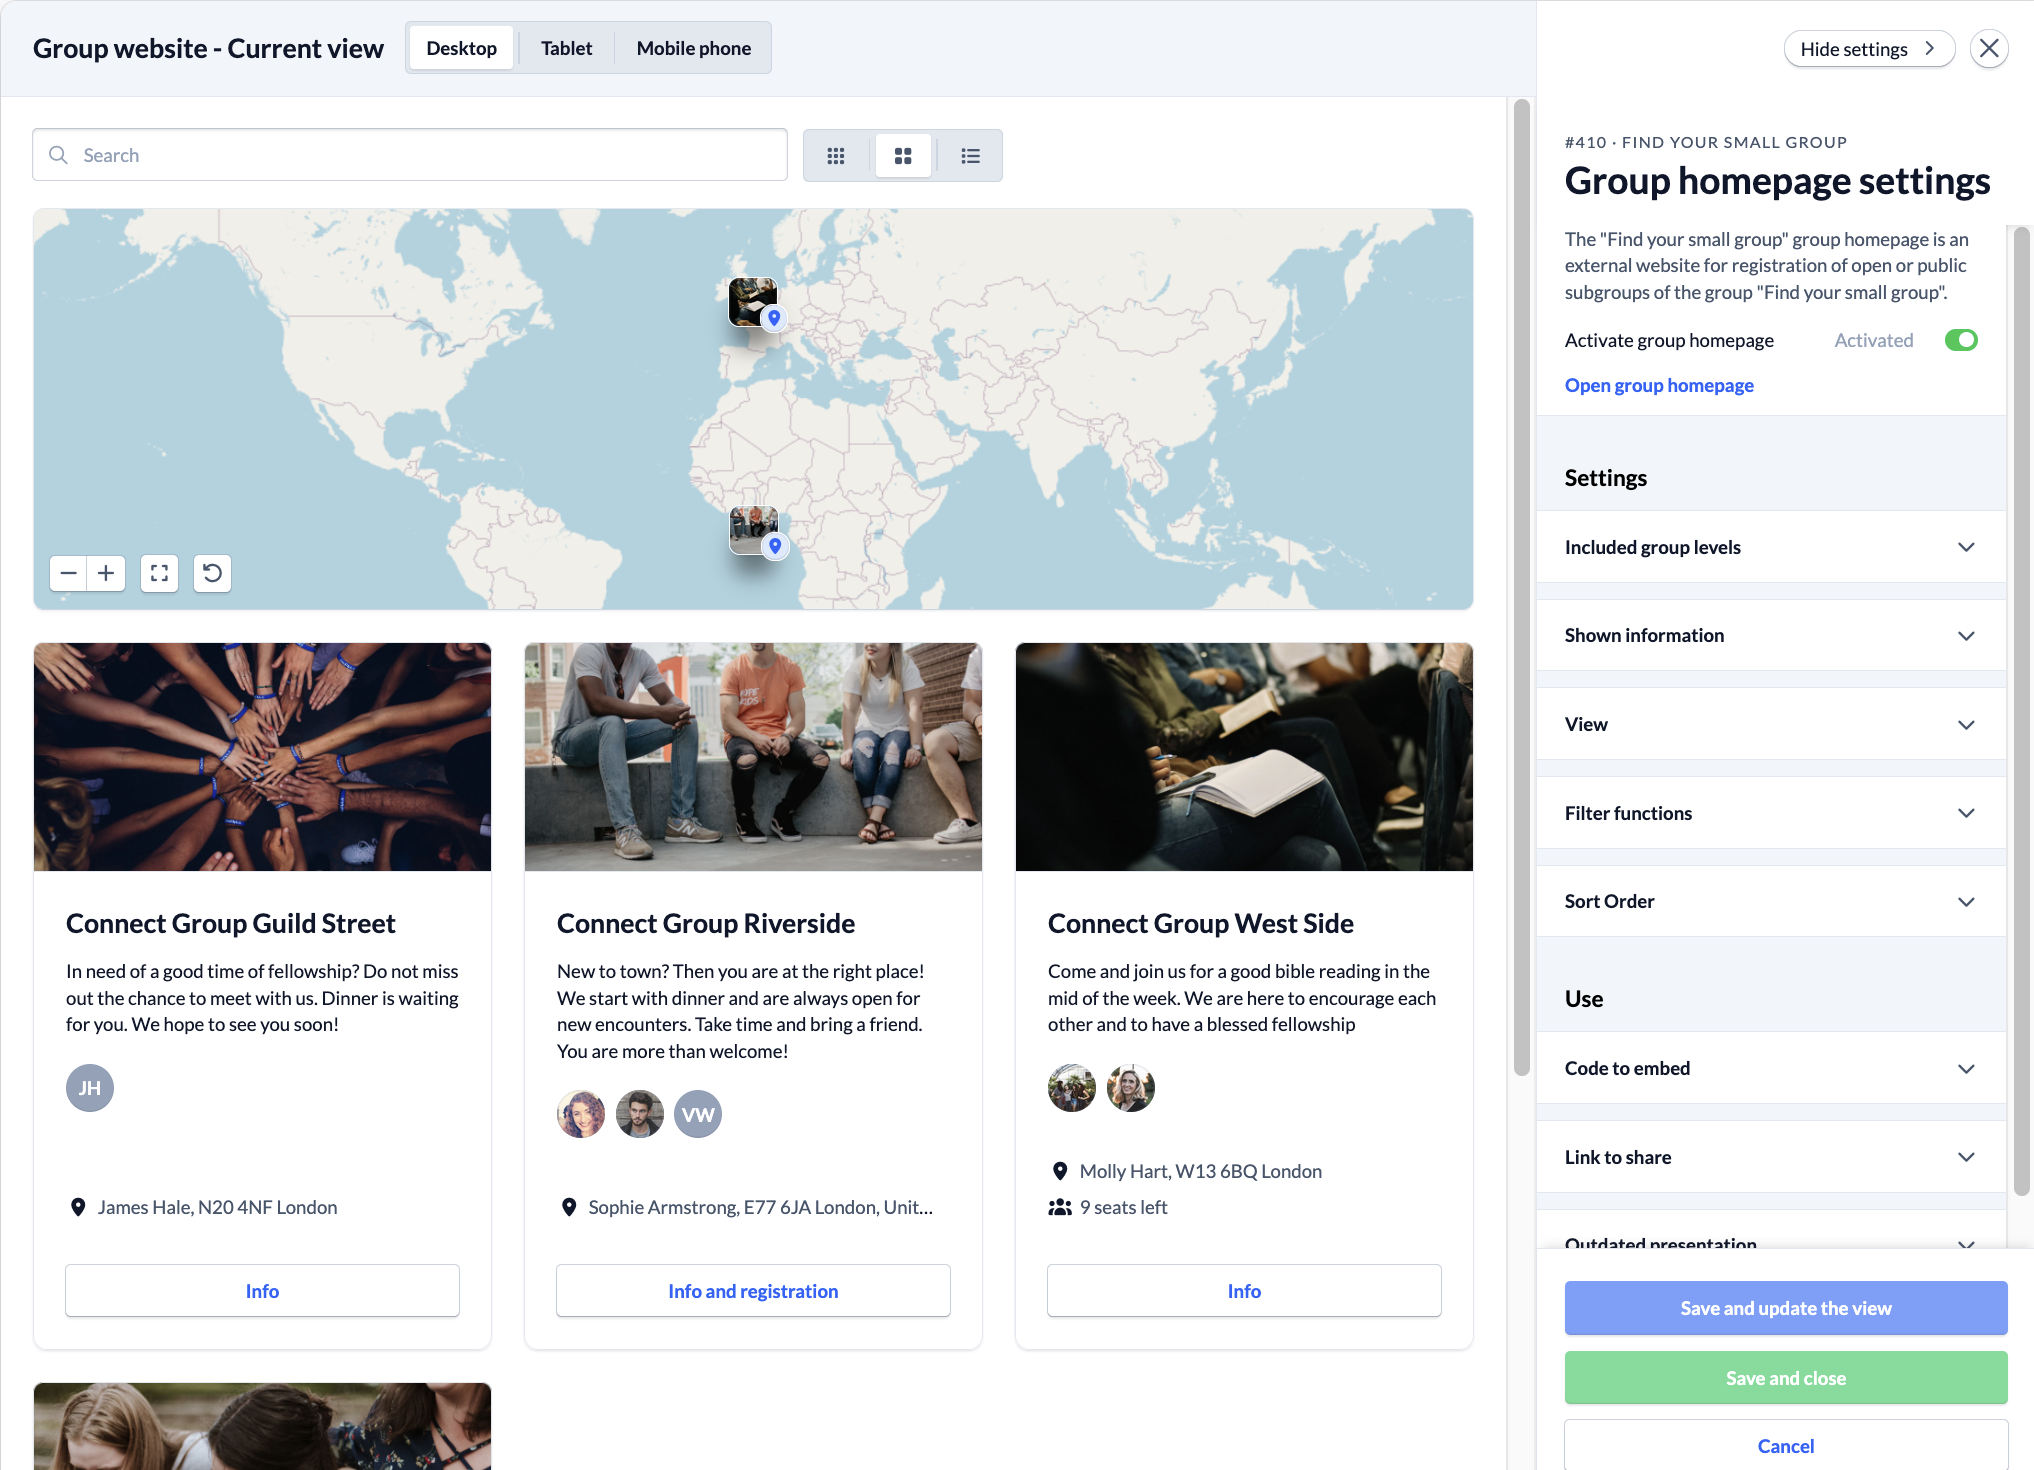
To make your groups visible to the public, you have the option of using a group homepage for superior groups, which you can embed on your church website or whose link you can share in a newsletter, for example. On this group homepage, all groups that are assigned to the same superior group are displayed together and can even be filtered. This creates an overview!
The leader of the superior group can customize the display of the group homepage via the group settings. We explain how to do this here.
7. Set up public pages of the subgroups #
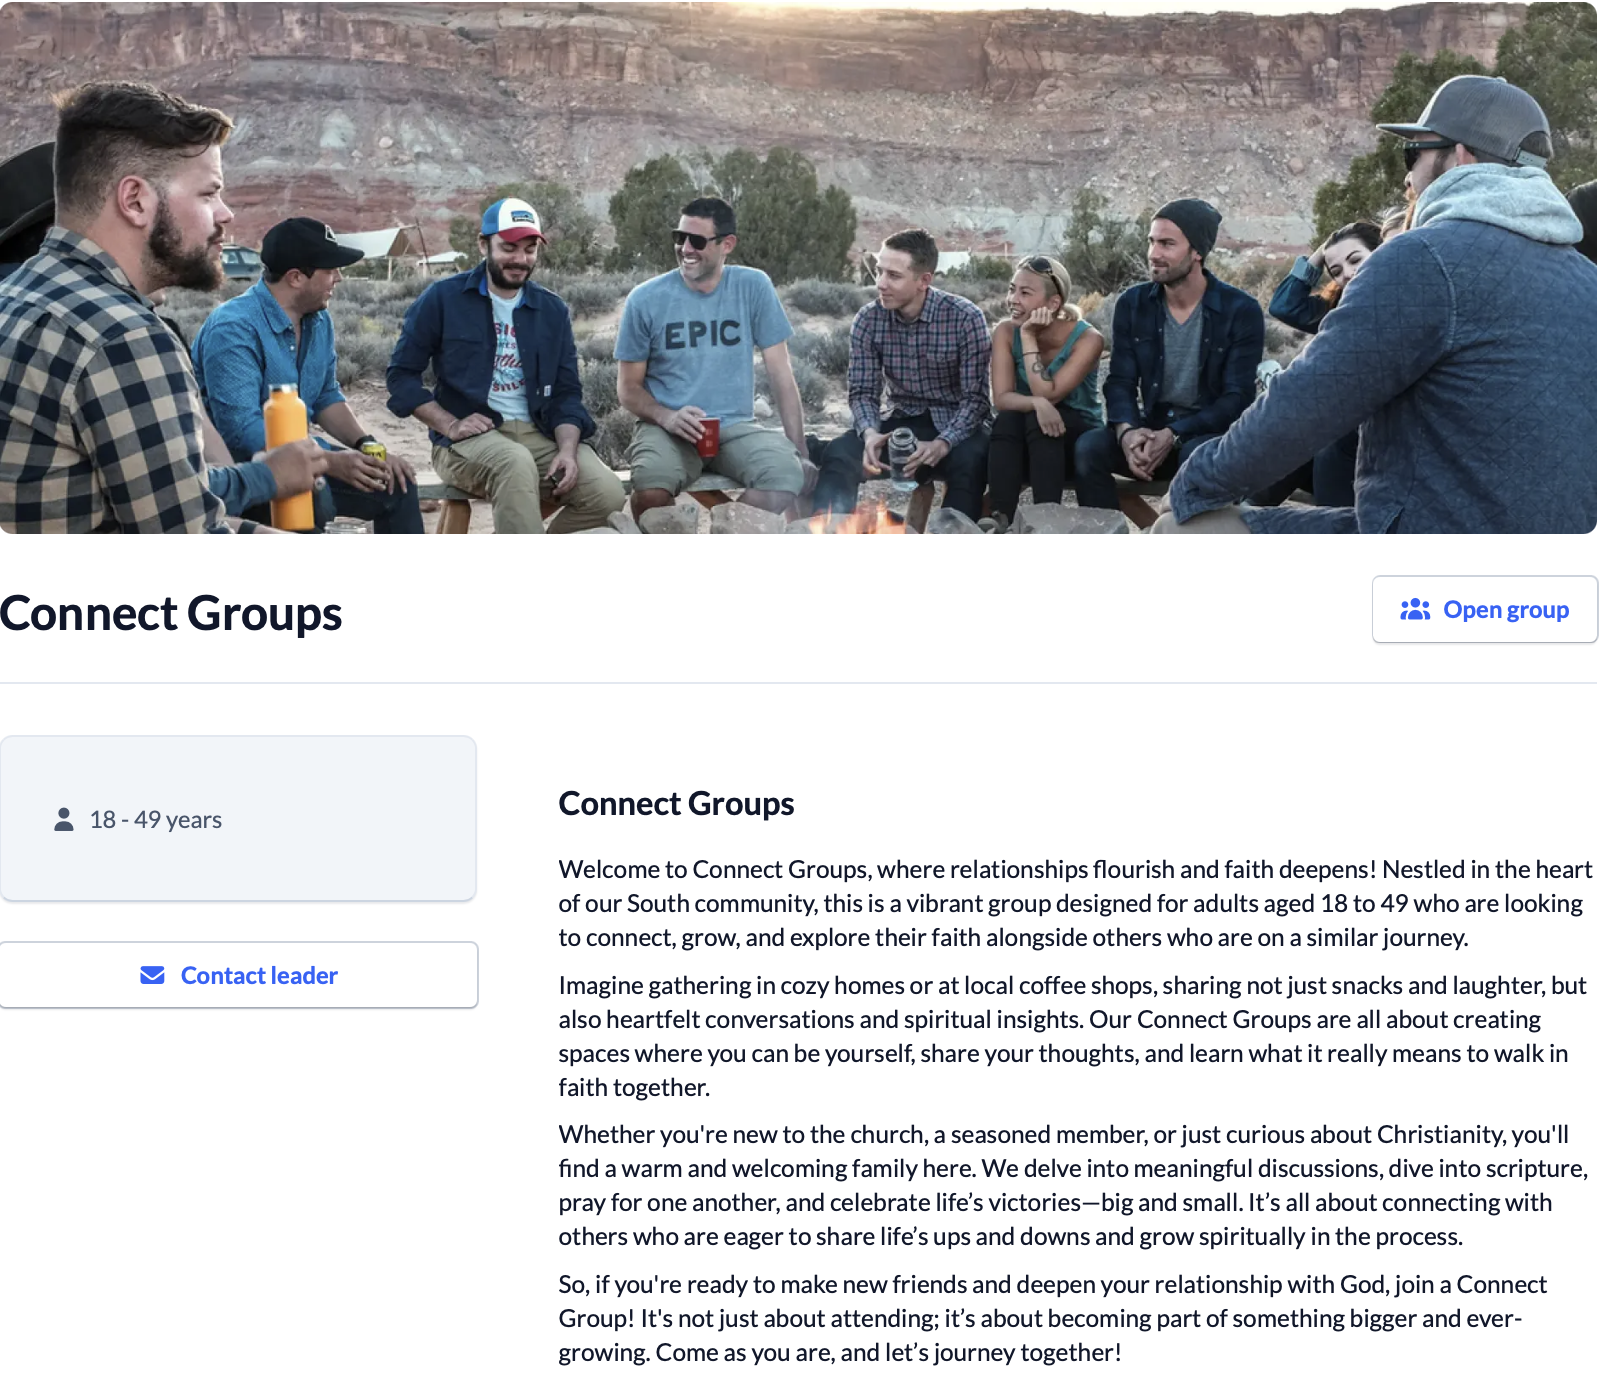
If a visitor to your website or a reader of your newsletter calls up an individual group on the group homepage, information and registration options for the group are displayed on a public page.
You (or ideally the group leader) configure this display of the public page in the subgroup under Settings > Public group page. You can find our instructions here.