
To obtain an account setup file in a format that ChurchTools can read, you can download an import template from ChurchTools Finances, which you can use as a basis for importing your data.
1. Download the Cost Center Import Template #
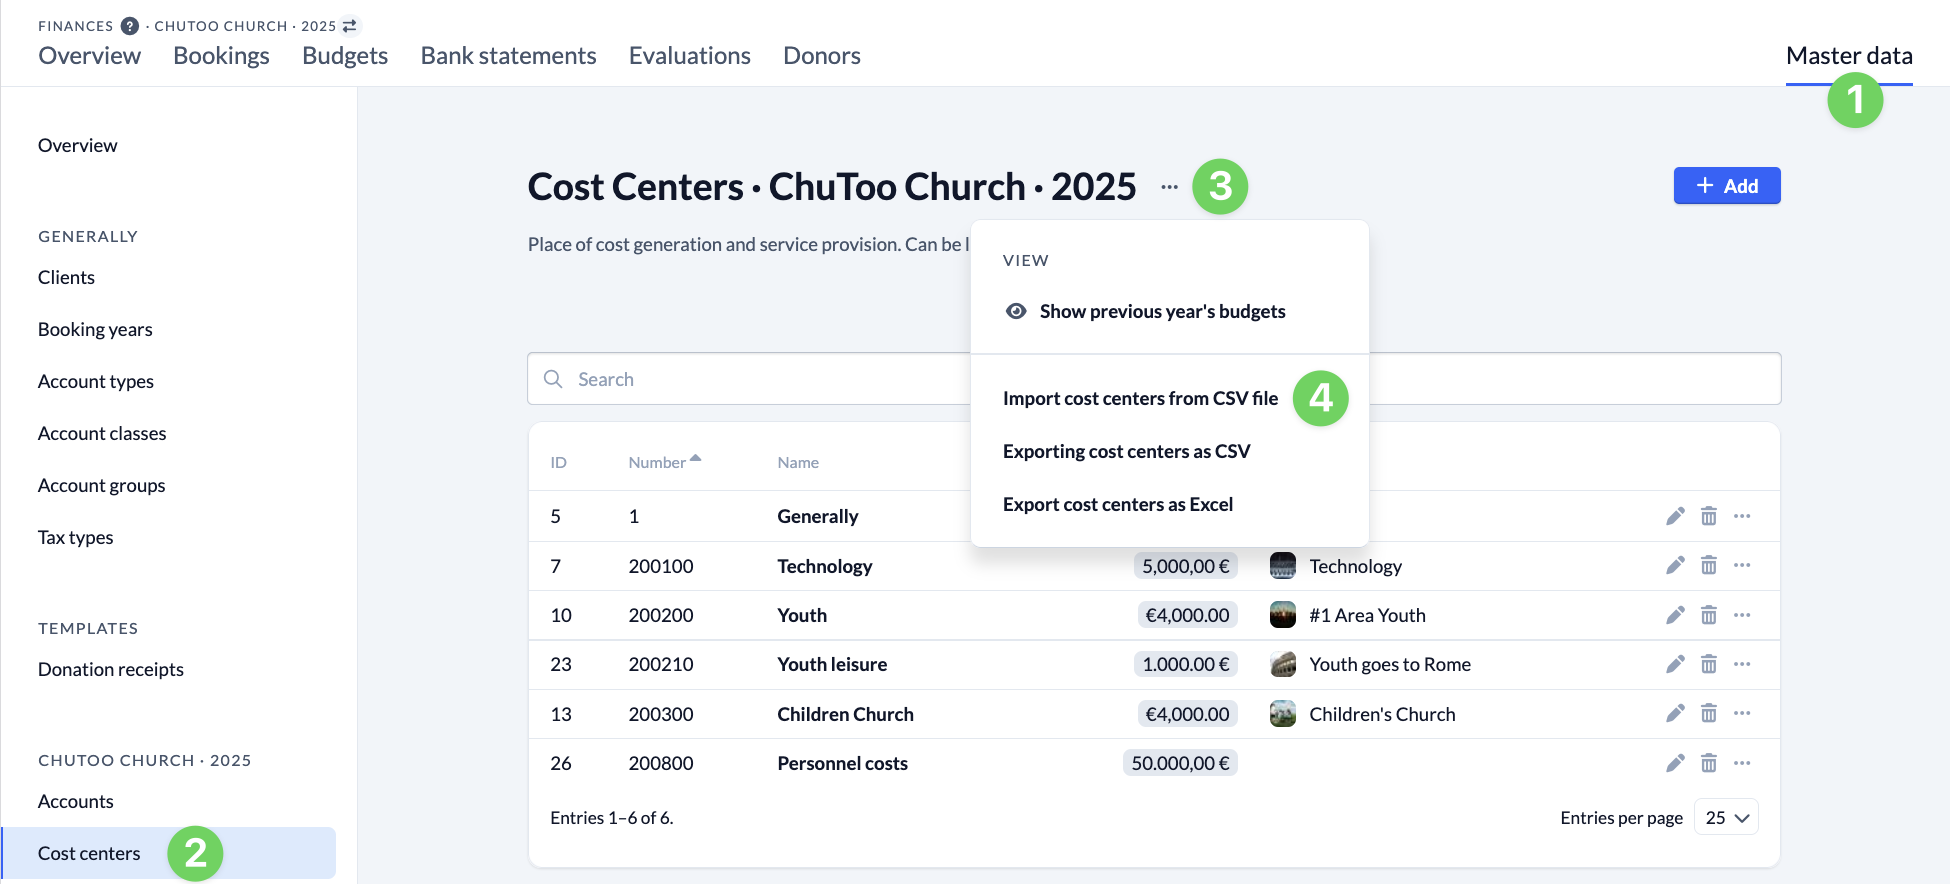
In ChurchTools, navigate to the Finances module. Open Cost Centers (2) in Master Data (1). From the context menu (3), select Import Cost Centers from CSV File (4).
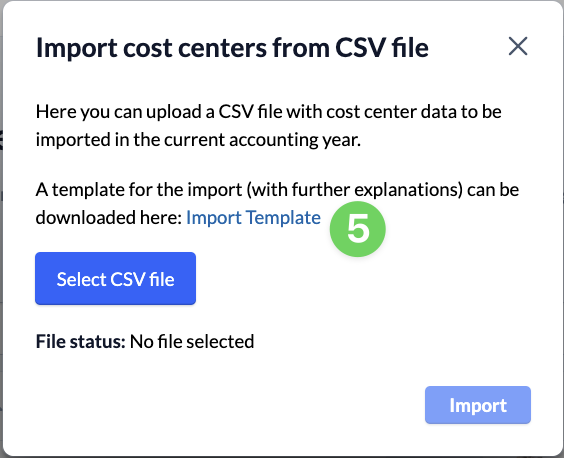
Here, you can download an import template (5) that is tailored to the general master data that has already been created.
2. Customize the Cost Center Import Template #
Copy all the data from your export file, paste it into the cost center import template, and customize it to suit your needs.
2.1 Optional: Enter a budget #
In the ” Budget in € ” field, enter the budget for the respective cost center.
2.2 Optional: Enter the IDs of associated groups #
In this step, you enter the IDs of the groups you want to link to the cost center. Of course, you can also enter the IDs after the import is complete.
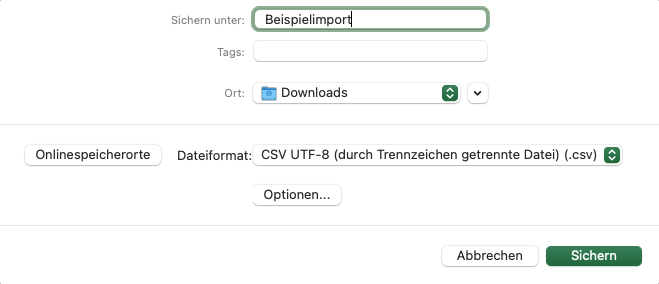
3. Save the import file #
Save your customized cost center file by selecting File > Save As… in CSV UTF-8 (comma-separated values) format as a CSV file.
We’ll show you how to import your prepared file into ChurchTools in the article ” How to import cost centers from a file?”