
To sync transaction data from Optigem to ChurchTools, you’ll need to set up your chart of accounts in ChurchTools first. To do this, export your accounts from Optigem, edit the data, and then import them into ChurchTools. Here’s a step-by-step guide on how to do it.
1. Prepare ChurchTools #
1.1 Create Account Groups in Finance #
In the Finance module, you create all the account groups you need for your chart of accounts in advance.
To learn how to create account groups and other master data in the Financials module, see the article ” How do I create a chart of accounts?”
1.2 Create Tax Rates #
If you want to assign specific tax rates to accounts, create all the necessary tax rates in the Finance module beforehand. In step 3.5, you can then adjust the tax rates in the import file accordingly.
To learn how to set up taxes, check out the article ” How Do I Set Up Taxes?”
2. Export and prepare general ledger accounts from Optigem #
Next, you’ll need to export the accounts you’ve been using from Optigem and prepare them for import into ChurchTools. You have two options for doing this. One is to export your general ledger accounts as an Excel file, and the other is to run an SQL query directly in Optigem, which will return only the account numbers and names.
Option 1: Export your general ledger accounts as an Excel file from Optigem #
To do this in Optigem, follow these steps:
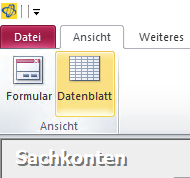
Open the general ledger accounts and access the data sheet in the View tab.
Next, switch to the ” More ” tab and click on ” Excel.”
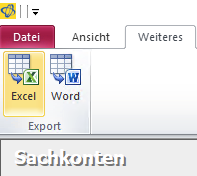
Then save the export under the name of your choice. You don’t need to save the export steps.

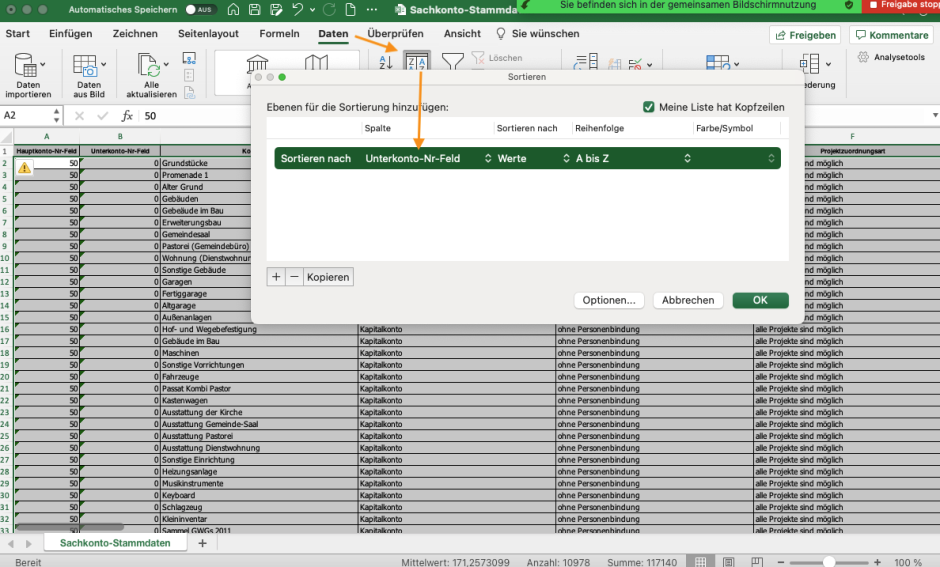
Open the Excel file and select the entire table. Under ” Data,” sort everything by subaccount.
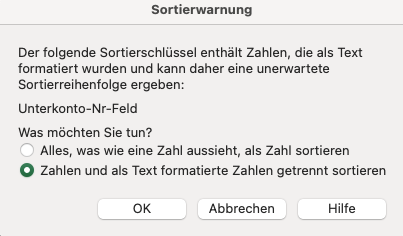
In the sort warning, you specify that numbers and numbers formatted as text should be sorted separately.
Select and then delete all rows that do not contain a 0 in the ” Subaccount ” column.
Option 2: SQL Query #
If you only want to export the account number and name, the easiest way to do this is with an SQL query.

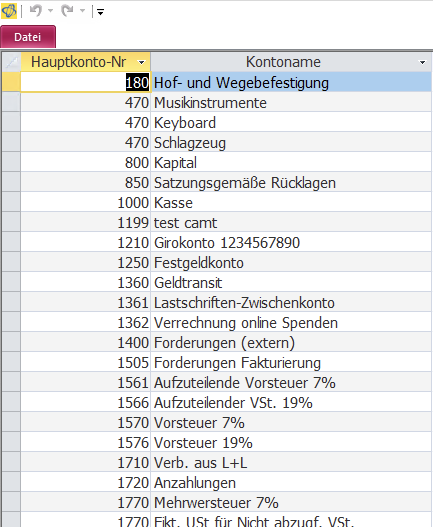
To do this, open the first fiscal year you want to import in Optigem (1), and then use the question mark (2) to enter an SQL command (4).
Enter the following SQL command here and confirm your entry by clicking OK.SELECT Sachkonten.[Hauptkonto-Nr], Sachkonten.Kontoname FROM Sachkonten WHERE (((Sachkonten.[Hauptkonto-Nr]) In (select [HK] from Teilbuchung)) AND ((IIf(([Personenunterkonten] Or [Art]>=3) And [Unterkonto-Nr]>0,-1,0))=0)) ORDER BY Sachkonten.[Hauptkonto-Nr];
Optigem will then display the account numbers and names in a table.
3. Fill in and customize the account import template #
3.1 Fill in the ChurchTools-Optigem account import template with your data #
Download this account import template.
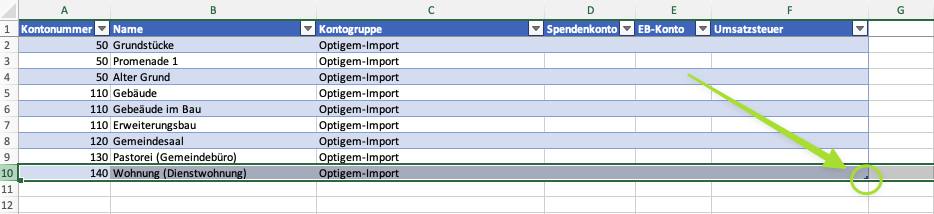
Copy all the rows from your export file and paste them into the ” General Ledger Accounts from Optigem ” tab in the account import template. Be sure to overwrite all the sample data. The template is designed so that the account numbers and names of your accounts are automatically transferred to the ” Account Import ” tab in ChurchTools.
Finally, in the “Import Accounts to ChurchTools ” tab, select the last visible row and use the small triangle to scroll the table down until all your accounts are visible.
Add a 0 to the beginning of all account numbers less than 1,000 so that all account numbers are 4 digits long; in other words, write 0520 instead of 520.
3.2 Optional: Customize Account Groups #
Under ” Account Group” in the “Account Import to ChurchTools ” tab, “Optigem Import” is selected by default. If you have already created your own account groups in ChurchTools (see step 1a), you can now assign them directly to the relevant accounts here.
3.3 Optional: Mark donation accounts #
In this step, you select the donation accounts by entering a 1 or an x in the ” Donation Account ” column.
3.4 Optional: Select Opening Balance Sheet Accounts #
In the “EB Account” column, you should also mark the account with a 1 or an x to indicate that it is an EB account. EB accounts are typically accounts starting with 9000.
3.5 Optional: Fill out the tax form #
In the ” Sales Tax” column, enter the name of the tax rate. This must already exist in the master data in Finance (see point 1b).
3.6 Save Document #
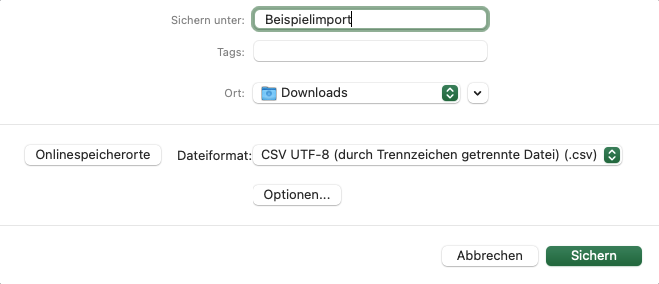
Once you have correctly adjusted all the data, make sure the “Account Import to ChurchTools ” tab is currently selected. Save your adjusted account import via File > Save As… in CSV UTF-8 (comma-separated values) format as a CSV file.
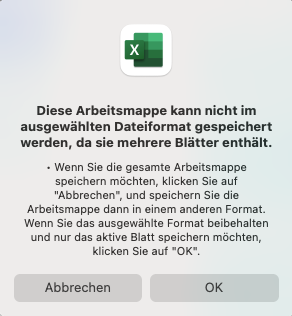
Since the account import template contains multiple sheets, you’ll be asked if you want to save only the active sheet. Confirm this prompt.
4. Import Accounts into ChurchTools #
In the Finances module, open the master data, go to the accounts, and open the context menu for the accounts.
Here, select ” Import costs from CSV file.”
We’ll show you exactly how to do this in our guide, ” How do I import account data from a file?“