
When you start with ChurchTools Finance, one of the first steps is to import your account data into your ChurchTools so that you can create bookings and manage your financial data in your ChurchTools in the future.
You can use the account import function to import all data that you have digitally and that relates directly to accounts and their properties into your ChurchTools. This also works for several clients at the same time. In this guide, we explain step by step how best to proceed.
1. Upload data #
1.1 Uploading client data #
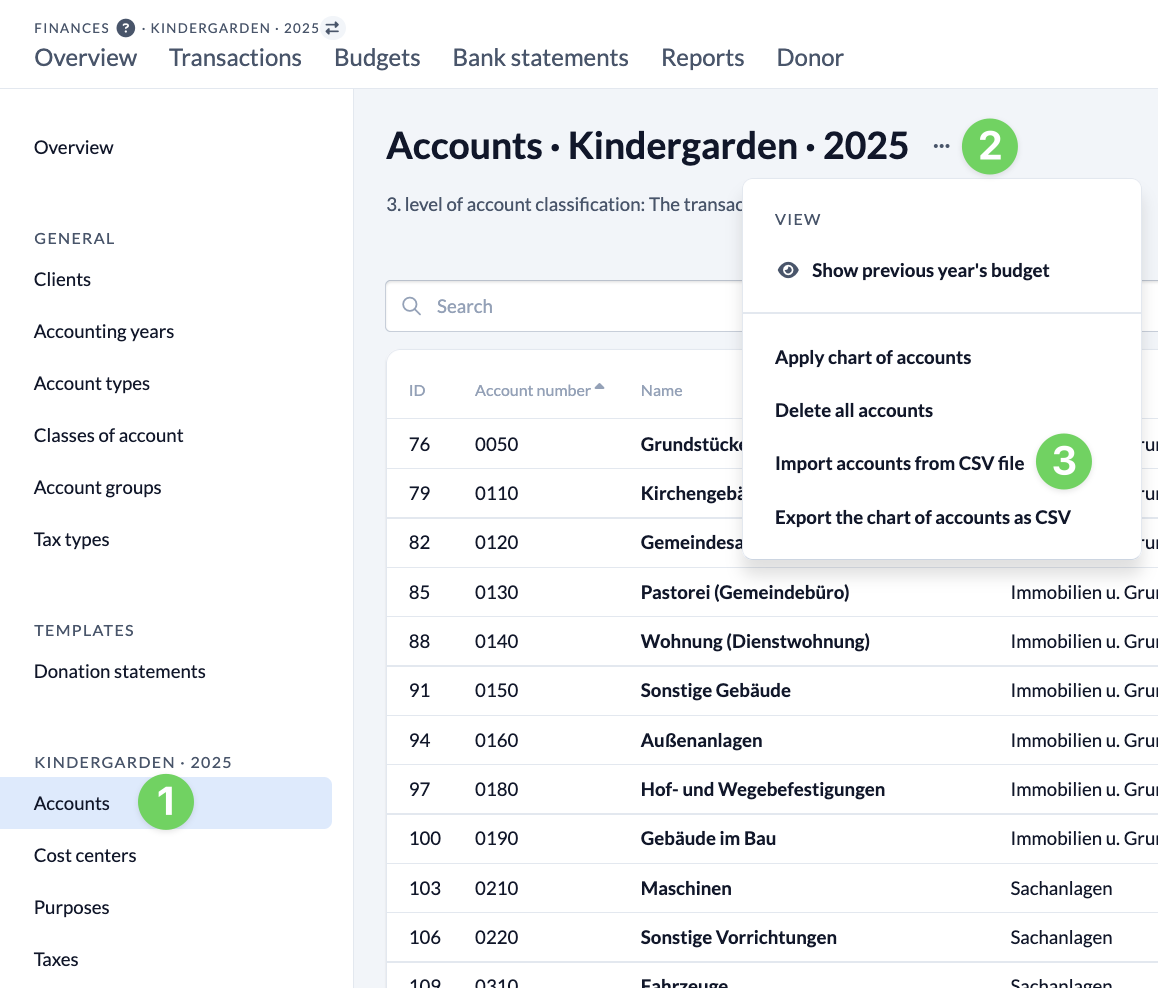
In the Finances module, call up the master data, switch to the accounts (1) and call up the context menu for the accounts by clicking on the three dots (2) next to the heading. Here you select Import accounts from CSV file (3).
1.2 Uploading data from several clients at the same time #
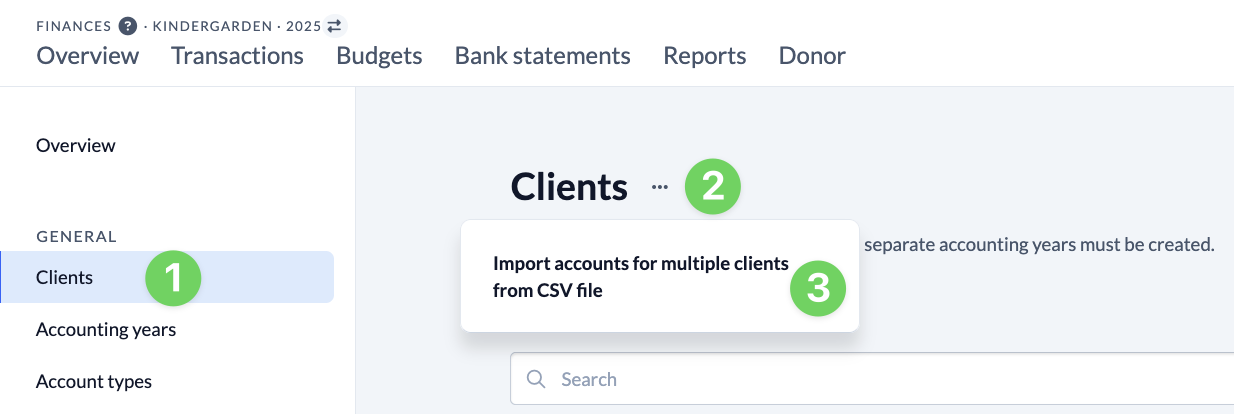
If you want to import the account data for several clients at the same time, go to the Clients (1) in the Master data and click on the three dots (2) next to the heading to open the context menu for the clients. Here you select Import accounts for multiple clients from CSV file (3).
2. import account data #
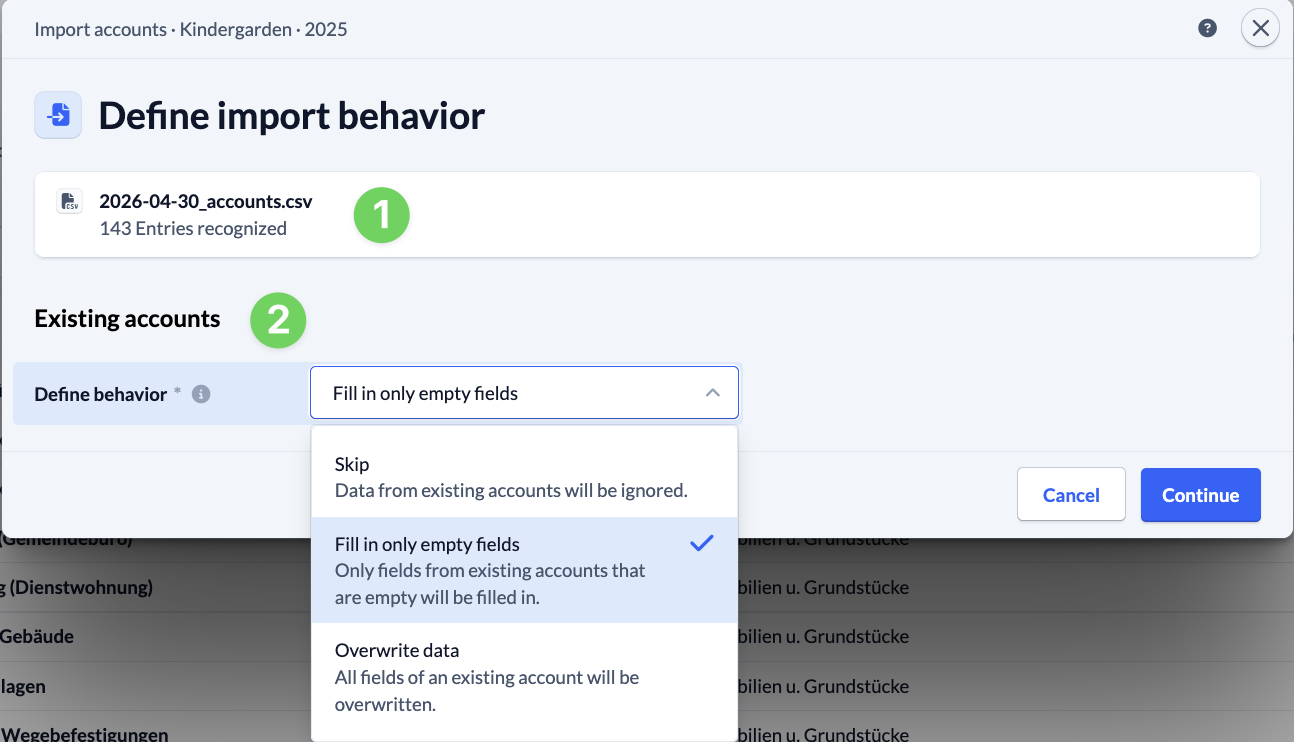
In the window that opens, upload your prepared file or insert it using drag and drop. Once the file has been uploaded, click Next.

2.1 Define import behavior #
The banner at the top informs you how many entries have been recognized in your import file (1).
For data from accounts that have already been created, you must specify in the next step how this should be handled during import (2).
Click on Next again.
2.2 Checking the assignment of account information #
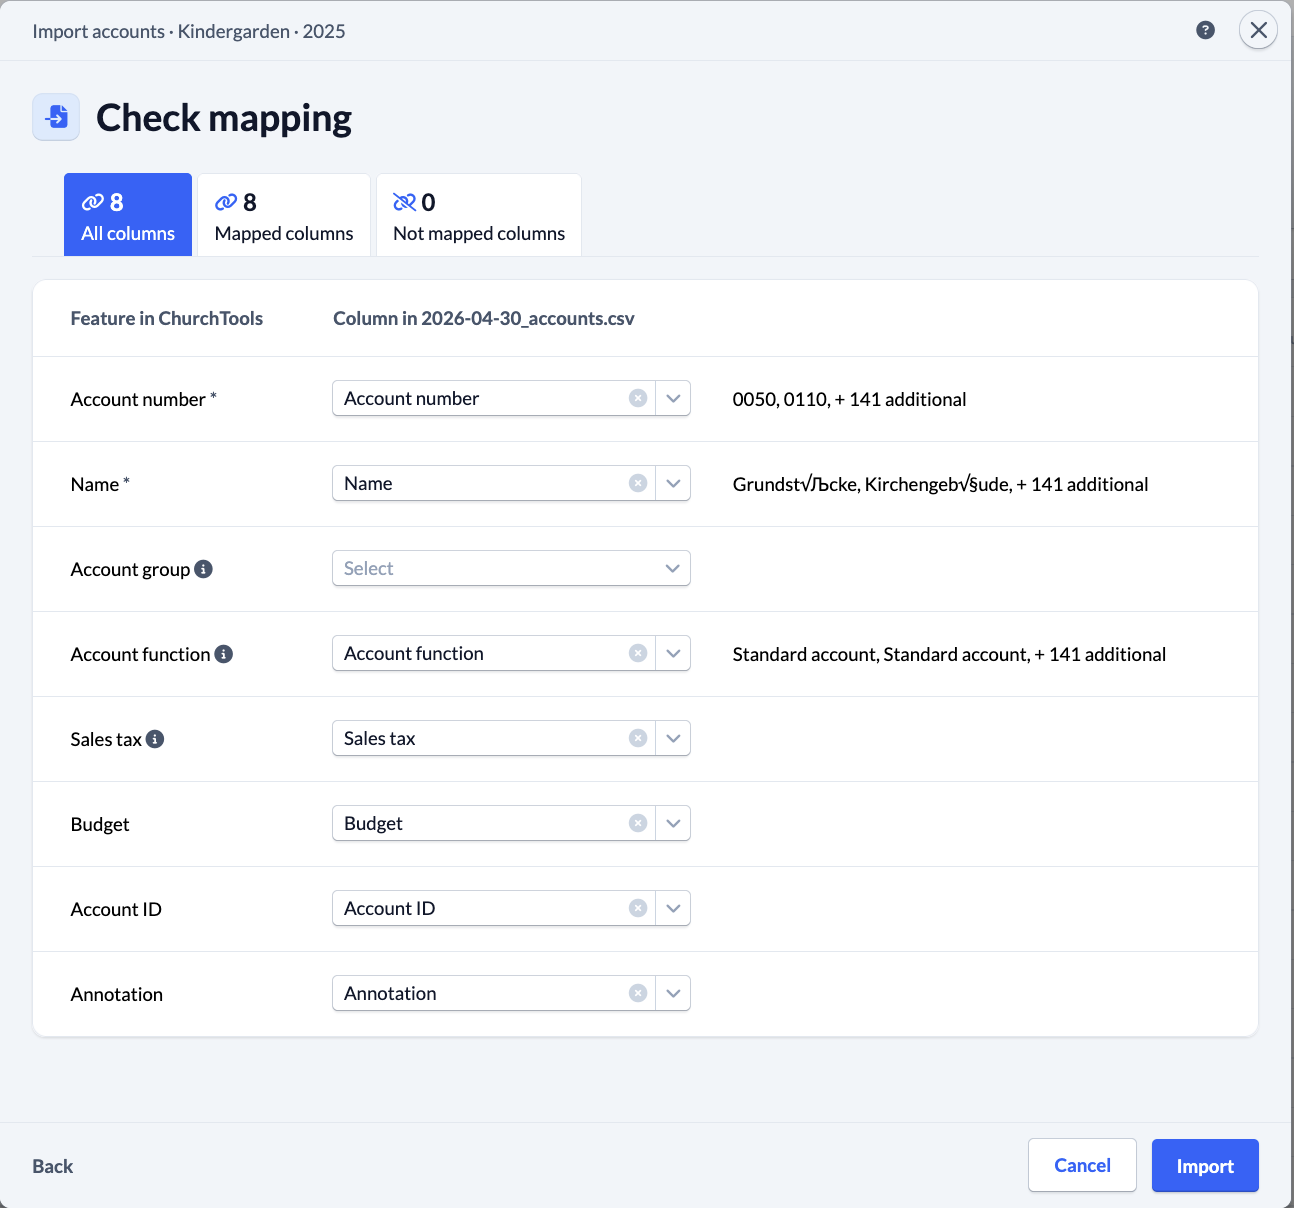
Now you need to match the assigned columns in the CSV file with those in ChurchTools. This is important as the column names in your CSV file may differ from those in ChurchTools. If you have used our import template, it is highly likely that everything is correct.
The designations from your ChurchTools are displayed on the left-hand side (1). On the right, the assigned columns from your CSV file (2).
Using the example data records provided (3), you can easily check the automatic assignment made by ChurchTools and correct it via the selection (4) if necessary.
2.3 Importing data records #
By clicking on the Import button under the field mapping, the data will be saved in your ChurchTools and you will be informed when the account import is completed.