With tags, you can assign individual keywords to calendar appointments to make them easier to find and organize. In this article, we show you how to create tags, add colors to them, rename them or delete them.
Manage appointment tags #
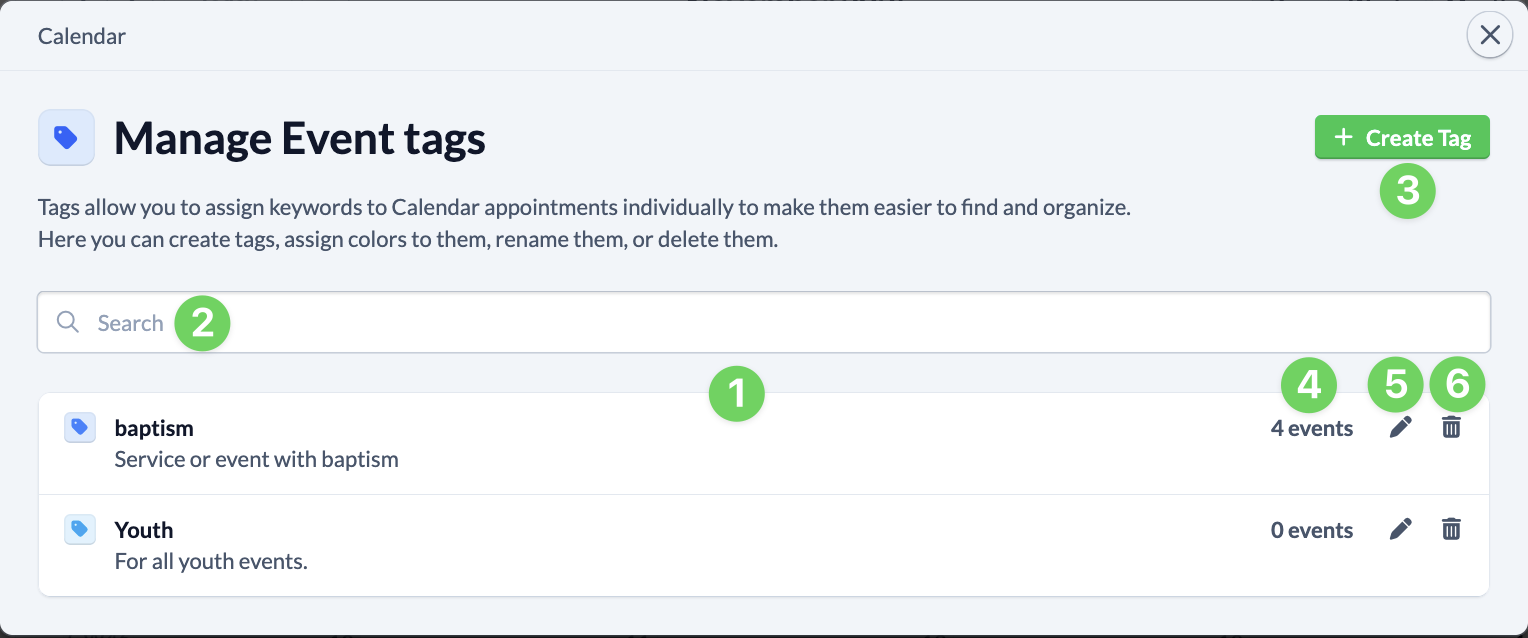
Navigate to the calendar module and click on the tags icon in the top menu bar (1) and then on Manage appointment tags (2).

Here you can see a list of all the appointment tags that have already been created (1). The search (2) makes it easy for you to find the right tag. Use the green button at the top right to create a new appointment tag (3).
Each line of the tags shows you how many appointments (4) the tag is currently being used for. You can edit it using the pencil icon(5) or delete it using the trash can icon(6).
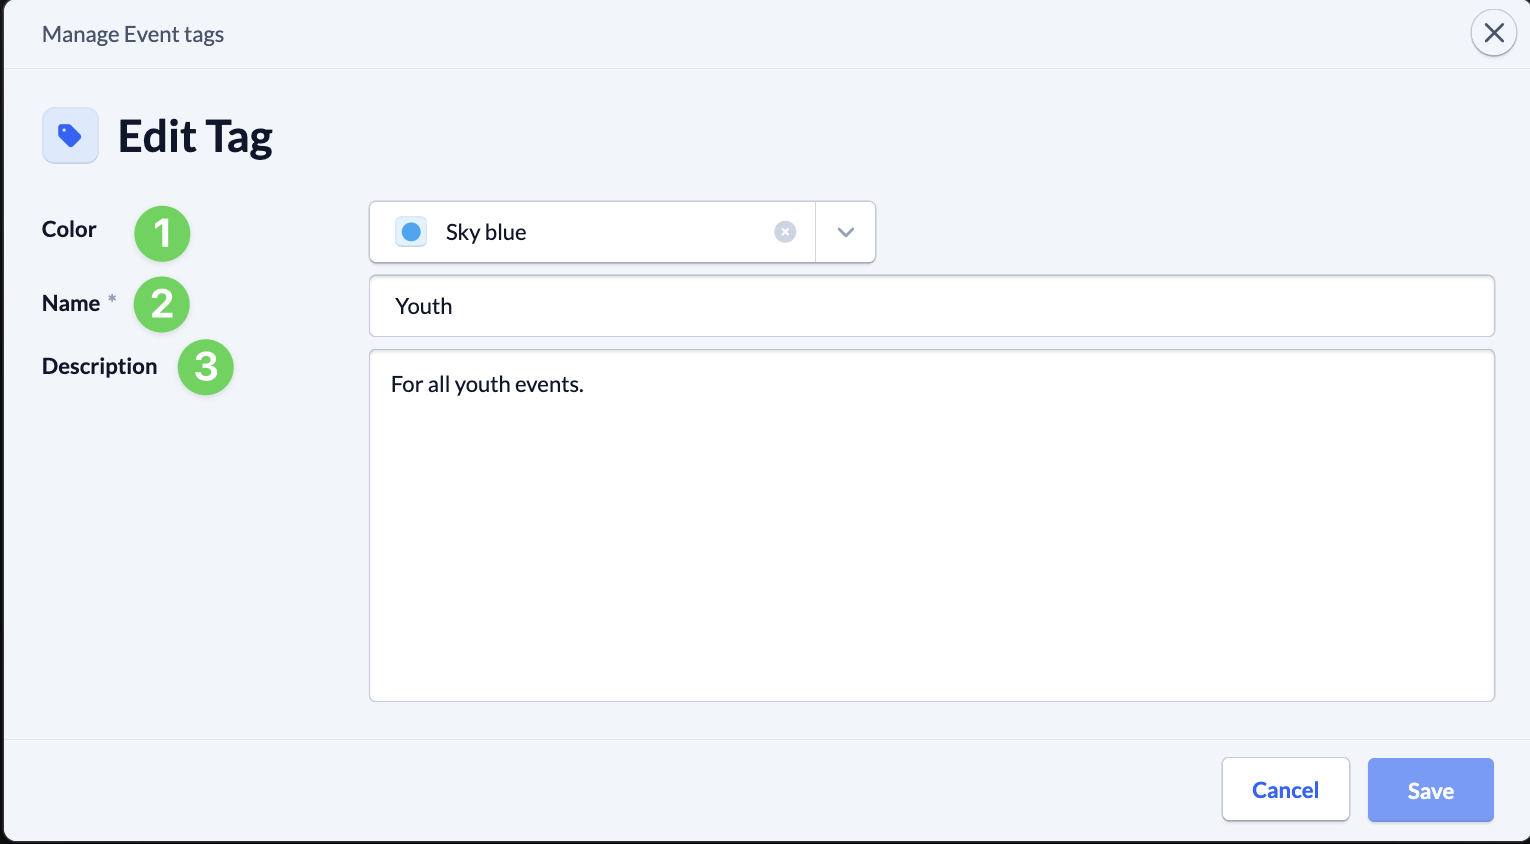
Edit individual appointment tags #
For each appointment tag, you can select a color (1), specify a name (2) and enter a description (3) that will be displayed in the tag list.