

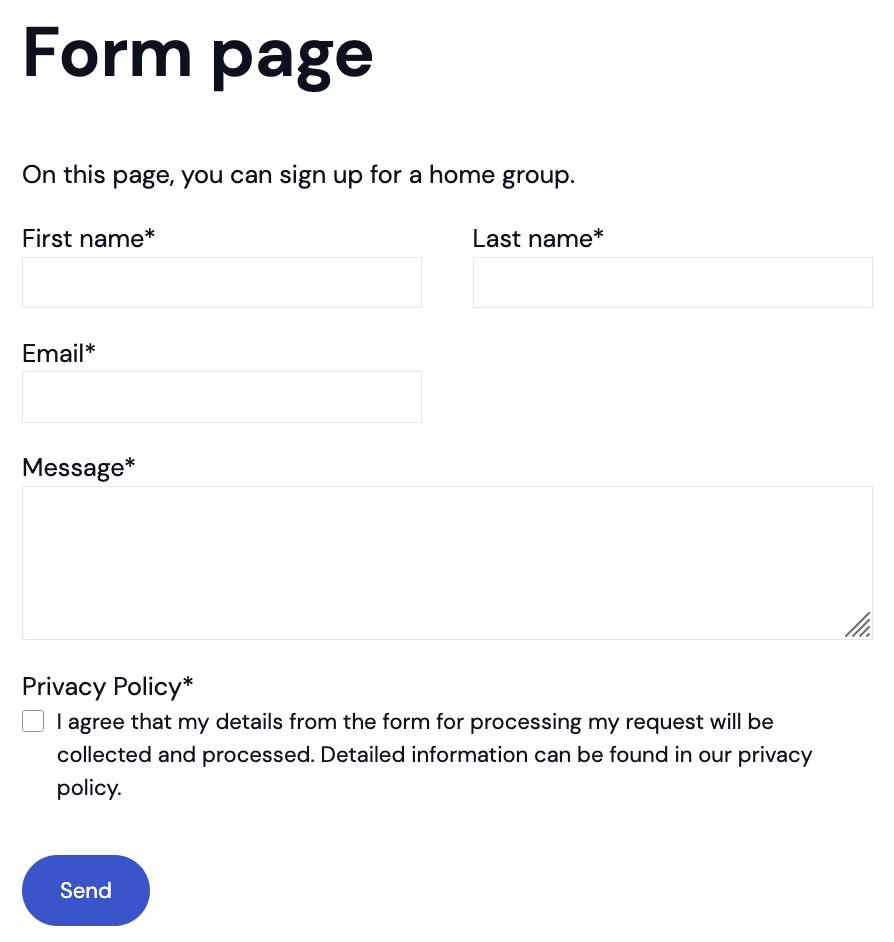
Using the editor, you can embed simple contact forms on all page types. You can have the received messages sent to you via e-mail and/or saved as an Excel list. In this article, we’ll show you step by step how to embed a contact form you’ve already created into a page. To learn how to create or edit a contact form, click here.
1. View page content #
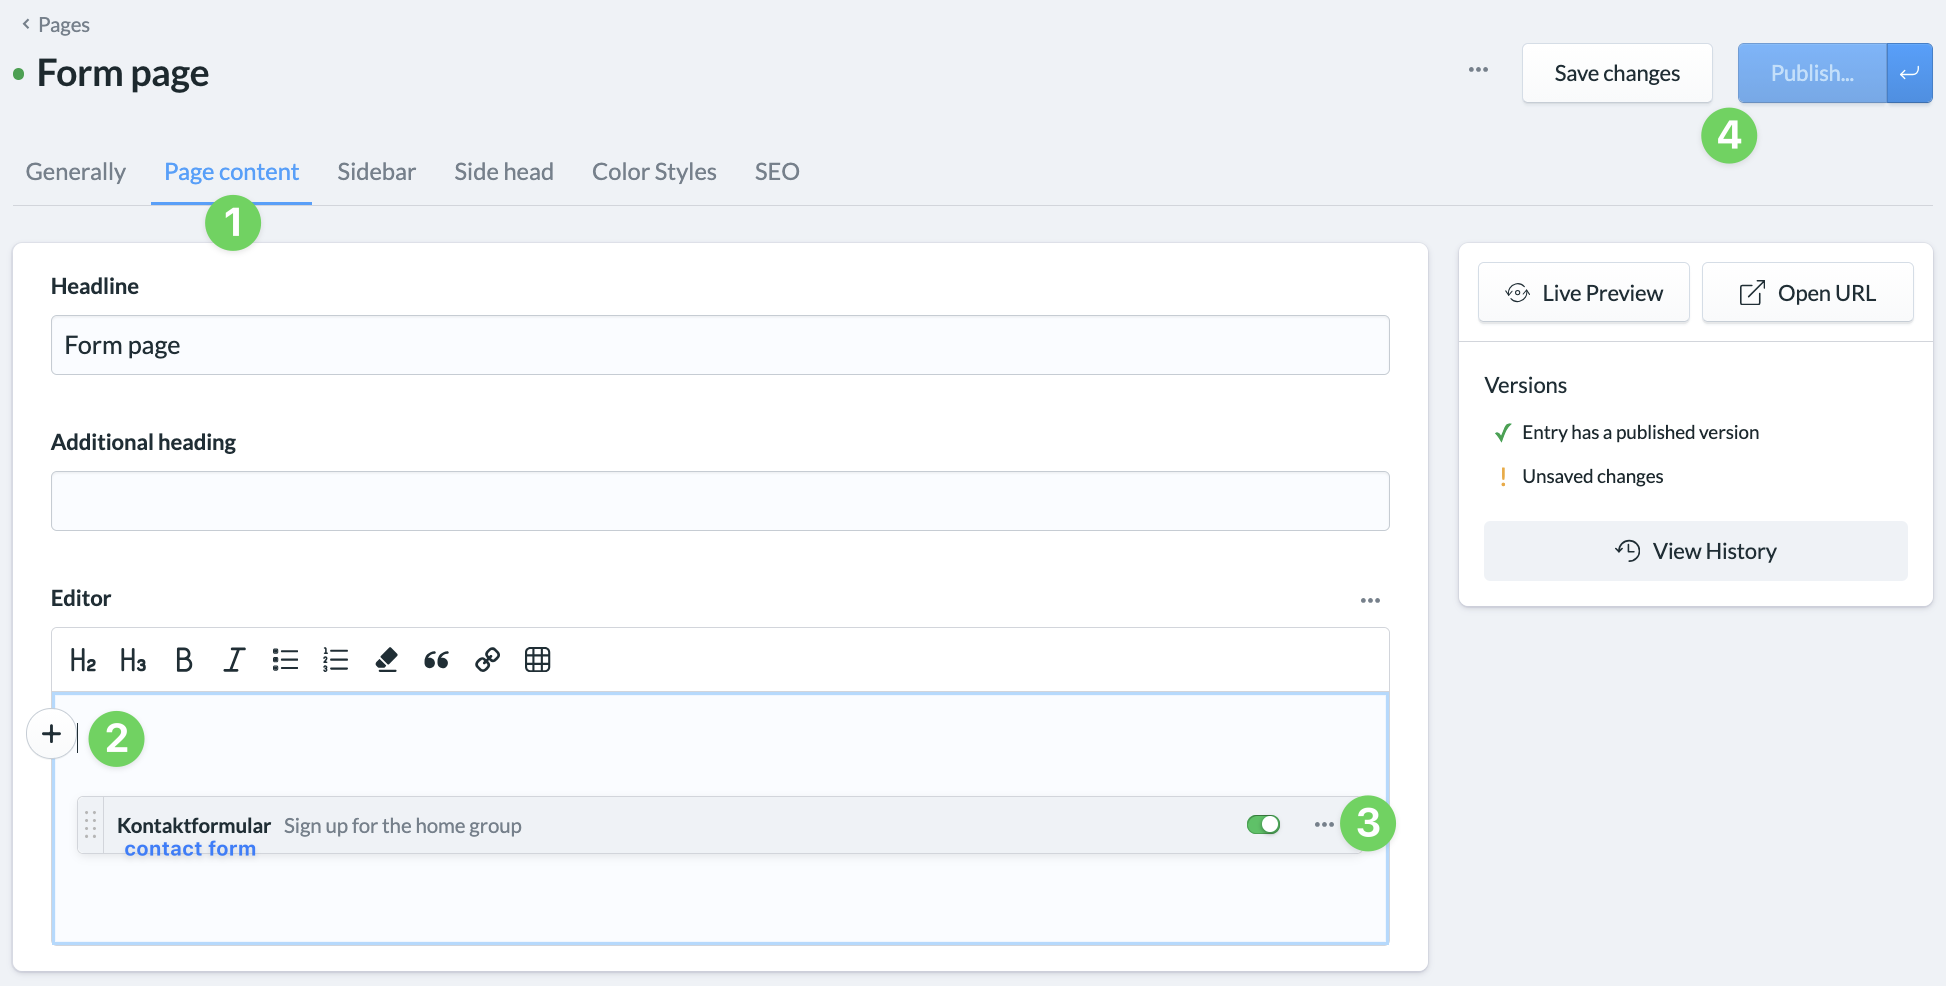
Create a new page for your form, or open an existing page and switch to the Page Content/Additional Content tab. You can read here how to create or edit a page.
2. Add a contact form element #
Here, use the + icon to add the new “Contact Form ” element at the desired position.
3. Unfold the element and edit it #
For the contact form you’ve added, you specify which of your previously created contact forms should be used. Optionally, you can add a description and an image. Finally, select the design option that works best for you and, if desired, set a schedule to control when your element is visible. You can find more information about editing an element here.
4. Save and publish #
Finally, save your new or modified page and publish it.