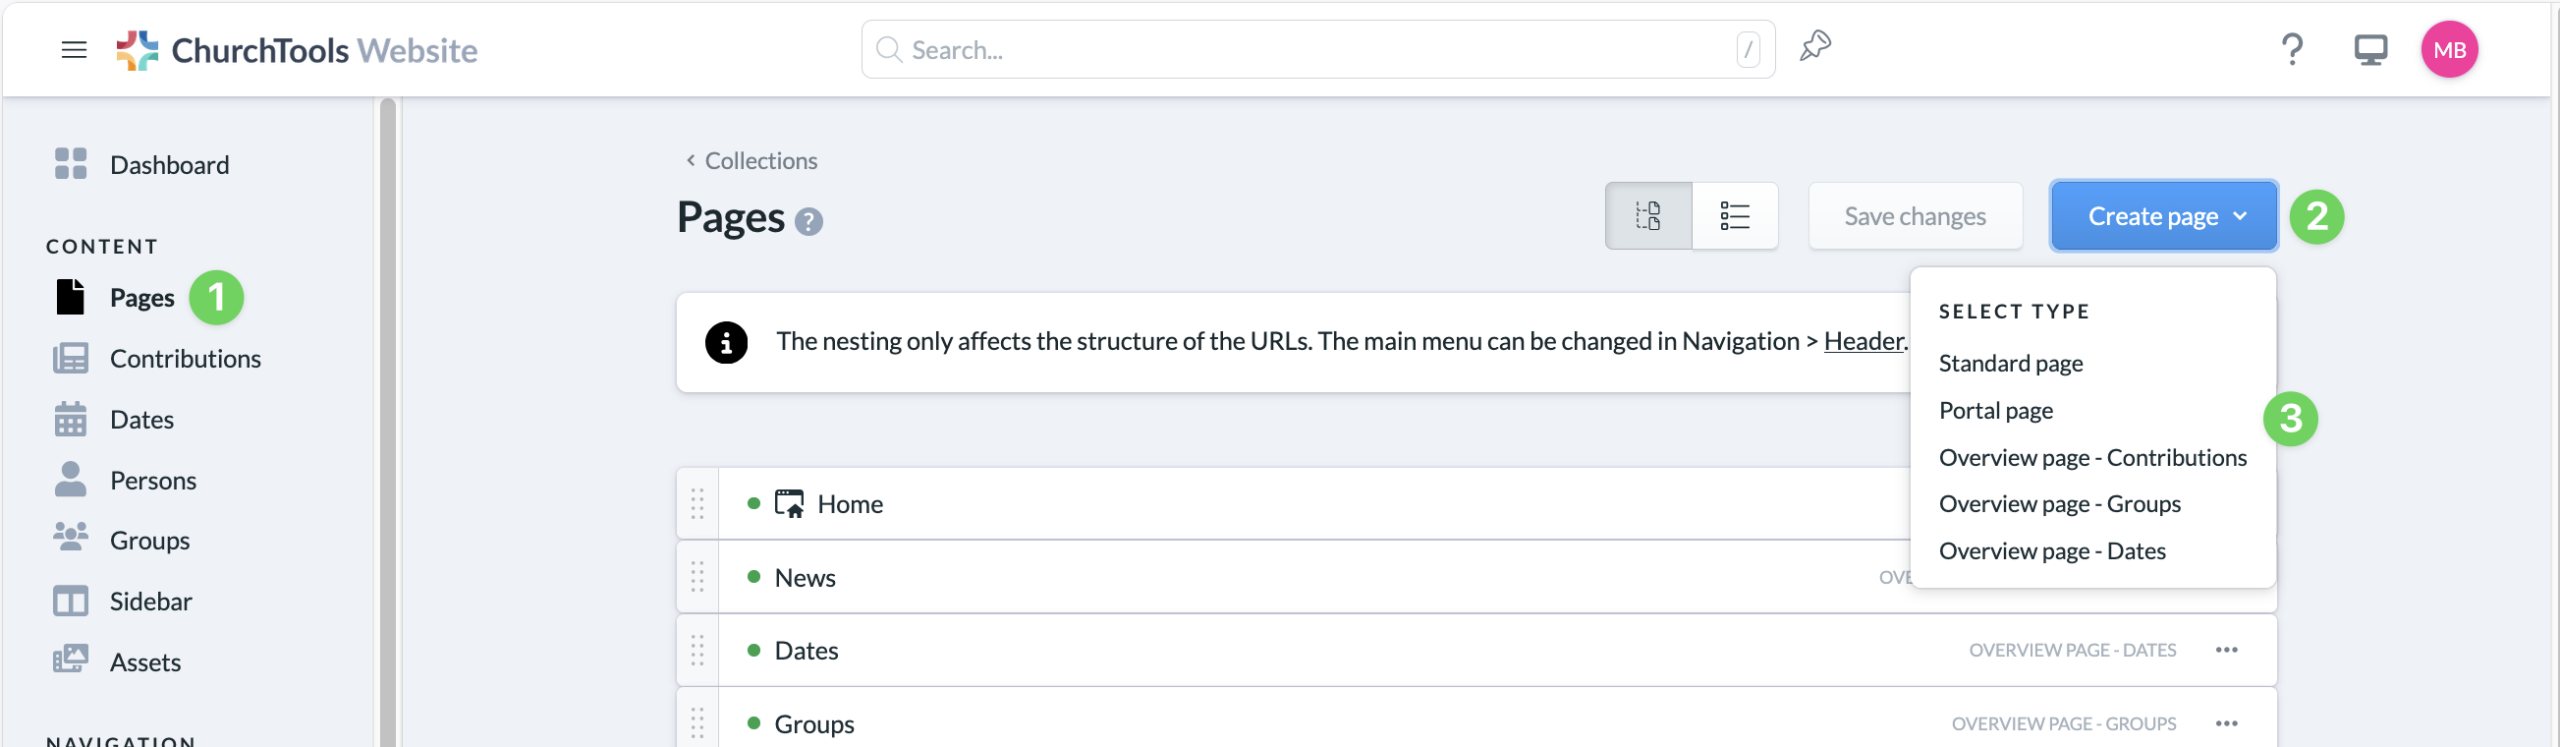
You can create a new page in the admin area of your ChurchTools Website. Here you will find the menu item Pages (1) on the left-hand side.
1a. Create new page #
Use the Create page button (2) at the top right to select the type of page. You can read about the different page types (3) in the article What page types are there and what makes them different?
1b. Create new subordinate page #
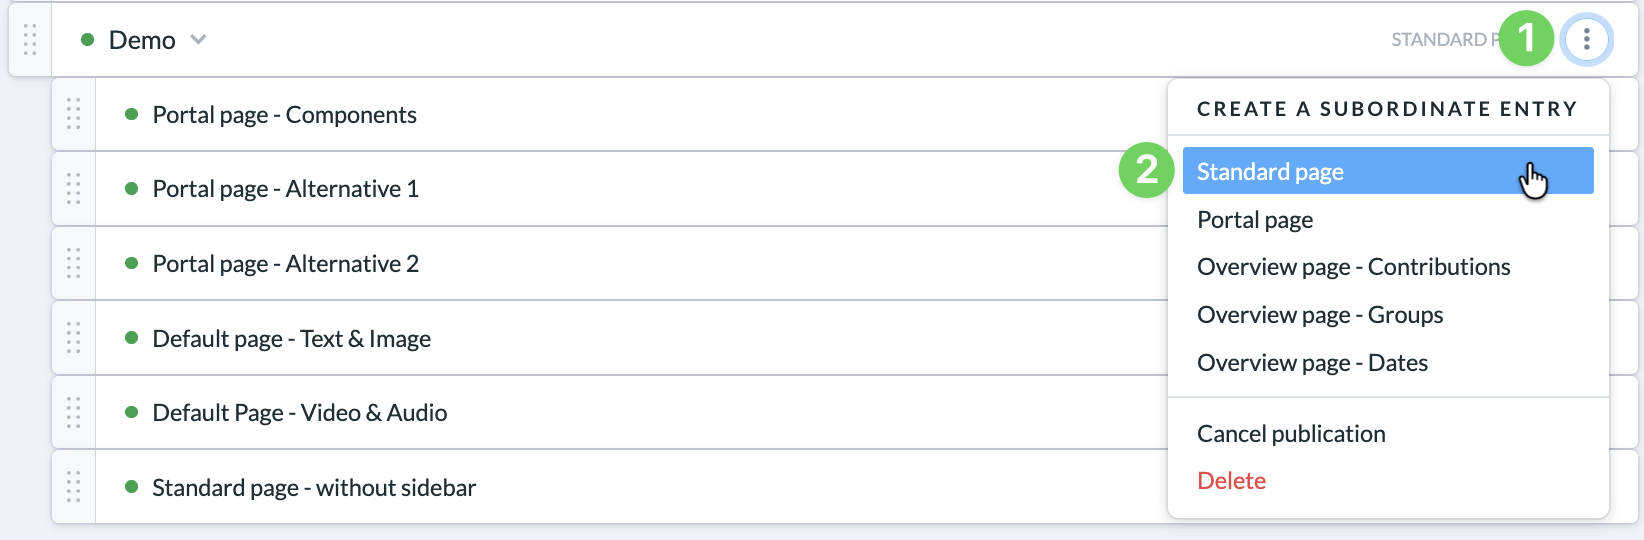
If you want to create a subordinate page, click on the 3-dot button (1) of an existing page and again select the desired page type (2).
1c. Call up existing page #
You can call up an existing page by clicking on the title of the page in the page list.
2. Edit page #
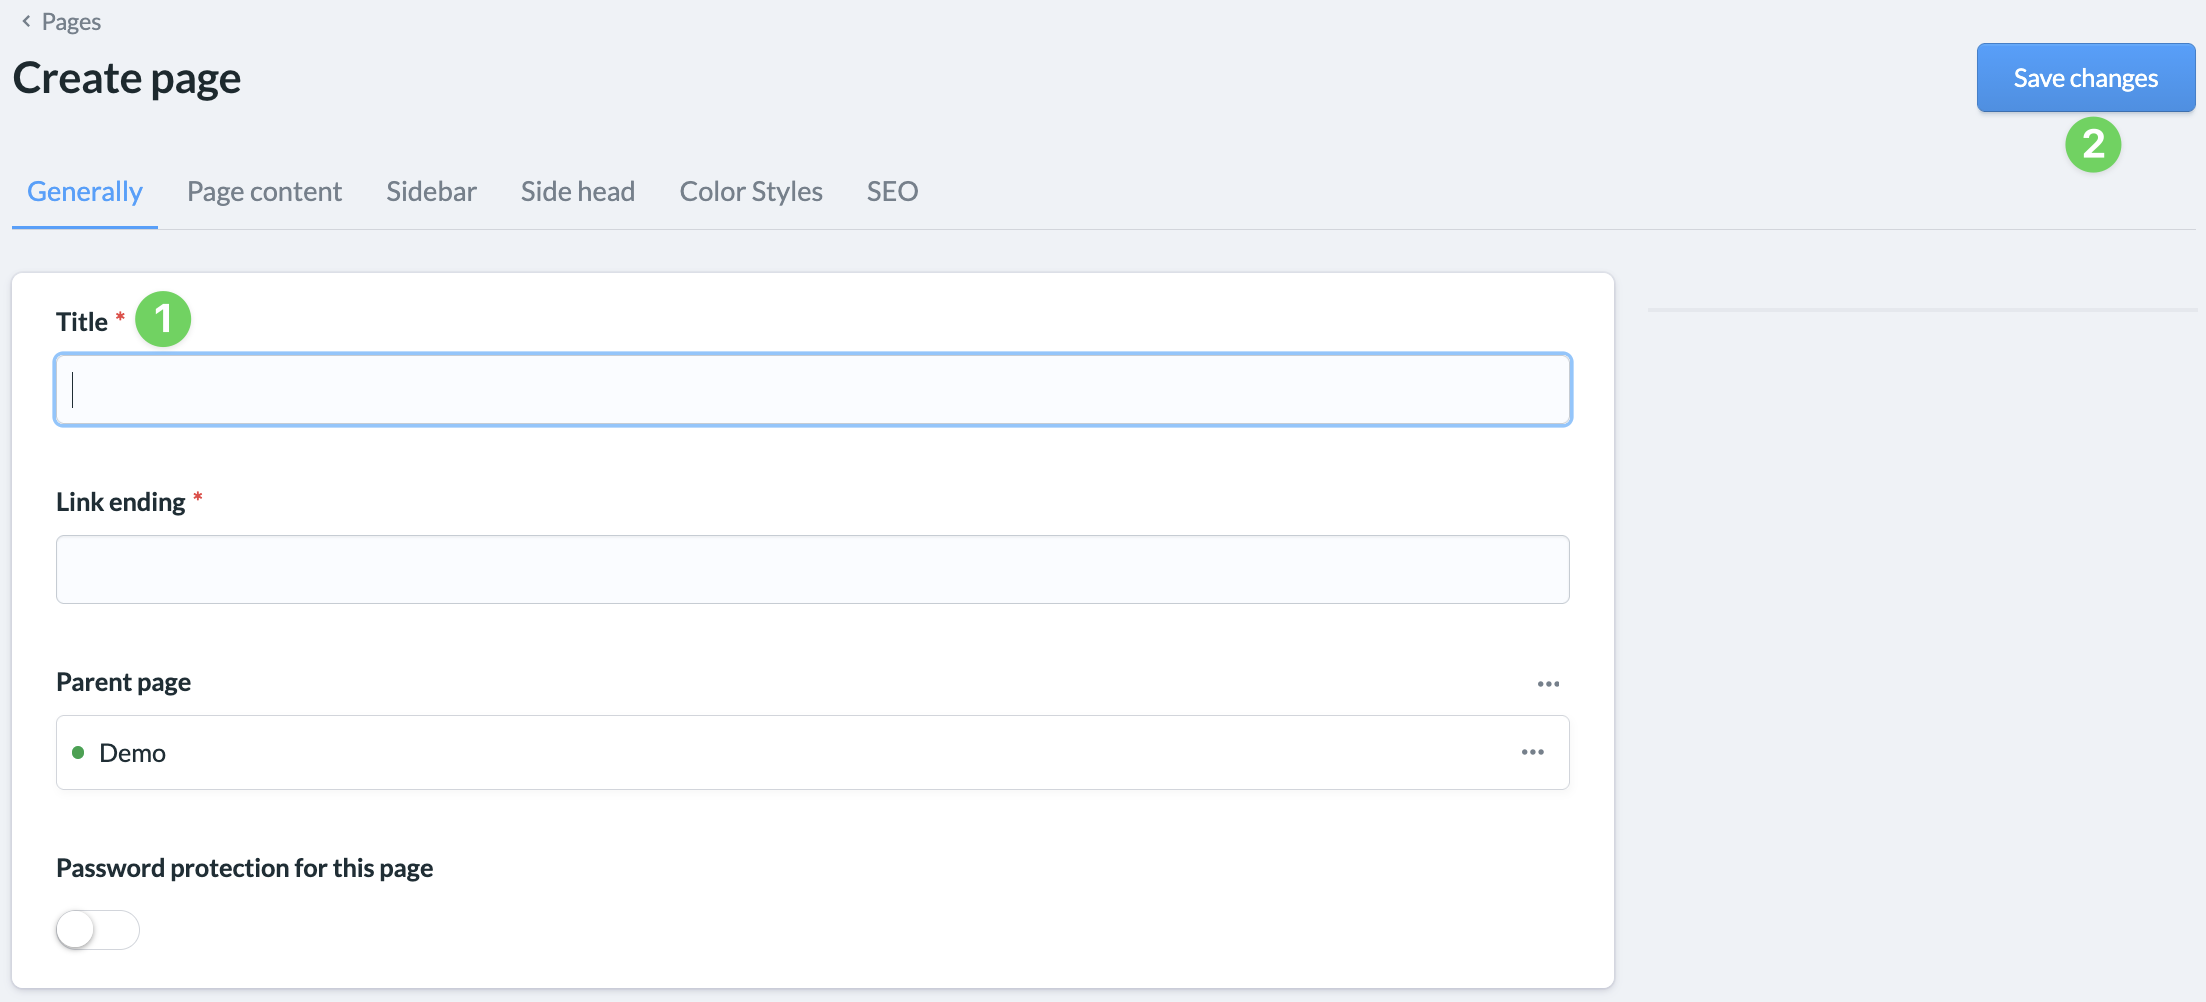
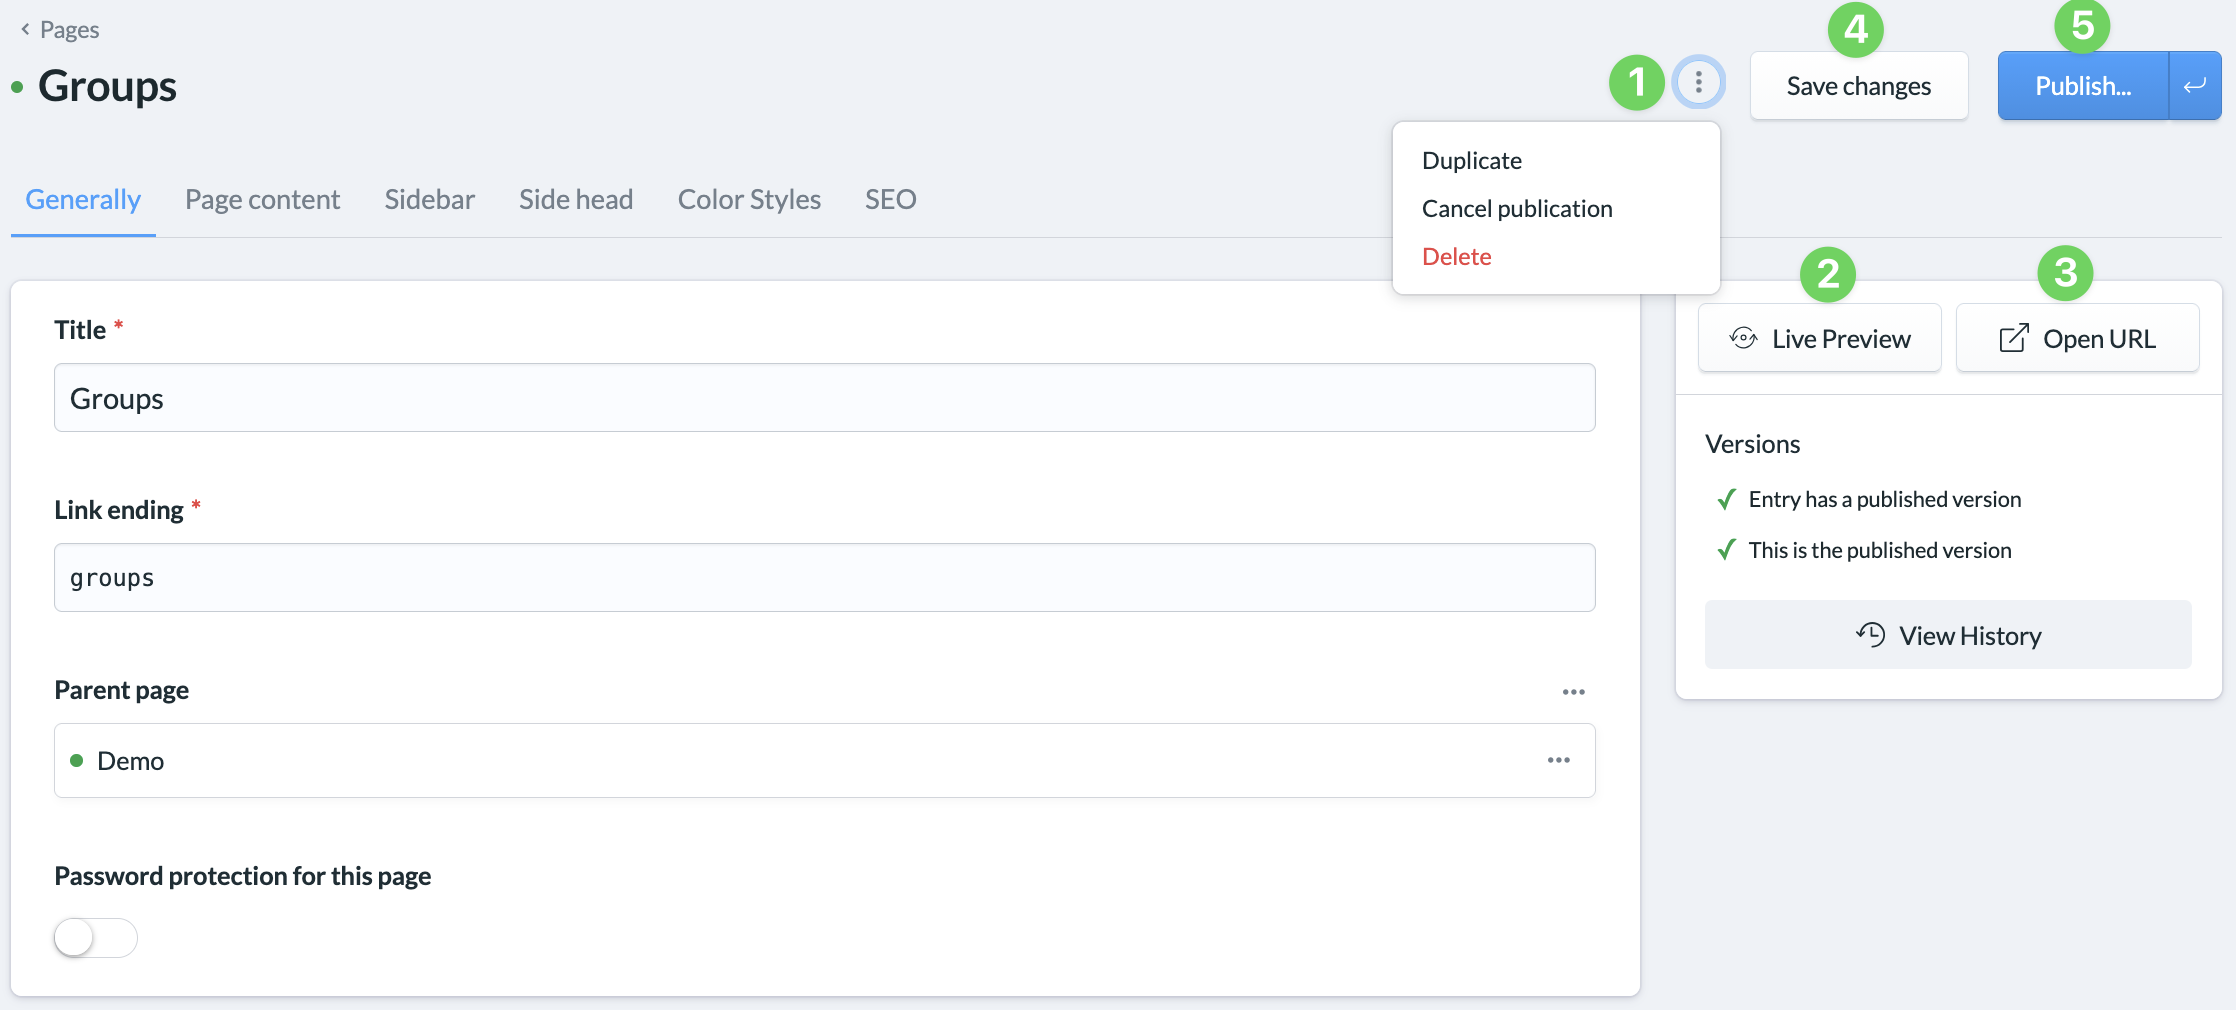
Once you have created a new page, enter the title (1) and click on the Save changes button (2). The editing window then changes and you can edit the new page in the same way as an existing page.
You can use the context menu of an existing page to duplicate it, unpublish it or delete it (1).
In the live preview (2), you can follow all the changes you make to the page in real time. We explain how to use it in the article How to use the live preview?
You can use the Open URL button (3) to see how the page would look live at any time.
If you save (4) a page, it is not yet published (5). You can do this when you are happy with the page and actually want to take it live. We explain more about this in the article How to publish pages and content?
General #
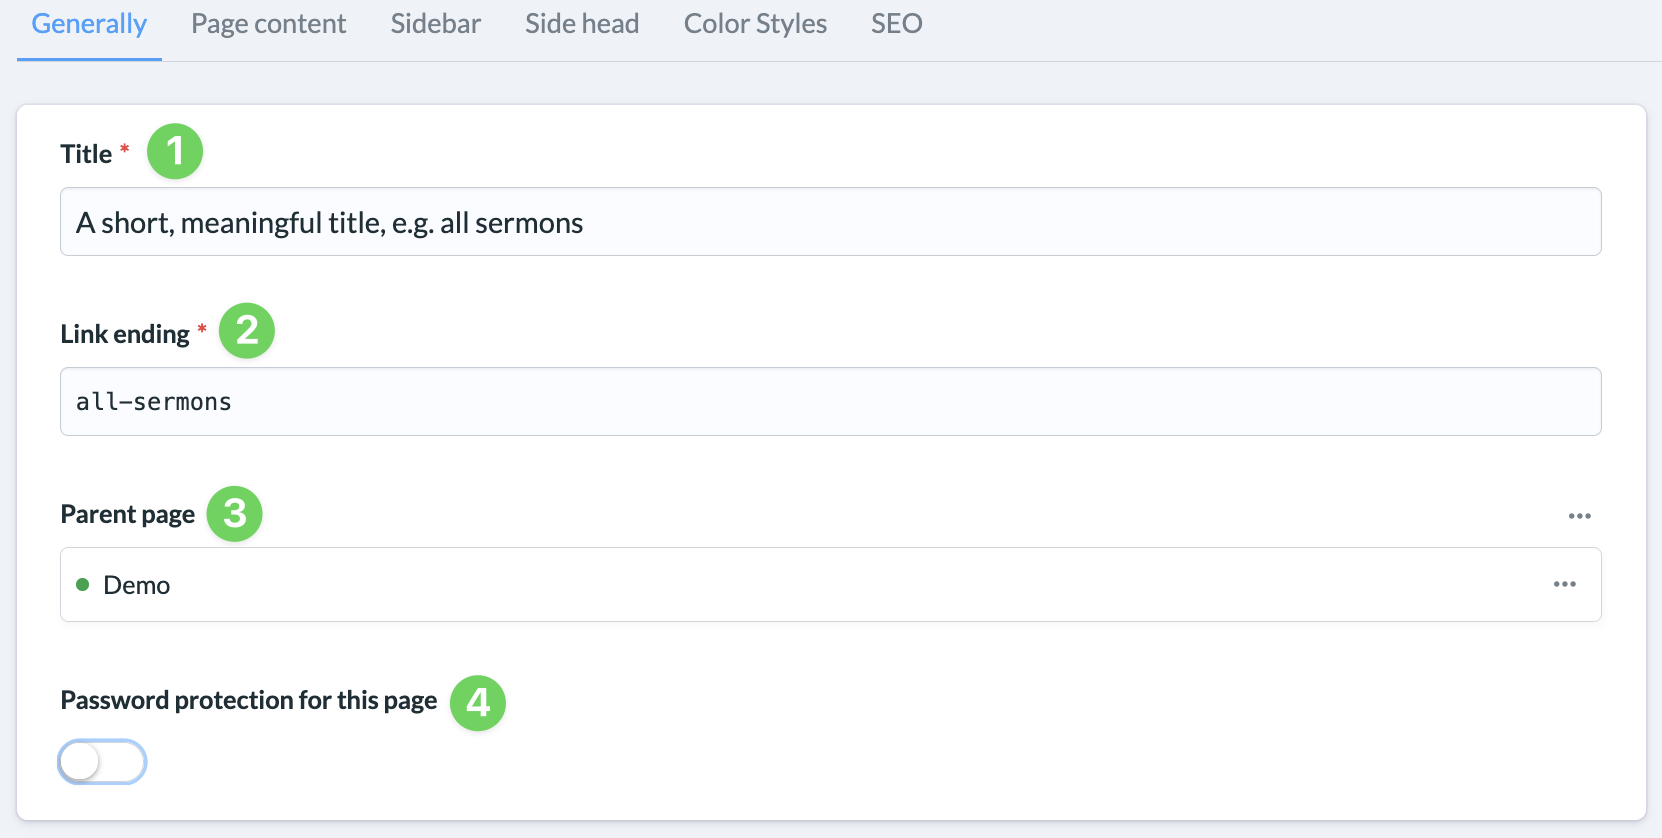
(1) Title
Here you give the page a title under which the page will later be displayed in the page list under Pages and in the name of the browser tab.
(2) Link extension
The link extension denotes the part of the link that starts after the link of the parent page.
- If the page is not subordinate to any other page, the link to this page is
https://meine-gemeinde-website.de/Link-Endung. - If the page is a subordinate page, the link is
https://meine-gemeinde-website.de/Link-Endung-der-übergeordneten-Seite/Link-Endung.
(3) Superordinate page
Use the Select button to link the page to an existing page and subordinate it to it. If the page is already subordinate, the parent page will be displayed here.
(4) Password protection
By activating the slider and assigning a password, you can set simple password protection for access to the page. Embedded media (images, files, etc.) can be accessed via their direct link even without a password.
Page content (only for standard and portal pages) #
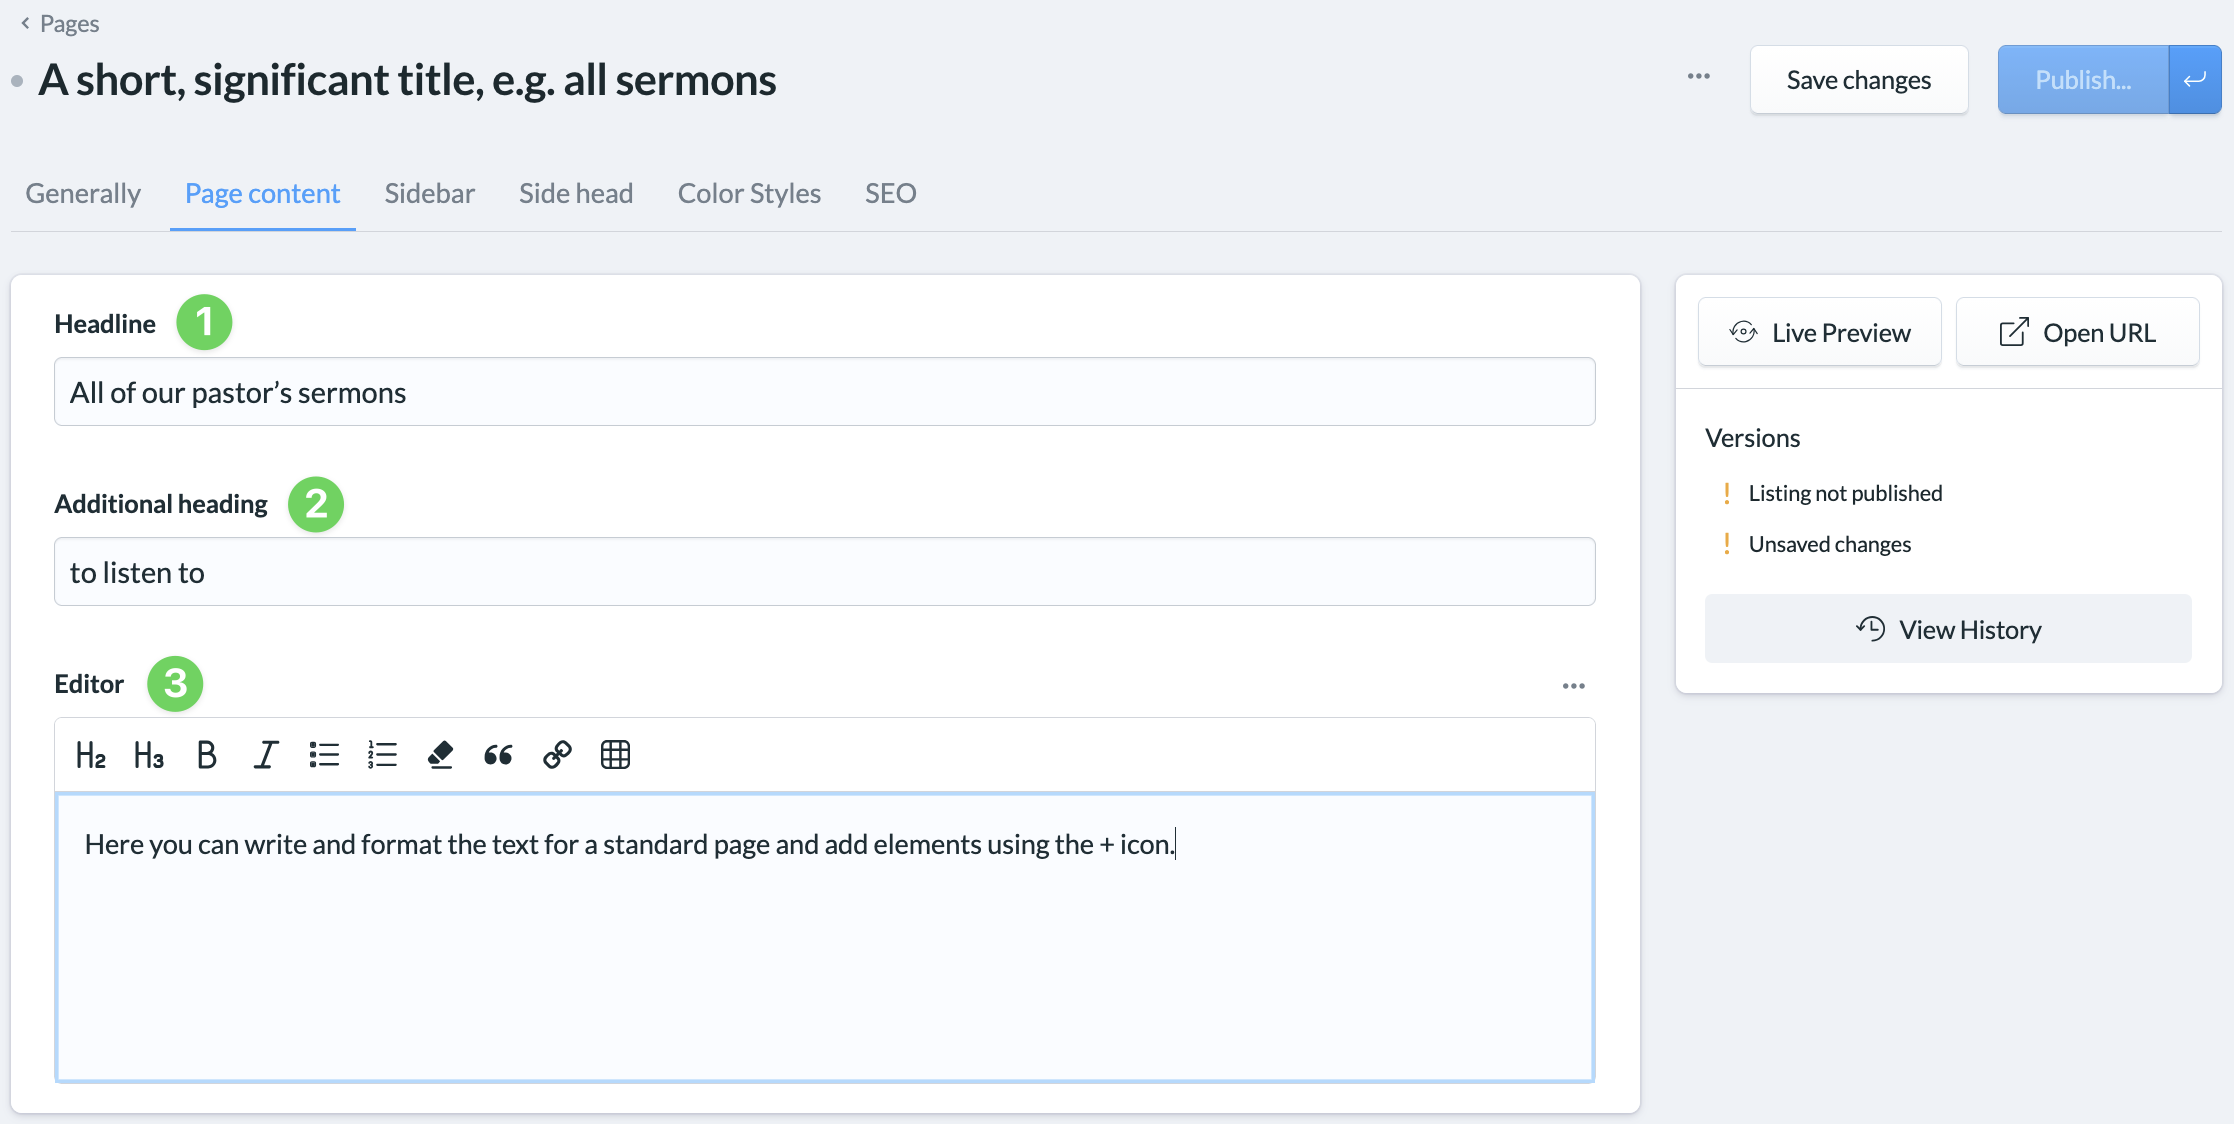
(1) Heading (only for standard pages)
Here you define the headline of the page that users see when they call up the page.
(2) Additional heading (only for standard pages)
A second, smaller heading, which is placed above or below the heading, depending on the design.
(3) Editor
Standard pages are very text-oriented, which is why we offer you a text editor. If you click in the editor field, you will see a small + symbol which you can use to insert elements.
Portal pages are element-oriented and therefore do not have a text editor. At the start, you will only see the + symbol for inserting elements.
Lists (only for overview pages) #
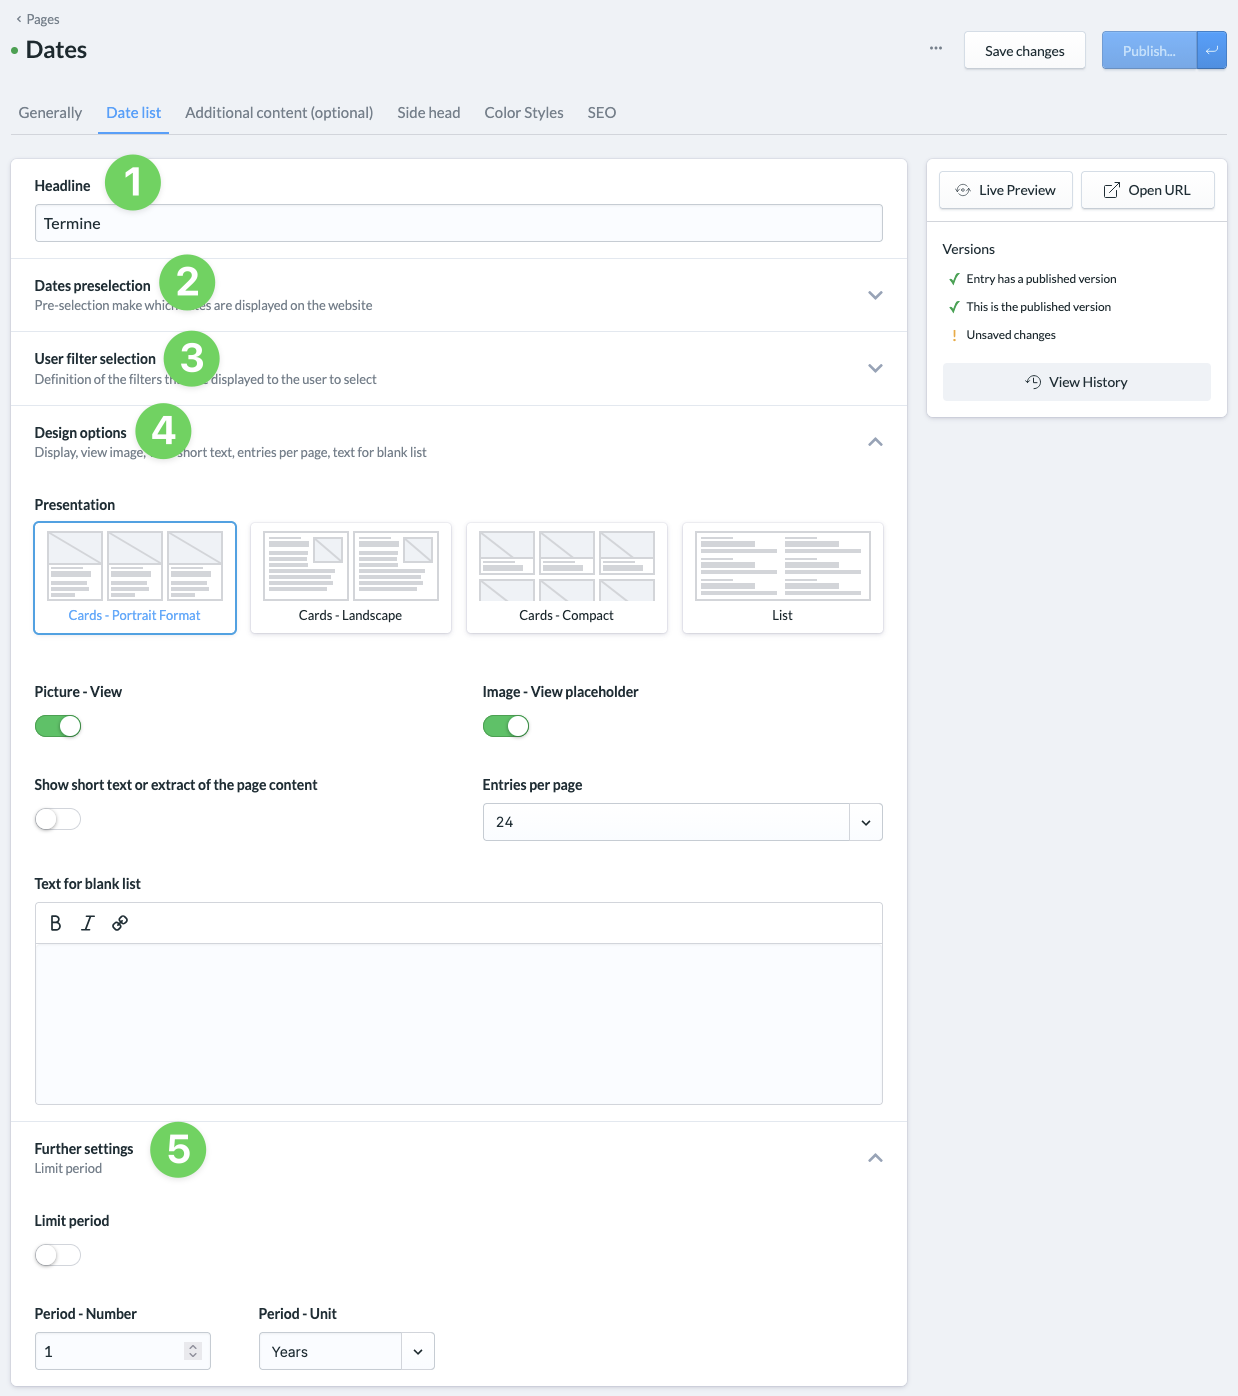
(1) Heading
Here you define the headline of the page that users see when they call up the page.
(2) Posts/groups/dates preselection
Here you select tags that were either synchronized when importing data from ChurchTools or that you have created yourself for your website. This allows you to preselect posts, groups or events that will be displayed on this page.
(3) User filter selection
Here you also select tags that were either synchronized when importing data from ChurchTools Website or that you created yourself for your website. This allows you to determine which filter option is displayed to the visitor.
(4) Design options
Here you define how the posts, groups and events should be displayed on the page and whether the image for the content should be displayed. You determine whether the image placeholder, which is stored in the settings under Page content, should be displayed if no image is stored. You can also determine whether a short text or excerpt of the page content is displayed and the maximum number of entries to be displayed on the page. If the list is empty, “No groups/post/appointment… available” is displayed by default. However, you can also enter a short text yourself, which will be displayed in this case.
(5) Further settings (only for overview pages – appointments)
For appointment pages, you can limit the time period from which appointments are displayed by activating the button and entering the desired number of days, months or years.
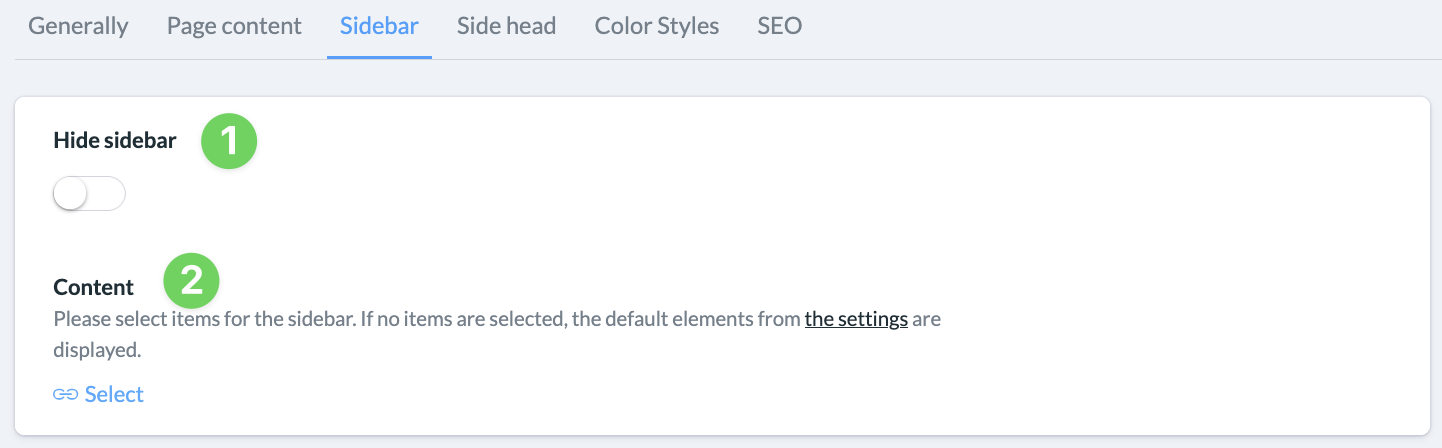
Sidebar (only for standard pages) #
The sidebar is displayed to the right of the page content.
(1) Hide sidebar
If the slider is active, no sidebar is displayed.
(2) Select content
Here you select existing sidebar groupings and sidebar elements that can be combined and expanded with other elements. It is best to keep checking the live preview to see how the sidebar changes.
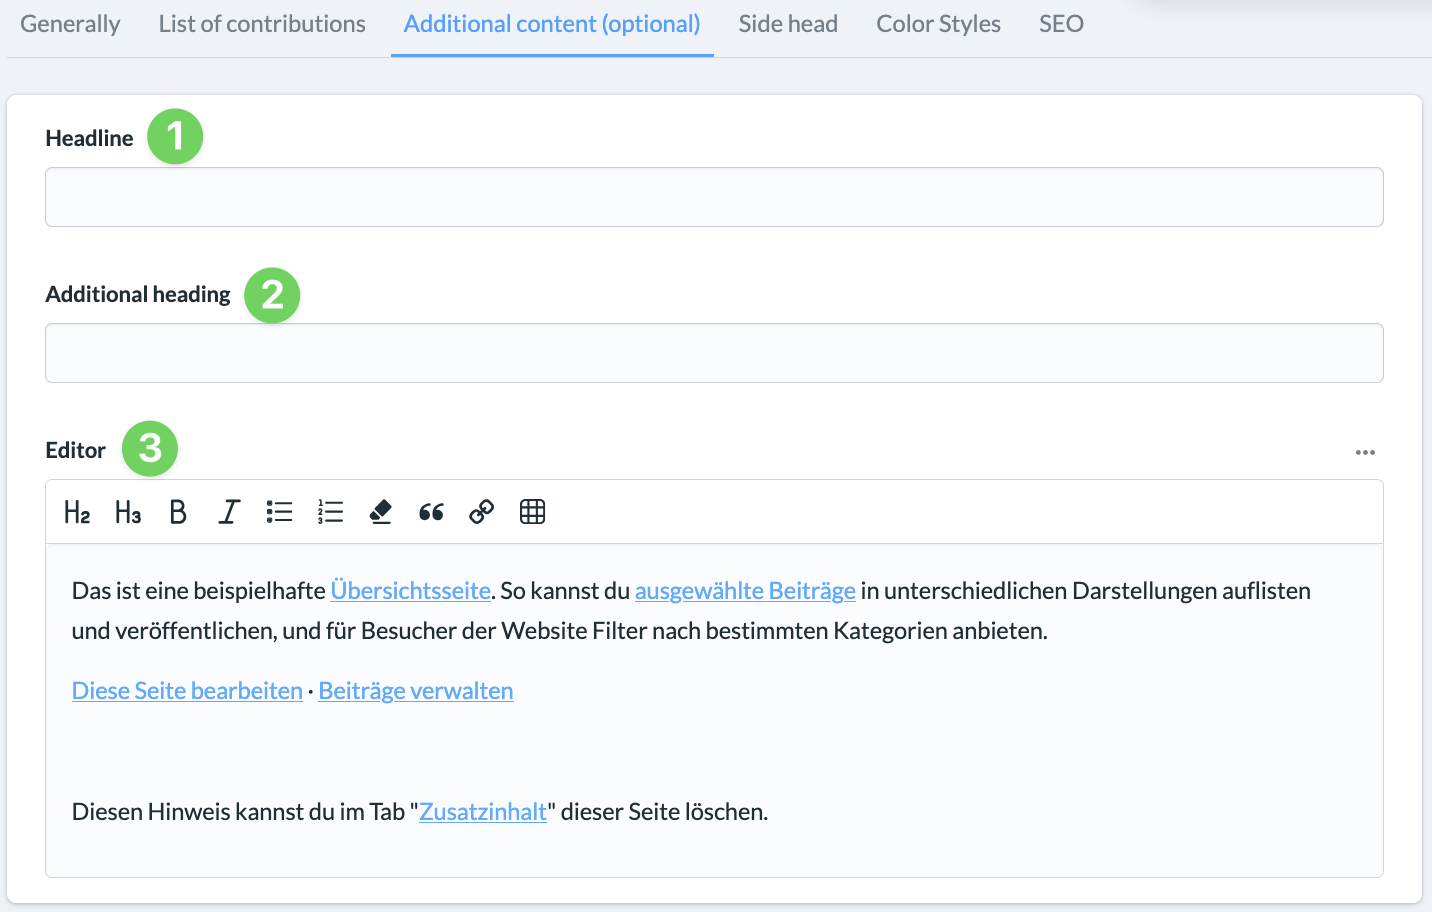
Additional content (optional and only for overview pages) #
The additional content is displayed above the other content at the start of the page. You can define an additional heading (2) next to a heading (1) and insert text or elements using the editor (3).
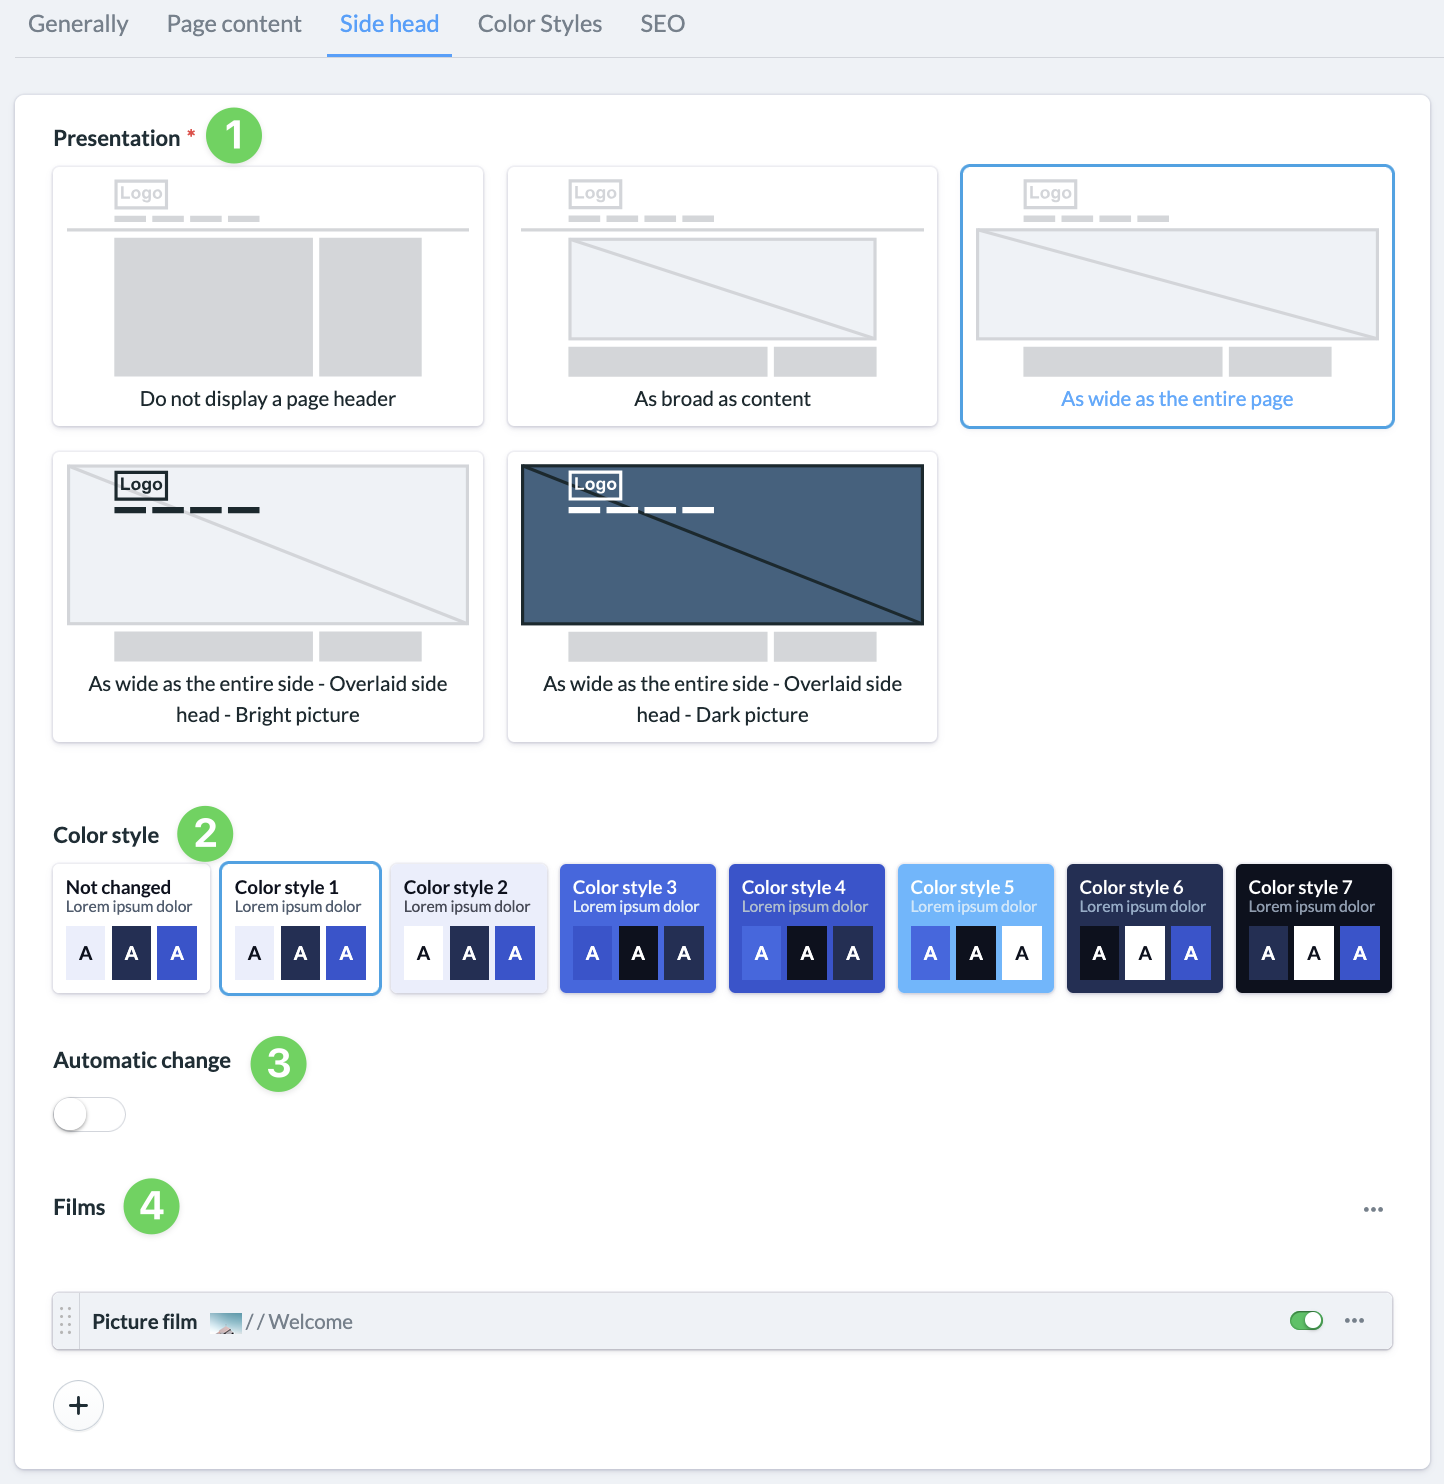
Page header #
The page header consists of one or more slides that can be displayed in the header.
(1) Representation
The default setting is Do not display page header. As soon as you select one of the other display options, three further options appear below it:
(2) Color style (only for portal and overview pages)
Here you can customize the color style of the page header, as always within the scope of your color scheme.
(3) Automatic changeover
If you have inserted several slides, you can set them to switch automatically here.
(4) Slides
Use the + symbol to add slides to be displayed in the page header.
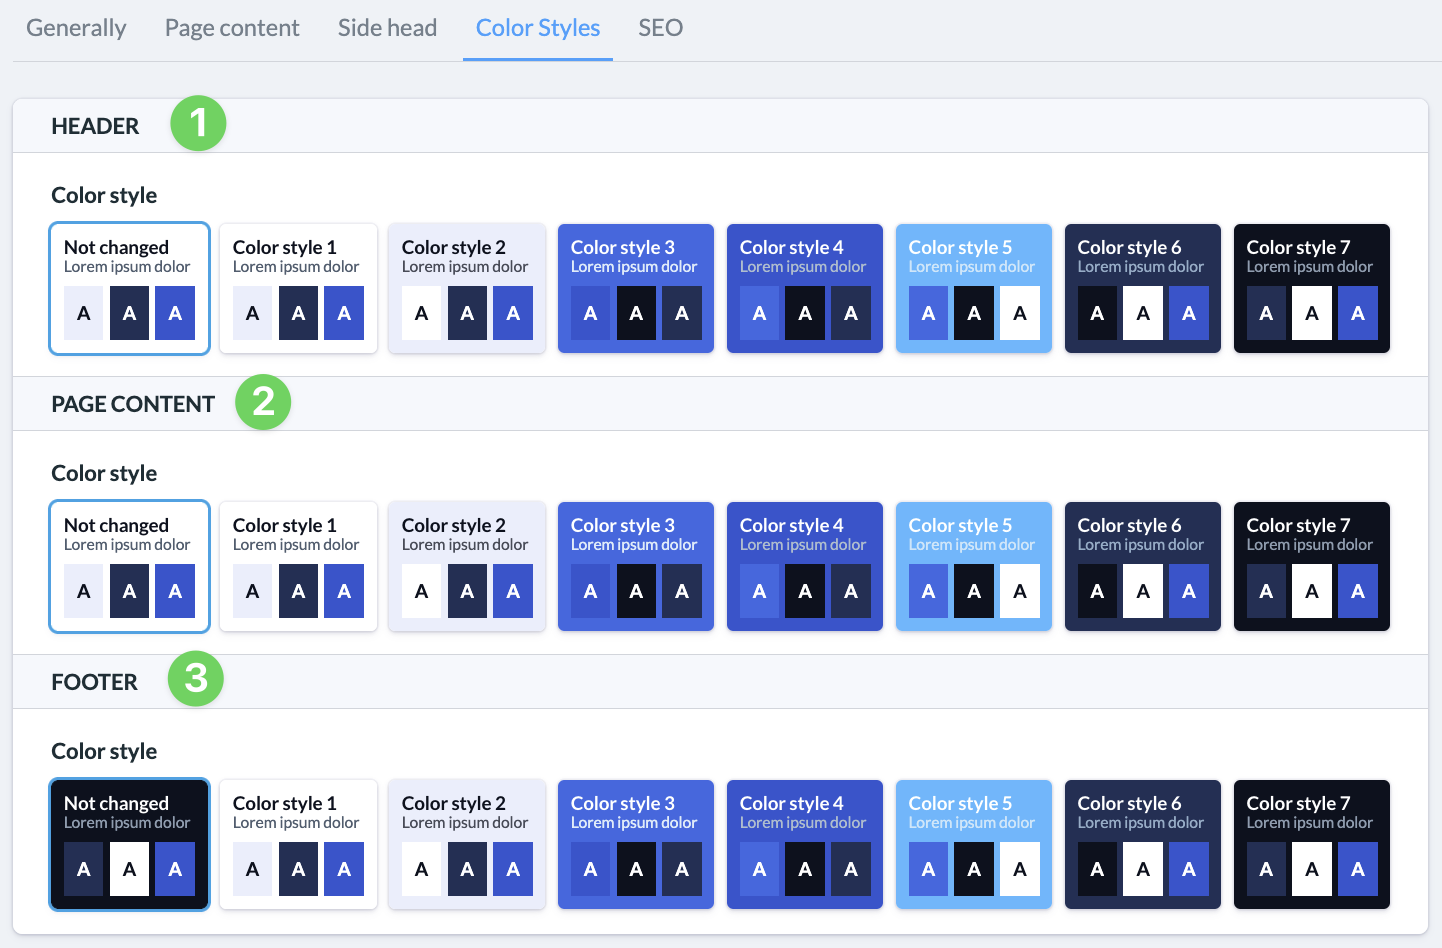
Color styles #
For each page, you can customize the color style you have chosen for your entire website. You can choose from several styles from the color scheme palette that is set in the settings under Design for the website.
You can set the combinations for the header (1), page content (2) and footer (3) of the page. This allows you to highlight individual pages while remaining within the color scheme of the website.
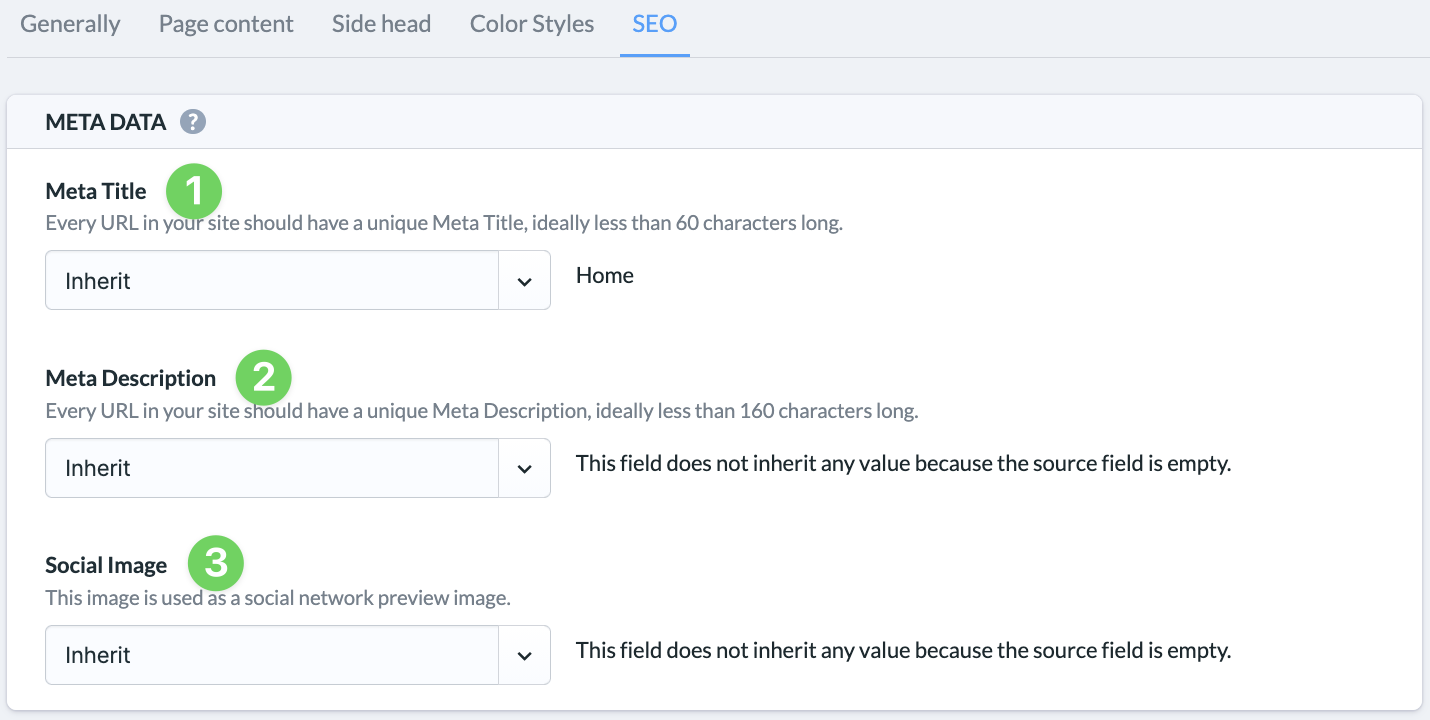
SEO #
Meta title, meta description and a social media image are important because they determine how your website is perceived externally – both in search engines and when sharing on social networks. You can find out more about SEO on How does ChurchTools support SEO?
Meta title (1): It is usually the blue, clickable heading on Google and Co. A clearly formulated title with suitable terms helps search engines to categorize the content and users to understand what it is about.
Meta description (2): This adds a short summary to the title. Even if it is not a direct ranking factor, it strongly influences whether someone clicks on your result.
Social media image (Open Graph) (3): This image is displayed when your page is shared on WhatsApp, Facebook or LinkedIn, for example. An appealing image attracts more attention and professionalism – and therefore more visitors.
The following options are available to you:
- Inherits standards that have been predefined for the page type.
- Custom opens an input field in which you can enter a text or shows the Browse button to upload an image.
- Deactivated (meta description only) deactivates the transfer of a meta description to search engines.
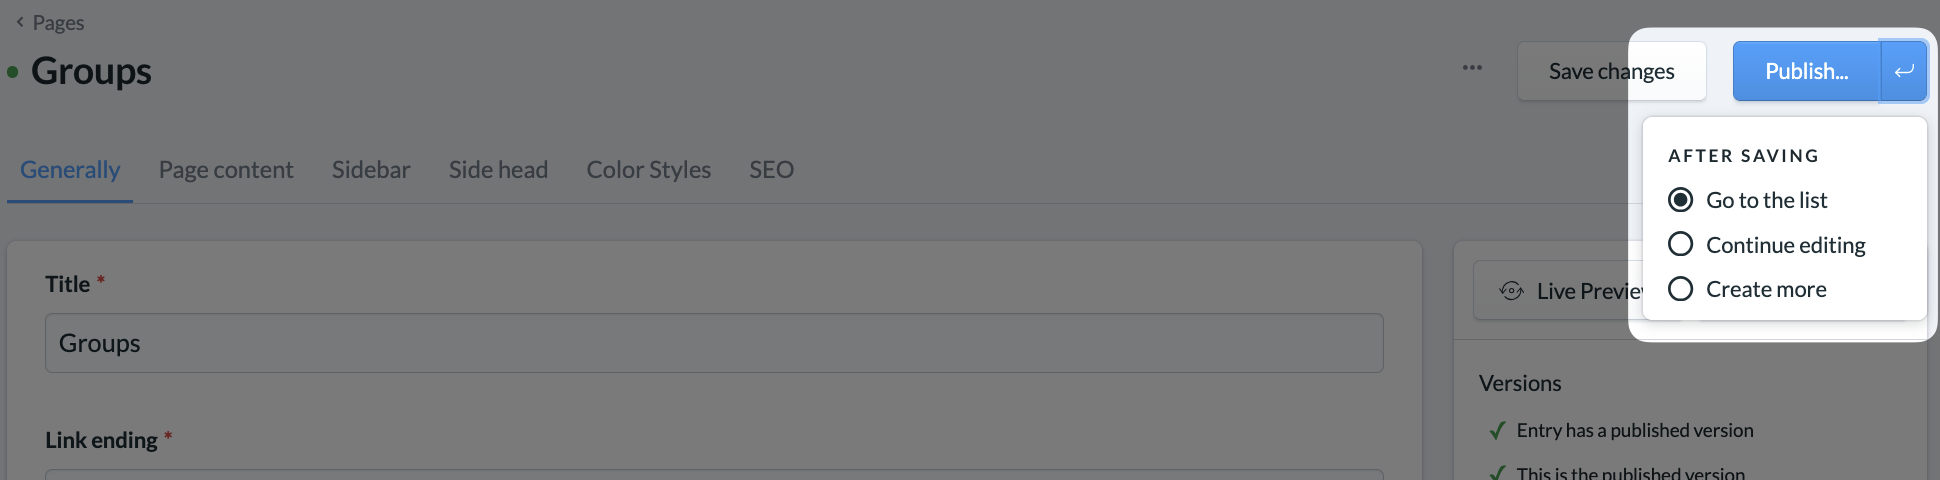
3. Save and publish page #
The Publish button and the other options for publishing a page only become visible after a page has been saved at least once. We explain exactly how you can use these options in the article How do I publish pages and content?