To delete an existing accounting year, you must first remove all the data it contains.
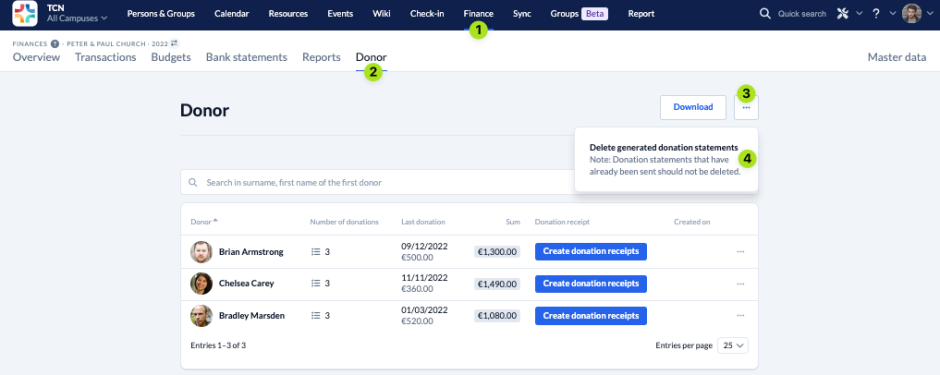
1. Delete donation receipts #
If you have already created donation receipts for the accounting year, it is important that you delete them first in order to avoid errors later on.
To do this, navigate via Finances (1) to Donor (2) and delete (4) all donation receipts that have already been generated.
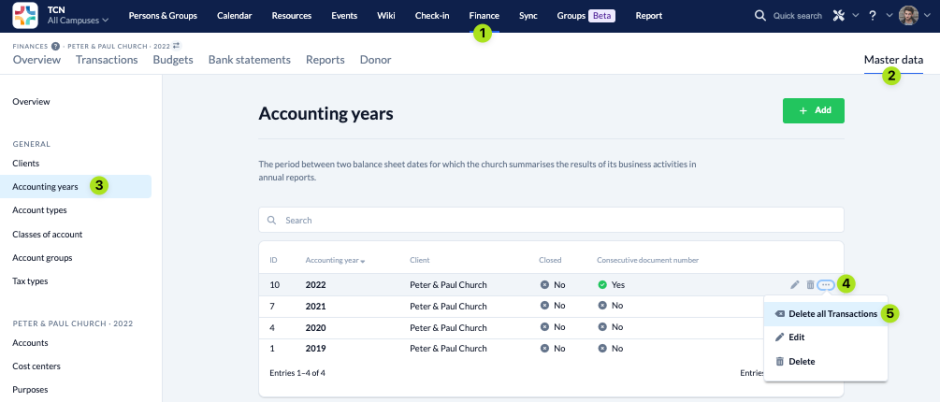
2. Delete transactions #
Next you have to delete all entered transactions.
To do this, navigate via Finance (1) > Master data (2) to the Accounting years (3), open the menu (4) of the accounting year you want to delete and delete all entries it contains (5).
3. Delete accounts #
Once you have deleted all donation receipts and transactions of the accounting year, you can delete all existing accounts.
To do this, navigate in the Master data (2) to Accounts (3) and select Delete all accounts (5) via the three-dot-menu (4).
4. Delete cost centers #
The last step is to delete all cost centers created in the accounting year.
To do this, navigate in the Master data (2) to Cost centers (3) and delete each cost center individually by clicking on the bin icon(4).
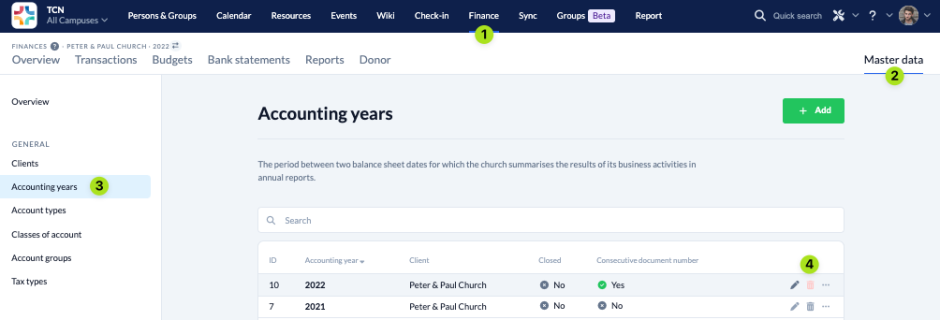
5. Delete accounting year #
Now you can finally delete the accounting year in the Master data (2) by clicking on the bin icon (4).