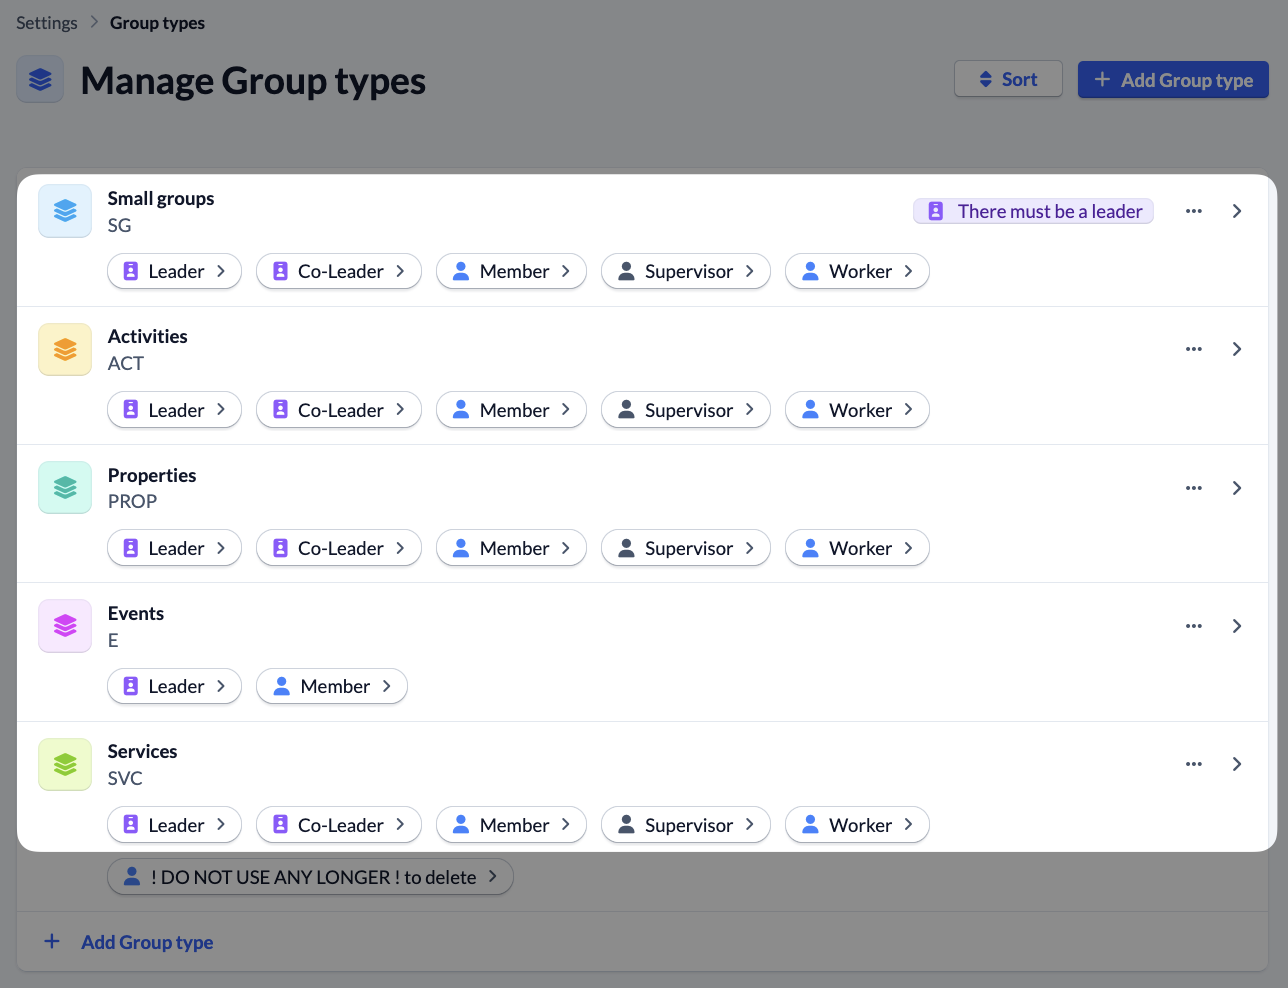
ChurchTools offers you the option of working with the four preset group types, changing them, deleting them or creating your own group types.
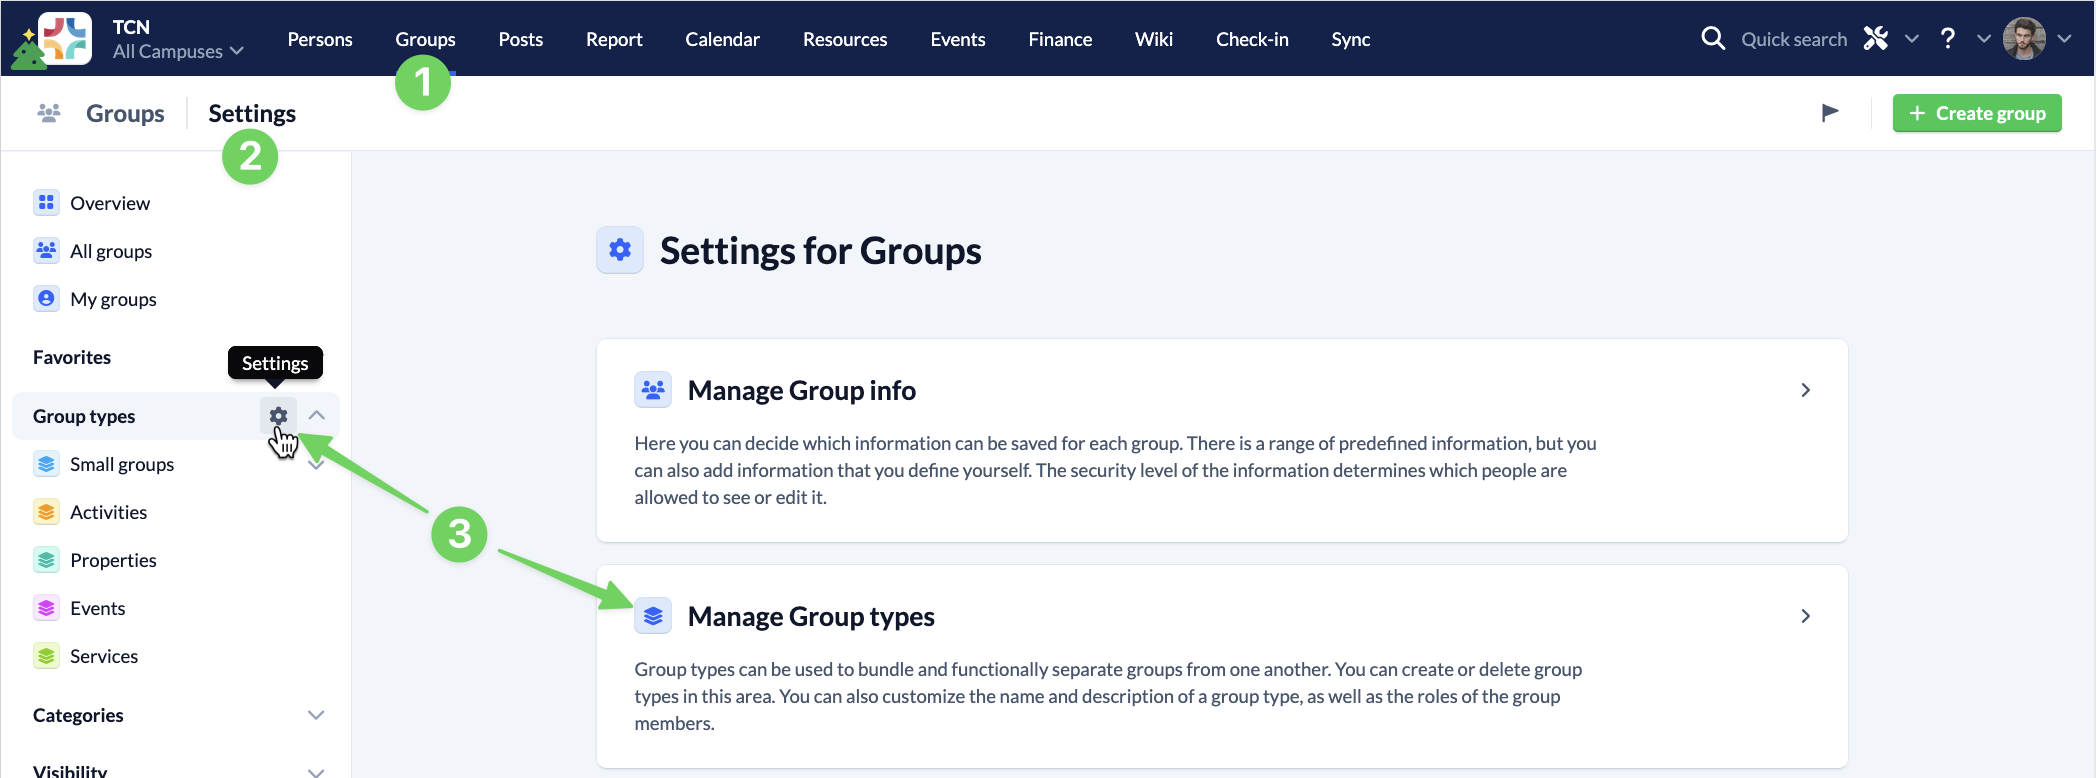
To do this, navigate to the Groups module (1) to the Settings (2) and select Manage group types (3).
Create new group type #
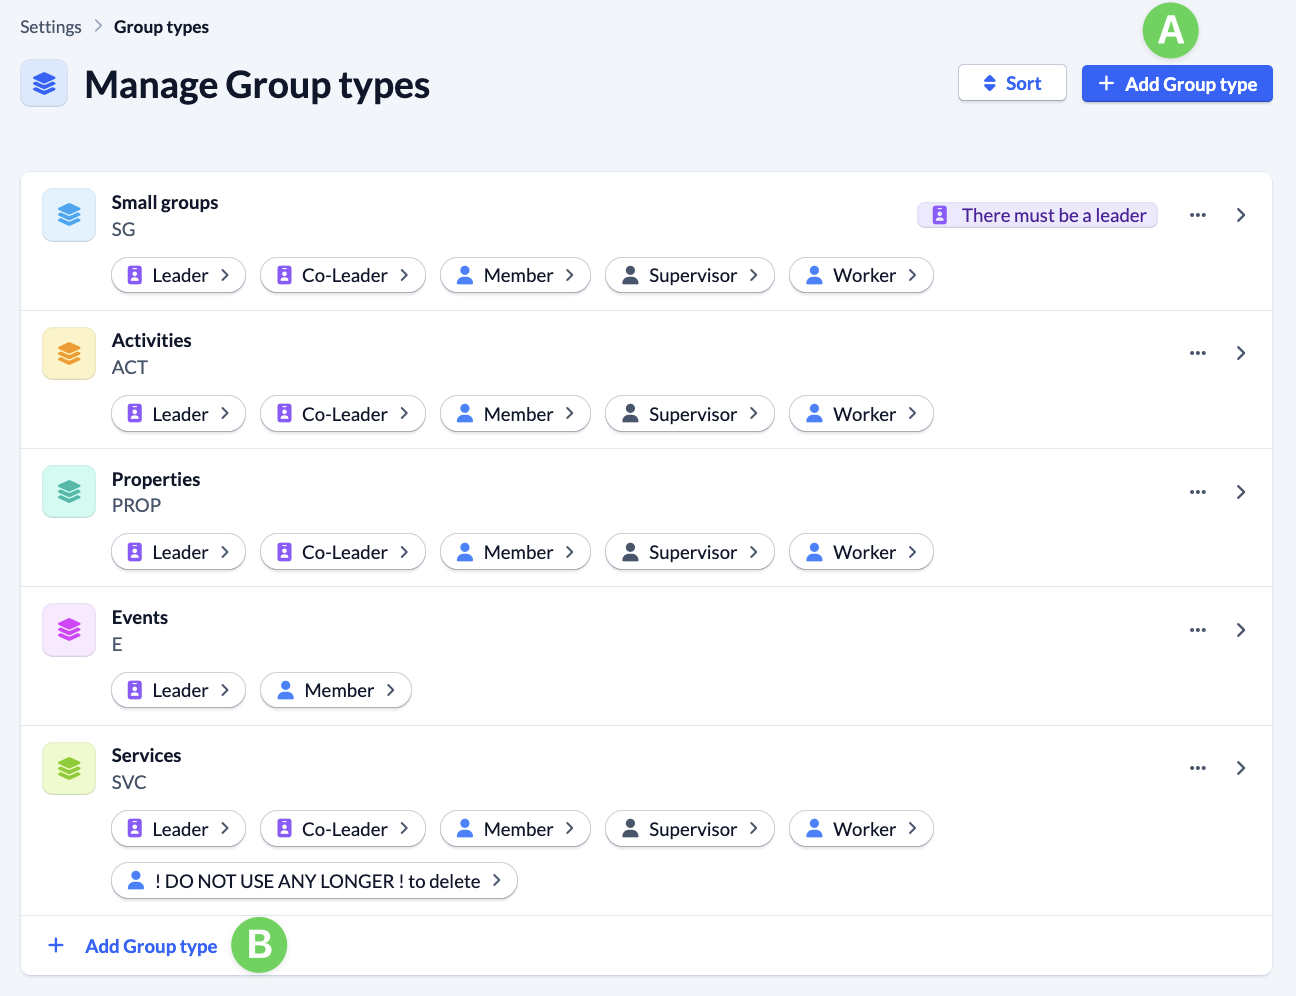
To create a new group type, click on the button Add Group type (A or B).
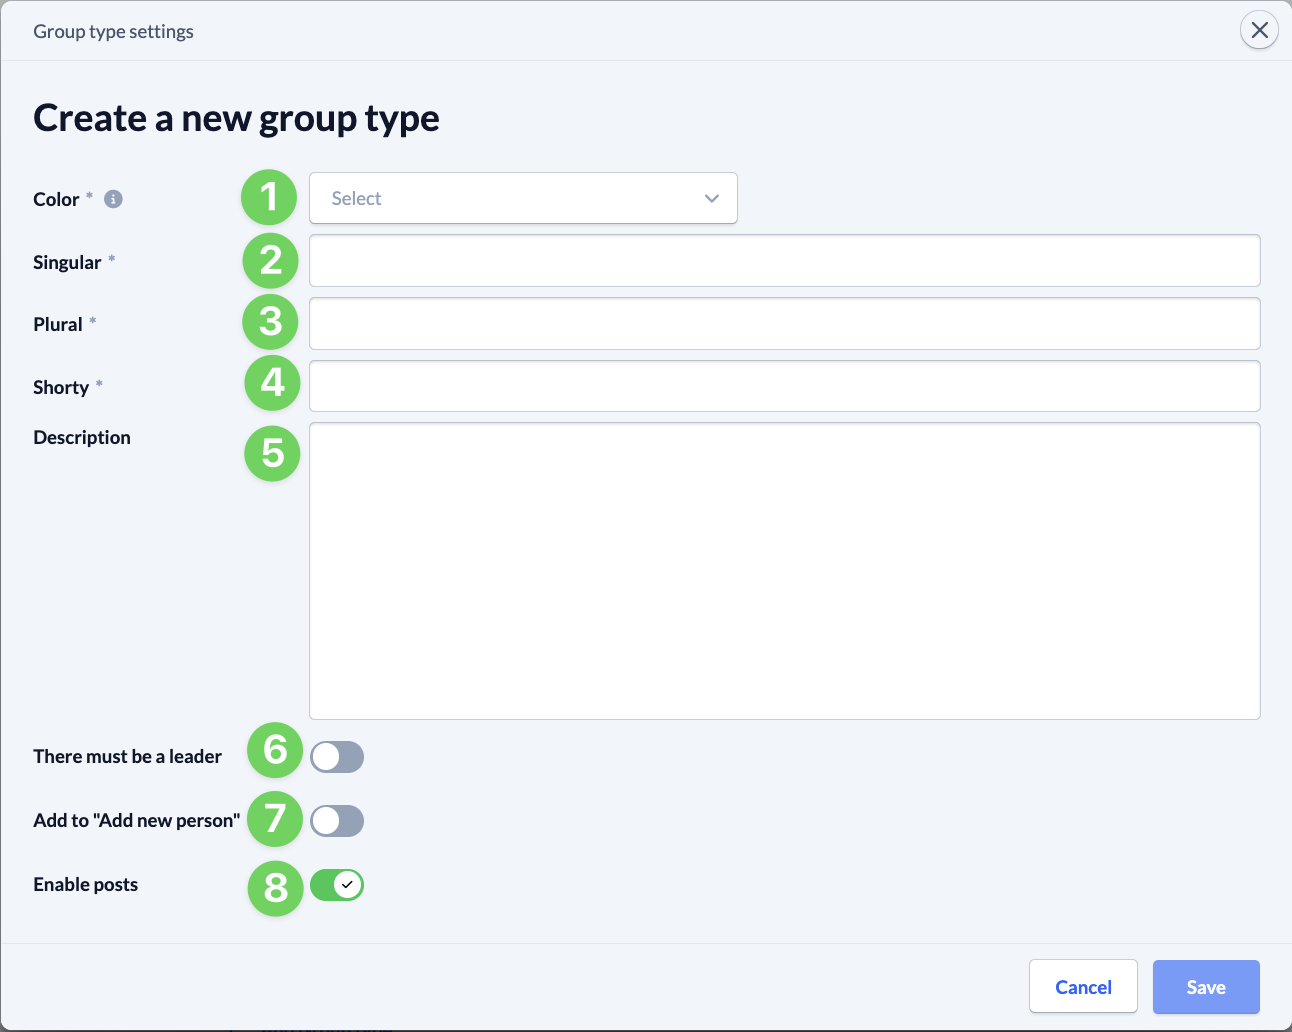
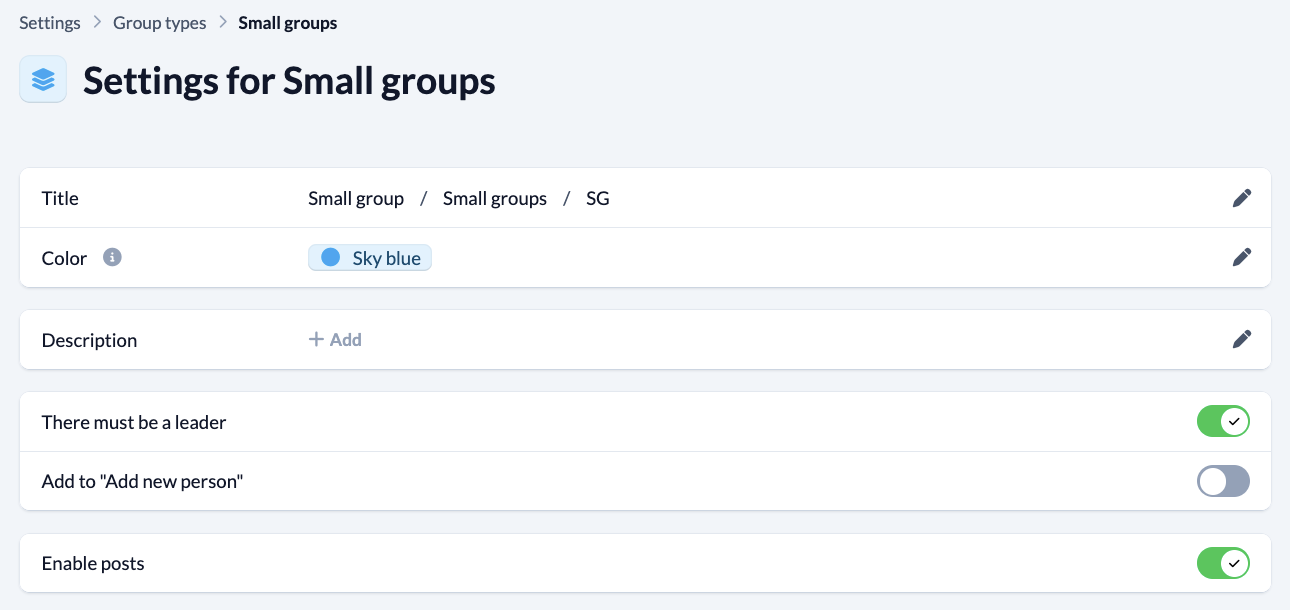
Then fill in all the required information:
- (1) Name of the group type (singular)
- (2) Name of the group type (plural)
- (3) Abbreviation of the name of the group type (usually two capital letters)
- (4) Optional description of what type of group it is and how it is to be used
- (5) Does a group of this type always have to include a person who has the Role of “Leader”?
- (6) Should the group type be displayed in the dialog box for creating a new person?
- (7) Enable posts for all groups that receive this new group type.
- (8) Should posts be enabled for this group type?
Edit group type #
To edit a group type, select the group type you want to change from the list.
You can then edit all the information that is also available to you when creating a new group type (see above), apart from the authorization depth. You can make detailed permission settings for subgroups in the rights management instead.
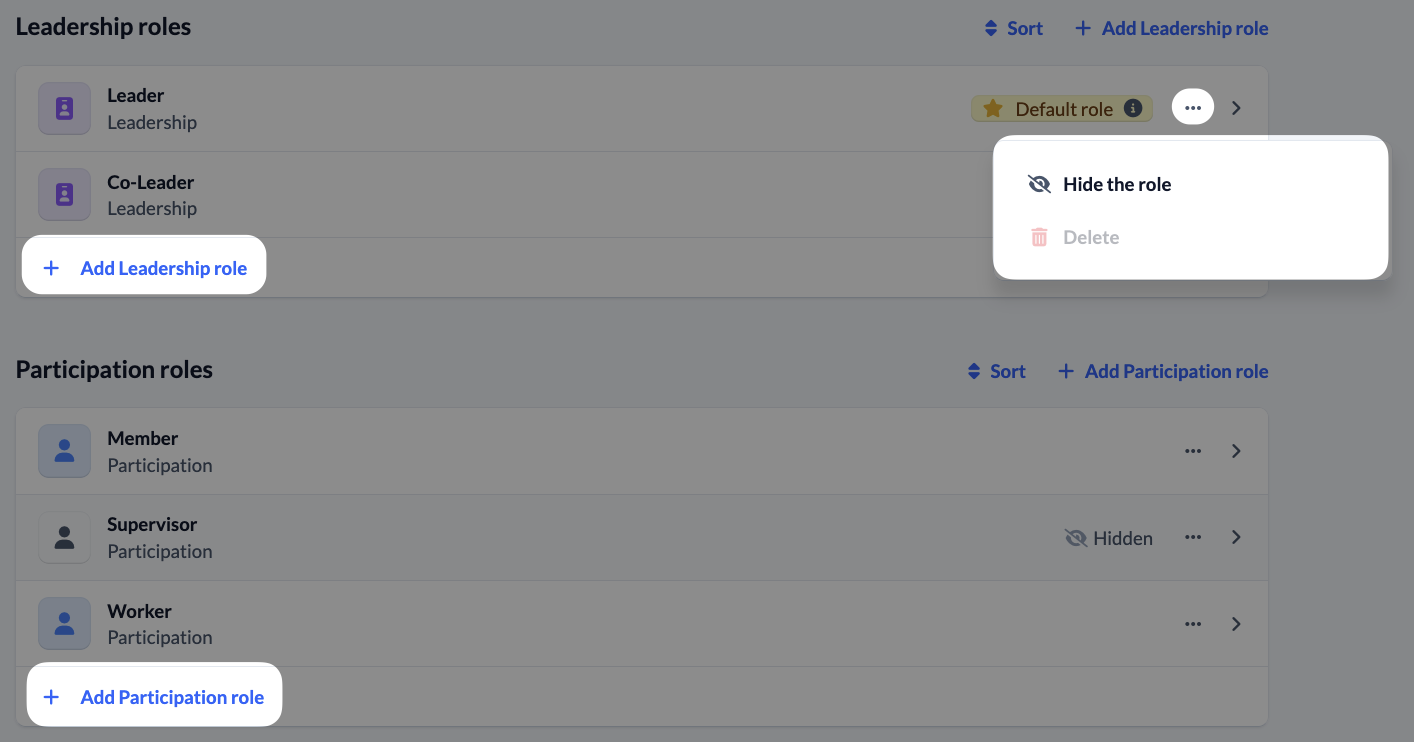
You can also edit which roles should be available and add, hide and remove both leader and participant roles.
If you would like to learn more about the function and possible applications of the various roles, please read our explanation of the roles or instructions for creating new roles.
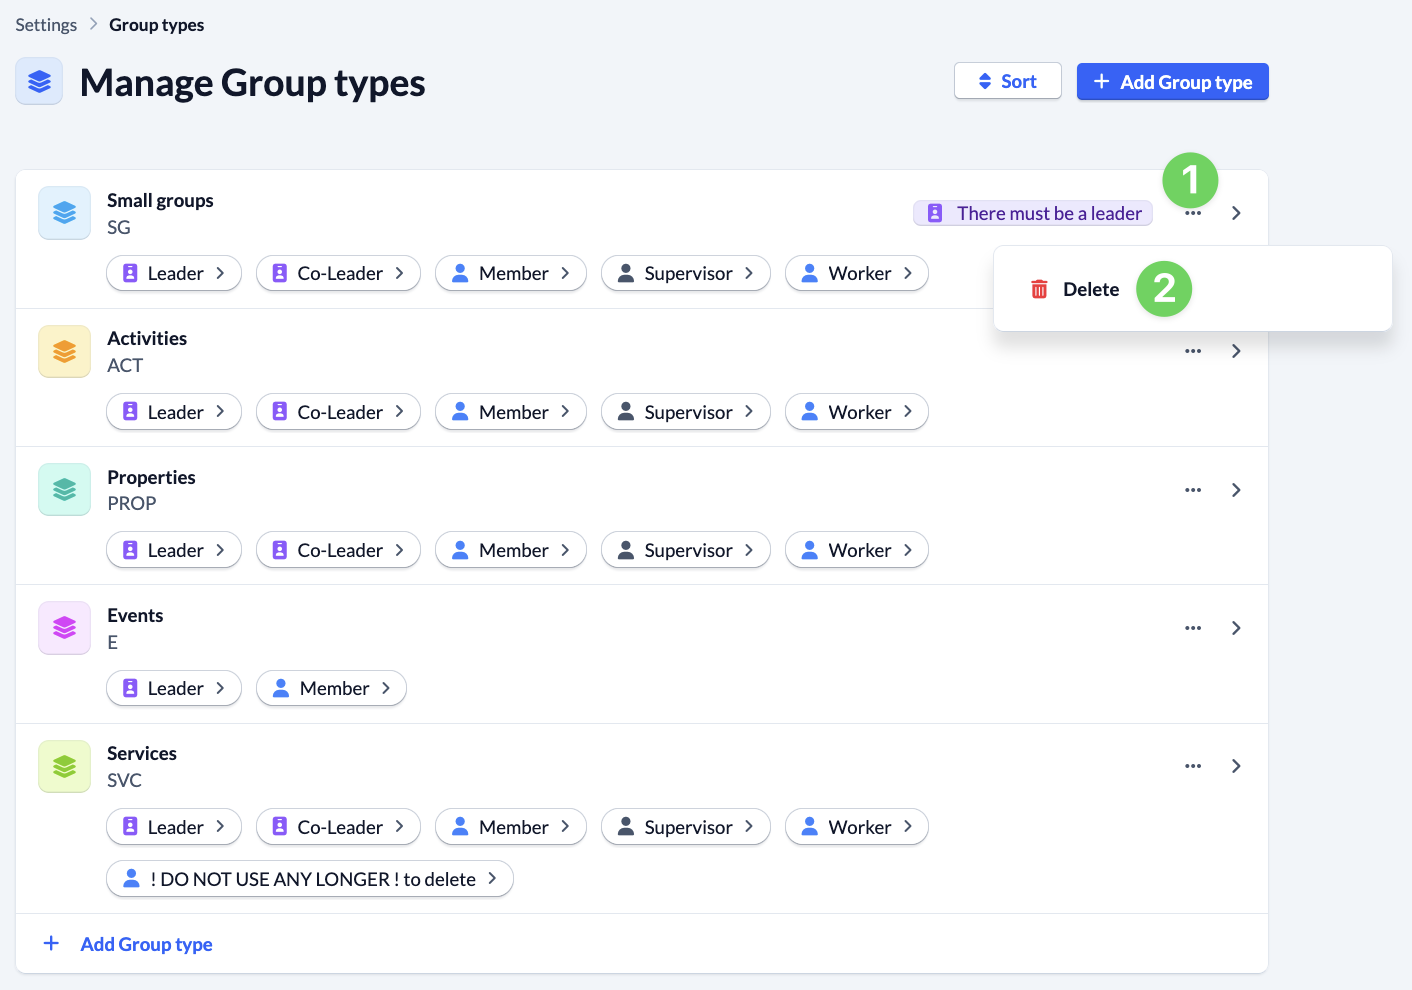
Delete group type #
If you want to delete a group type, open the corresponding menu (1) and click on Delete (2).