The Resources module helps your congegration to manage rooms, vehicles, beamers and anything else that needs to be coordinated.
Depending on their permissions, users of your ChurchTools can request resources, which may be confirmed immediately or, following review by an administrator, either confirmed or rejected. Users can also delete their own requests. If someone attempts to book a resource that has already been requested or booked, they will receive a clear warning message.
Resource managers can keep track of everything using the Resources module. To make their job even easier, they can also choose to be notified by email of booking enquiries and changes to bookings. We provide plenty of helpful tips on this task in the article ‘How to process booking enquiries?’
Your ChurchTools administrators specify, for each resource in the master data, which resource type it belongs to, who manages the resource, whether a resource needs to be approved, and much more. We have included a video tutorial on this further down under ‘Setting up the Resources module’.
Overview of the Resources Module #
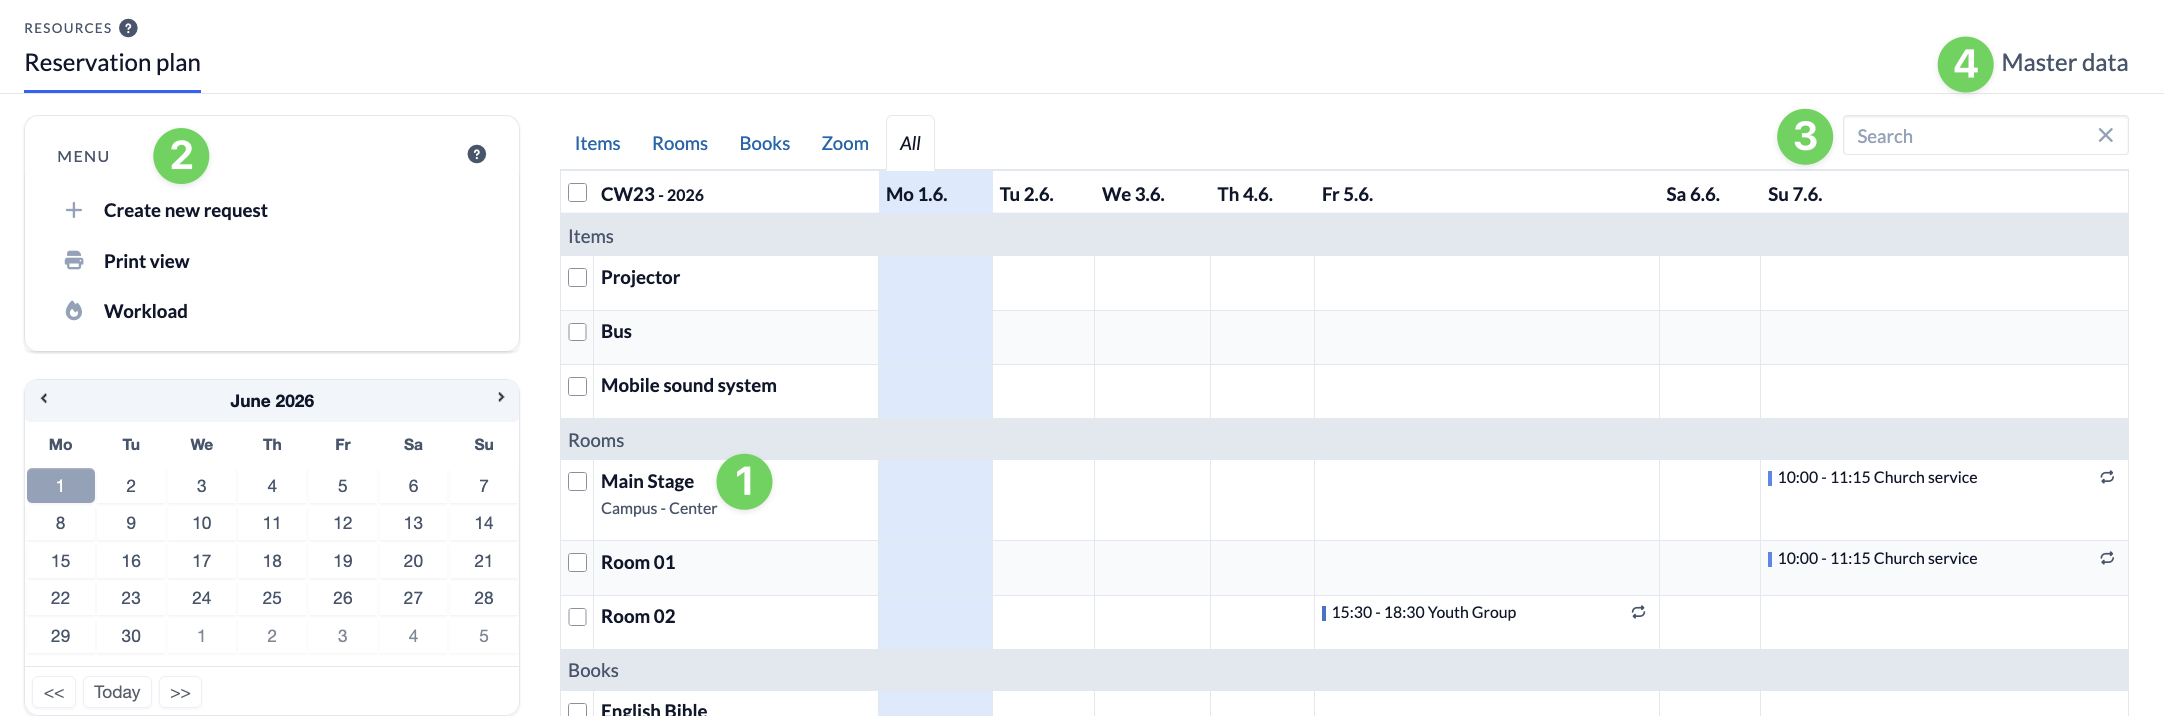
When you open the module, the first thing you’ll see is the booking schedule in the centre. It clearly shows you all the bookings for the resources you have created. You can choose to view them either filtered by the resource types you have specified, or all at once (1). You can find more detailed information about the bookings shown further down in this article.
Use the menu (2) to create a new request to book a resource, and use the print preview to print the booking schedule or save it as a PDF. The utilisation overview shows you a simple summary of all resources. You can find more detailed information on this in the article ‘How to read the utilisation overview for our resources?’.
The Search (3) function allows you to filter all enquiries and bookings by booking title. For example, if you search for “lunch”, you will only be shown bookings whose title contains the word “lunch”.
In the master data (4), you define the resource types and create the resources.
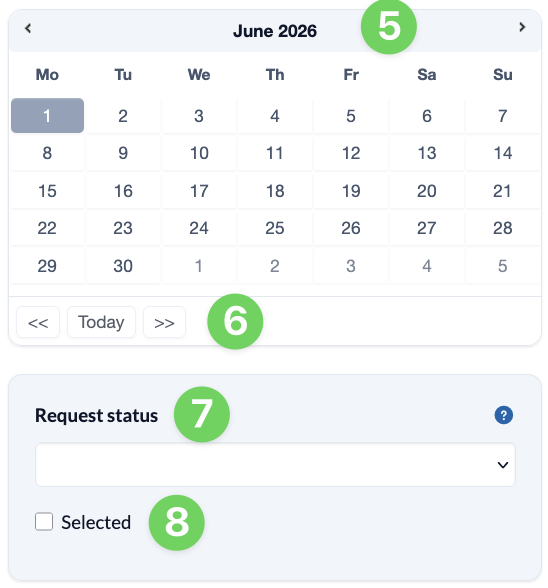
In the calendar (5), you can quickly switch between months and select a specific day. The corresponding week will then open on the right-hand side of the booking schedule. Use the arrow buttons (6) below the calendar to switch quickly between weeks.
If you are a resource manager, the enquiry status filter (7) is very important to you. It allows you to quickly filter all bookings to see which enquiries are still awaiting confirmation and which have been rejected, confirmed or deleted. You can select these options from the drop-down menu and view the results filtered accordingly.
If you tick the checkboxes at the start of a resource row in the booking plan and then tick the ‘Selected’ (8) checkbox, you will filter the previously selected resources in the booking plan. If you then use the calendar or filter by enquiry status, only the results for the previously selected resources will be displayed.
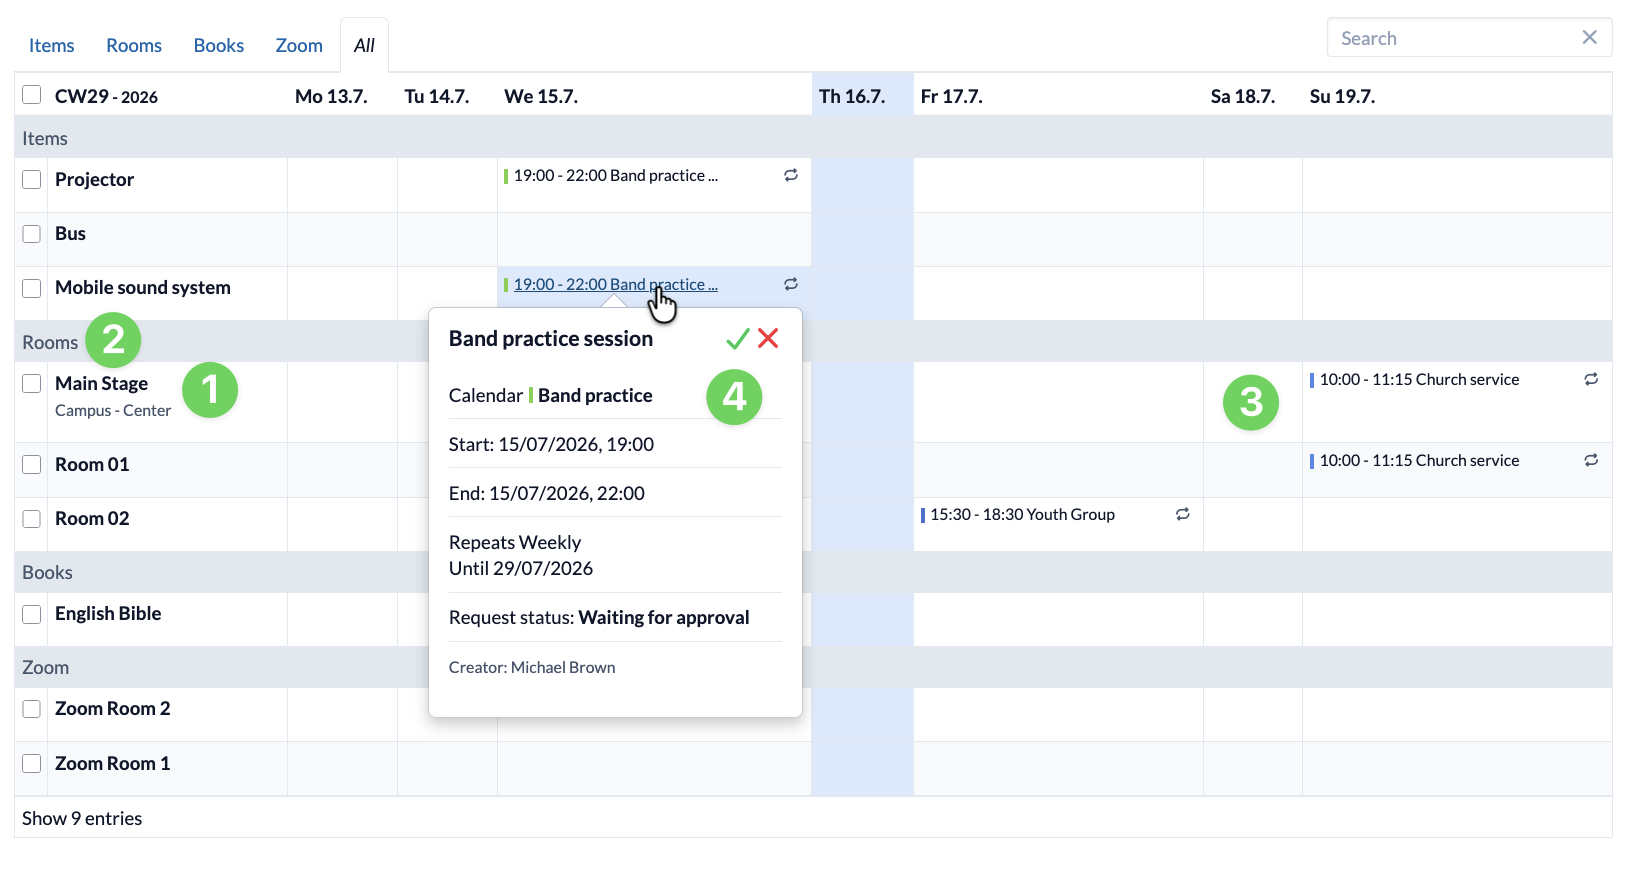
Each row in the booking plan shows the bookings for a resource (1). The resource rows are grouped by resource type and are shown in grey in the plan (2). The bookings are displayed differently depending on their status (3):
- Black headings = confirmed bookings
- Red titles = requested and unconfirmed bookings
- Crossed out titles = rejected bookings
- A coloured bar before the title = The resource was booked via a calendar entry. The colour displayed corresponds to the calendar colour from the calendar module.
- Circular arrow = recurring booking
If you hover your mouse over a booking, you’ll see more detailed information (4) about it, even without opening it. If the booking was created in the Resources module, you can also copy or delete it from there. Bookings created via an appointment in the Calendar module must also be deleted there.