The Resources module helps you to keep track of who is currently occupying which room, using which equipment or traveling with which vehicle.
From different rooms to equipment and software, you can create everything as resources and make it bookable.
You can find out how to create a new resource here.
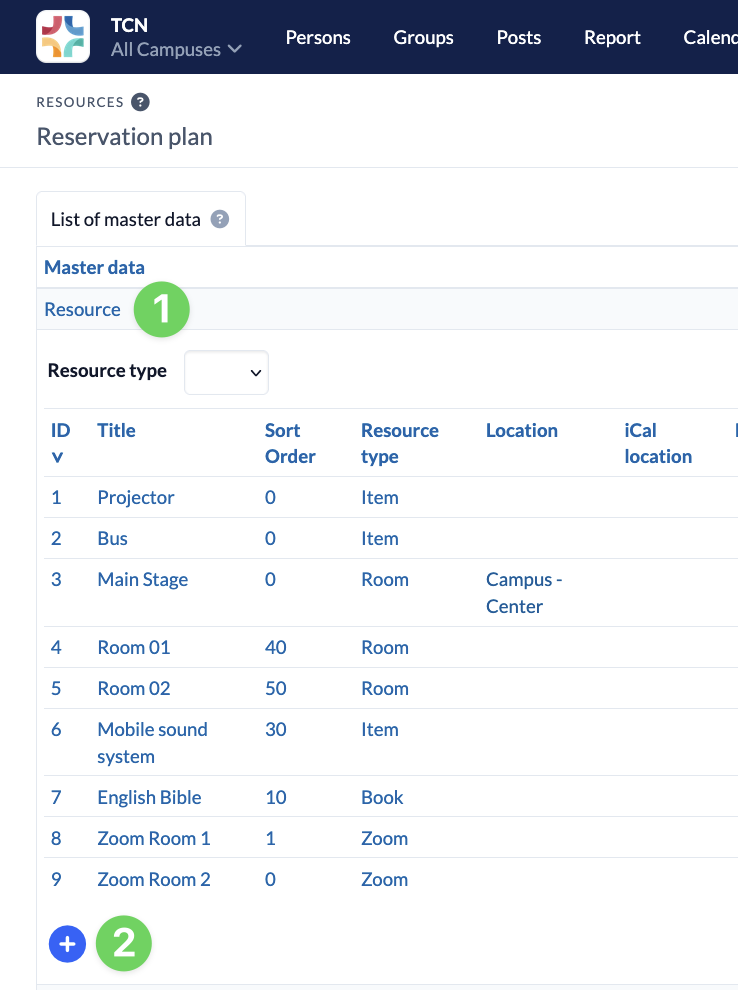
1. open Master data #
To create a new resource, open the Master data (2) in the Resources module (1).

2. create resource #
Here you open the Resource entry (1) and click on the plus (2) at the end of the list.
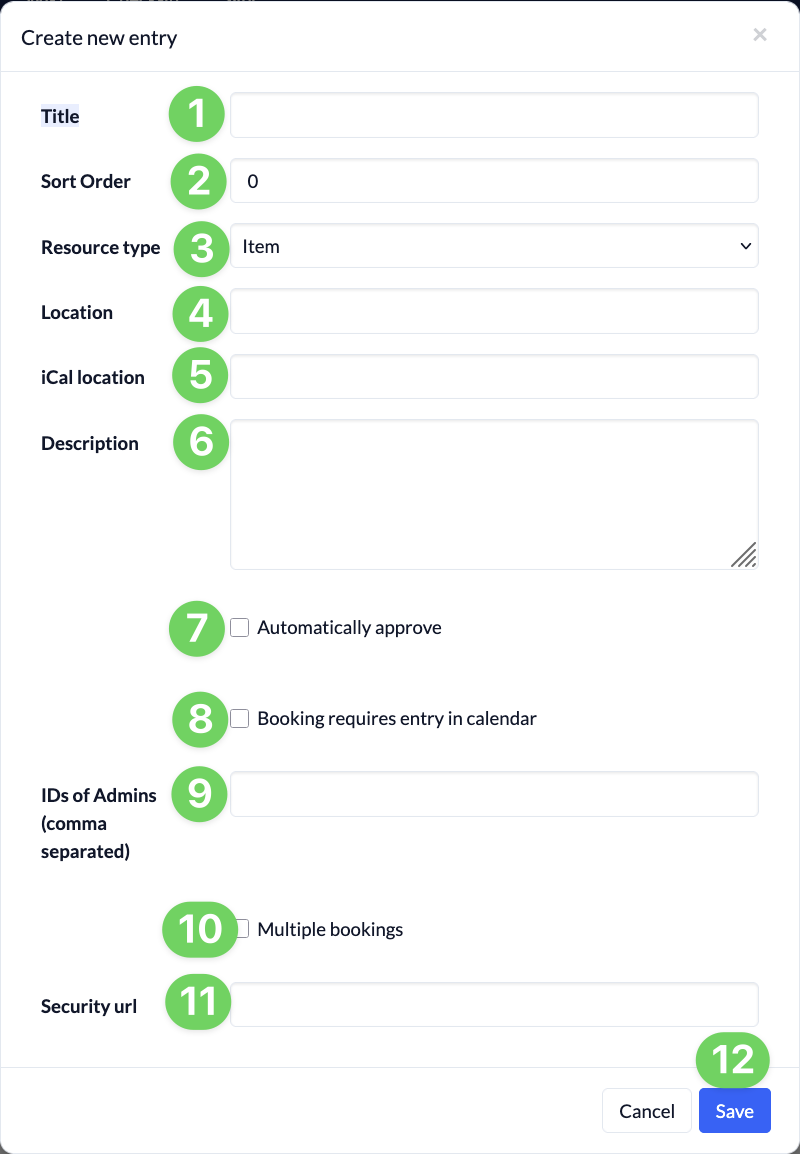
Then enter all the information for your new resource and save it.
- (1) Here you title your new resource.
- (2) The sorting determines where in the list and in selection menus the resource is displayed later.
- (3) Here you can specify which type the new resource belongs to. You can find out how to create resource types here.
- (4) If the resource is in a specific location, you can enter it here.
- (5) Resources can be subscribed to via iCal. If you want the address field to be filled in the calendar entry, you can enter the location/address here.
- (6) You can use a description to identify the resource more precisely.
- (7) Here you can specify whether the resource is confirmed automatically or whether the booking must be confirmed by a responsible person.
- (8) You can determine whether a corresponding appointment must be created in the calendar for the booking of this resource.
- (9) Here you can specify who can confirm this resource. To do this, enter the personal ID of a responsible person, which you will find at the bottom right of the person’s user card.
- (10) This setting is useful if you have several identical resources and it does not matter which one is booked. For example, a microphone can be booked if there are 10 of them in total and it does not matter which exact microphone is issued.
- (11) You can leave this field blank, as it will be filled in automatically after the new resource has been created. However, you can change the security URL later if you want to restrict access to the resource via iCal, e.g. because the person responsible has changed and the previous administrator should lose their access to the resource via iCal.
Click Save (12) to create your new resource.