The calendars in ChurchTools are very helpful for organizing different areas within the church and keeping track of appointments. Of course, it is even better if the calendars are also integrated on your own church website and display all relevant information there.
However, there are times when certain appointment information should be displayed in ChurchTools but not be visible on the website. In this tutorial, we will show you how to hide appointment information in the embedded calendar using the example of resources.
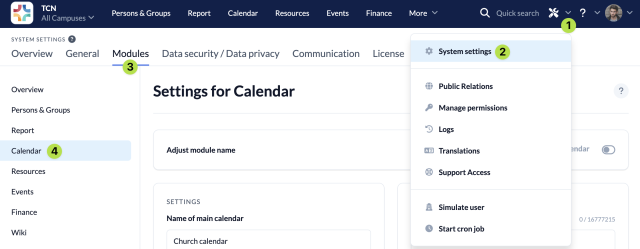
Open system settings #
You can customize your embedded calendar with CSS classes. You store these in advance in the system settings of your ChurchTools.
To do this, open the system settings (1) and (2) and navigate to Modules (3) > Calendar (4).
What is CSS?
CSS stands for Cascading Style Sheets (https://de.wikipedia.org/wiki/Cascading_Style_Sheets) and is a core language of the internet. This style sheet language for electronic documents is used to customize the appearance of a website using commands.
Enter CSS command #
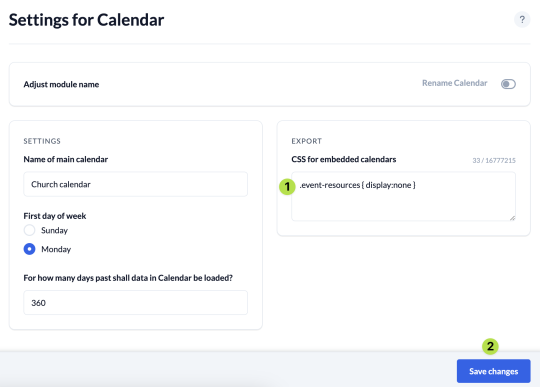
To hide the resources stored in the event, enter the following CSS command in the field provided (1): .event-resources { display:none } . Then save your changes (2).
Check CSS command #
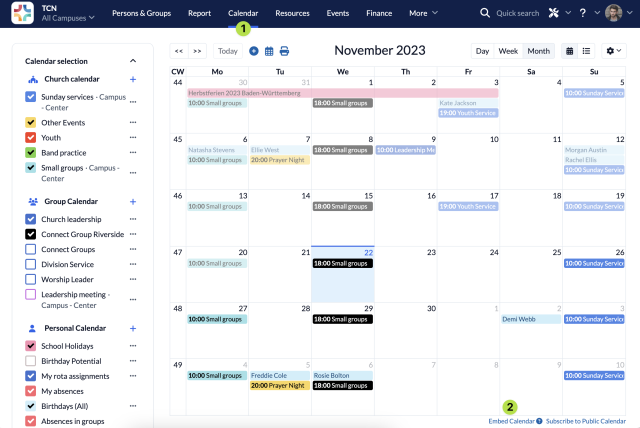
Now navigate to the calendar module (1) and open the dialog box (2) to embed the calendar.
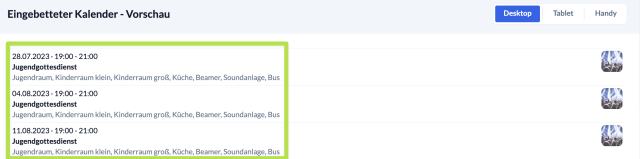
The CSS command stored in the system settings to hide the resources is automatically applied.
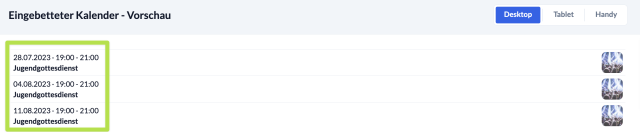
You can already see this in the preview:
Resources displayed
Resources hidden
You can find our full explanation on the different settings when embedding a calendar in our guide. It also explains how to add the calendar to your website.
Customize various calendars differently #
Depending on how your website is structured, you may not want the resources to be hidden for every embedded calendar, but only for the calendar that you display on the homepage of your website, for example.
You can also implement this with ChurchTools by assigning your own CSS class.
Assign your own CSS classes #
To do this, go back to the system settings of the calendar module (see above), set your own CSS class before the CSS command that hides the resources, e.g. .mainpage (1) and save your change. There must be a space between your CSS class and the following command!

The CSS command is now only applied if the corresponding CSS class is entered before embedding.
Enter CSS class #
Switch back to the calendar module and open up the dialog window to embed the calendar (see above). In order for the CSS command for hiding the resources to be applied, you must enter your previously assigned CSS class here via Display > Advanced settings > CSS class (1).
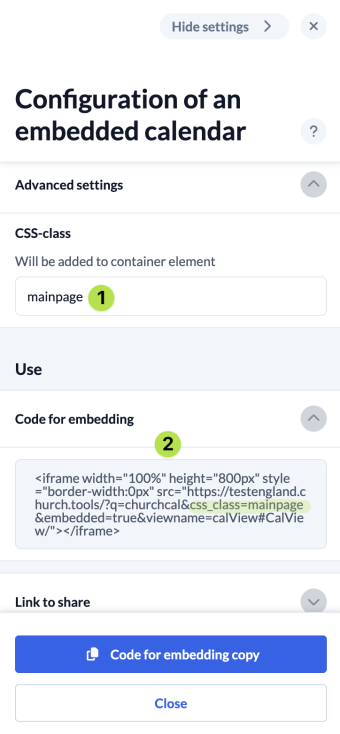
You have now assigned your own CSS class for this embedded calendar, which is also visible in the embed link (2).
Use those steps to set individual CSS commands for different calendars to customize the calendars on your website.