


Here, we’ll explain how to connect an external Login provider to your ChurchTools using OIDC. This allows your users to use their Login credentials from a third-party system—such as Microsoft 365—to log in to your ChurchTools.
1. Register ChurchTools with the provider #
Create an application for your ChurchTools system with the provider. Some providers also refer to this as a “client.” If you’re asked to select an application type, choose “Confidential Client” and the “Authorization Code” flow. For some providers, such as Google, be sure to specify “External” as the target audience.
Next, open the System Settings in ChurchTools via the Manage menu. Under General, go to Login. The provider endpoints are displayed here (see also “Logging In to and With ChurchTools”).
Copy the OIDC redirect URI that is displayed and enter it as an allowed redirect URL with the provider. Enter it exactly as shown and do not change it.
During or after setup, the provider should display the issuer address, client ID, and client secret. Keep these handy for further configuration of your ChurchTools.
2. Add an OIDC provider to ChurchTools #
In the “Login to ChurchTools via a Third-Party System ” section, click the blue “+ Add Login Provider ” button and select ” OIDC” from the menu.
Fill in the fields with the appropriate information. The following screenshot shows an anonymized example. When setting up the provider, enter your provider’s actual information.
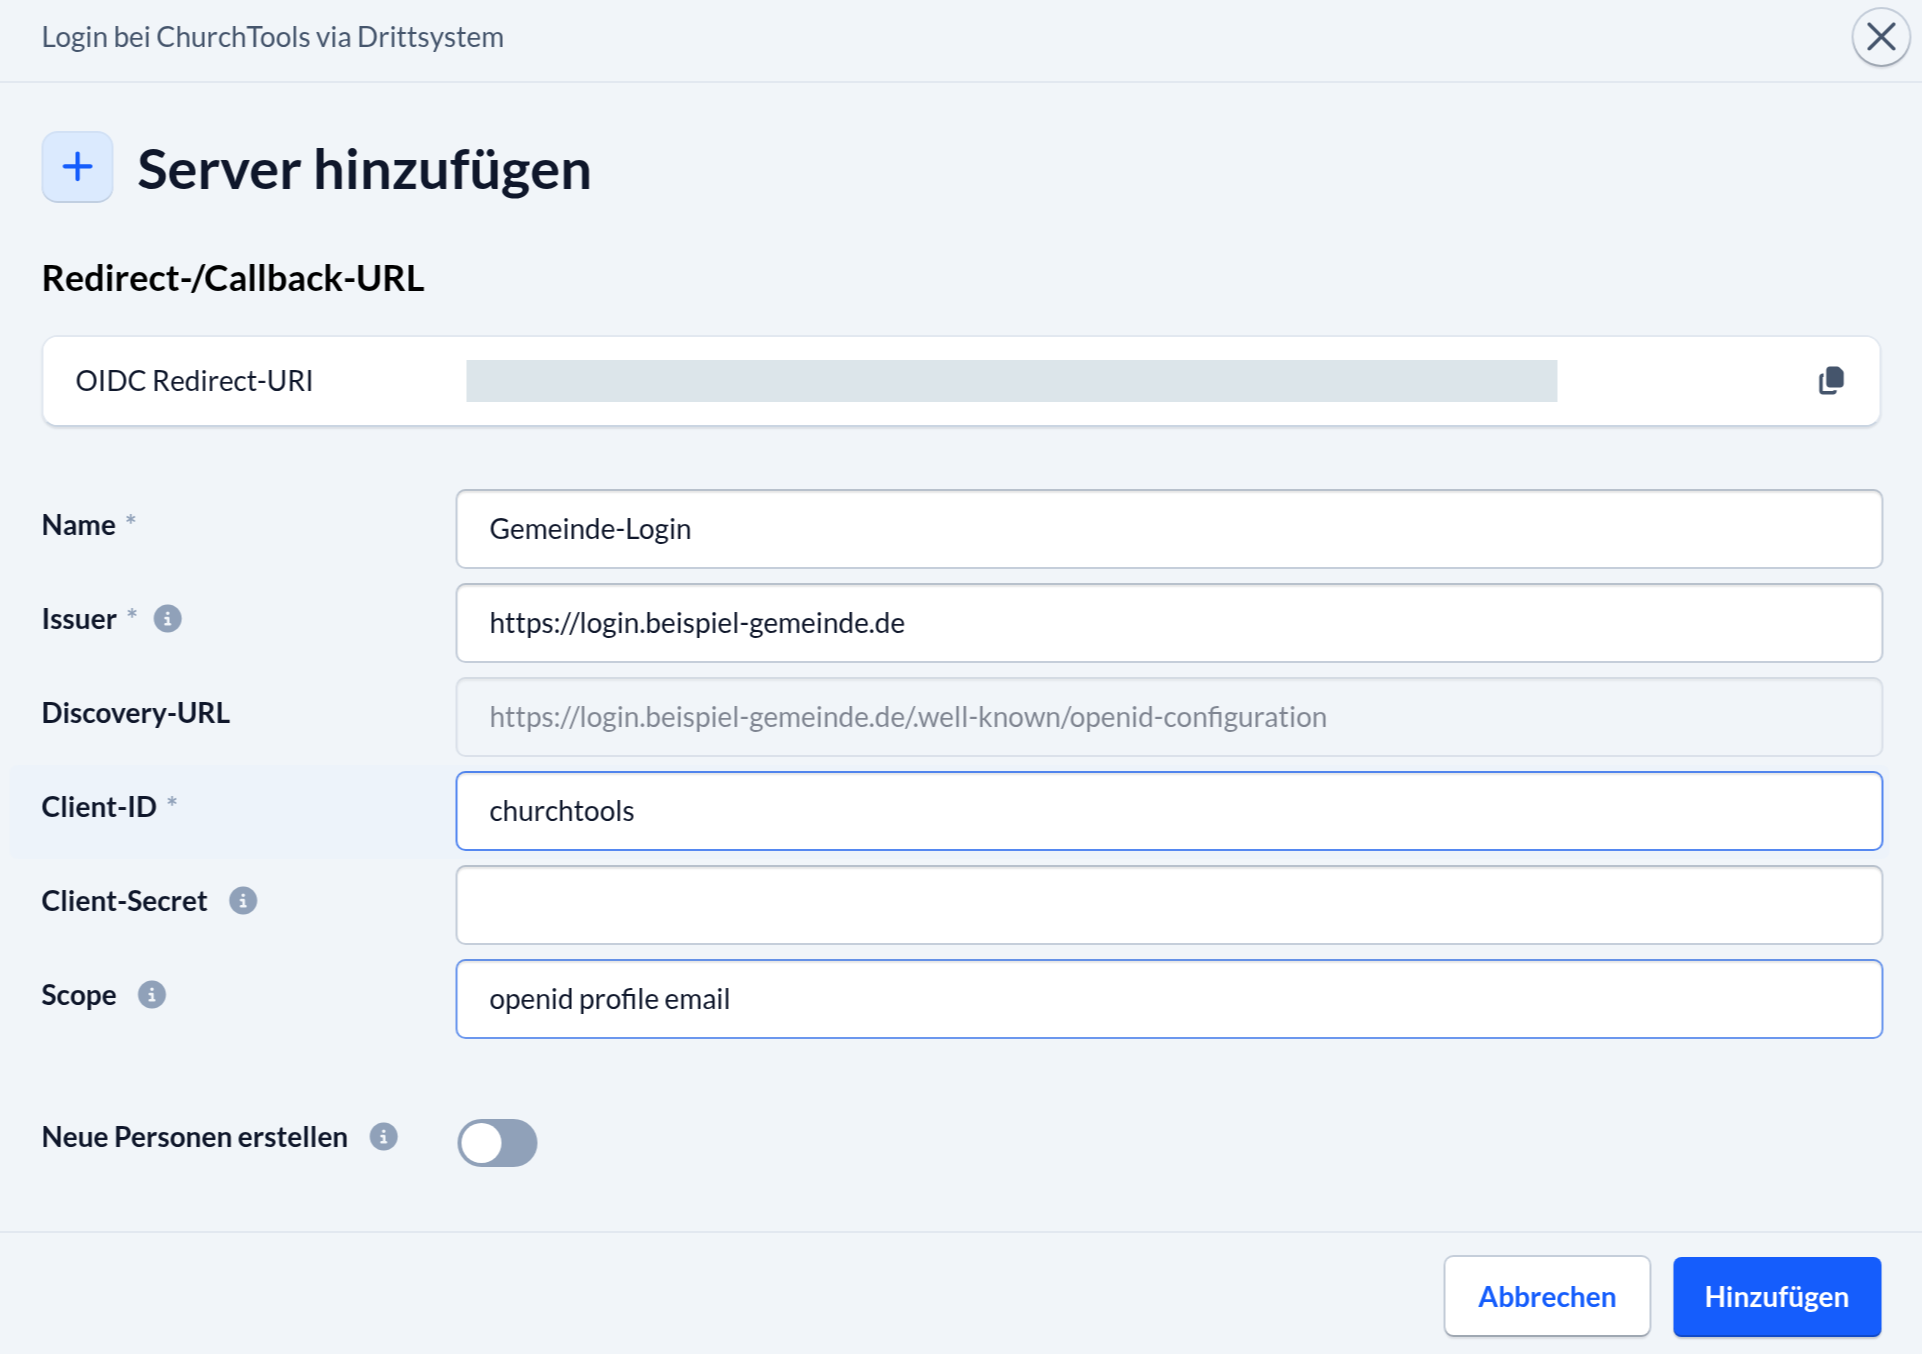
| Field | What are you entering? |
|---|---|
| Name | A clear name that helps your users identify the provider; for example, “Login with Google” for a Google integration. |
| Issuer | The exact issuer address as specified in the provider’s documentation or configuration. Any trailing slash is part of the address. |
| Discovery URL | This is automatically derived from the issuer. You do not need to enter the individual registration and token addresses manually. |
| Client ID | The identifier of the application you registered with the ChurchTools provider. |
| Client Secret | The secret associated with this application. It is required when creating the application. If you leave it blank when editing later, the saved secret will remain unchanged. |
| Scope | Normally, there are three scopes: “openid profile email.” Multiple scopes are separated by spaces. Enter additional scopes only if the provider specifies that they are required to obtain the necessary information. |
| Create New People | If no matching person is found, a new person can be created automatically. |
Finally, add the Login provider.
3. Test OIDC registration #
Click on the newly created login provider to open its details page. Here you’ll find all the connection details again. At the bottom of the page, you can now test the OICD registration. Click the blue button to verify that the connection has been set up correctly.
An additional browser window will open. If your browser blocks it, allow it. Then sign up for registration on the provider’s site.
Return to the details page and check the results. If the test is successful, you’ll see what types of information the provider has submitted. Personal information is not displayed in the test.

The test checks the technical connection and the validity of the registration. It does not create any individuals in ChurchTools, does not link any accounts, and does not sign up any individuals into ChurchTools. A successful test therefore does not prove that the individual mapping works.
Therefore, check that you are actually signed up by using a separate browser profile or incognito window. Use a specific, active user and then verify that you are signed up in the correct ChurchTools profile. If you want to approve new users, it’s best to check this scenario as well and review the assigned permissions.