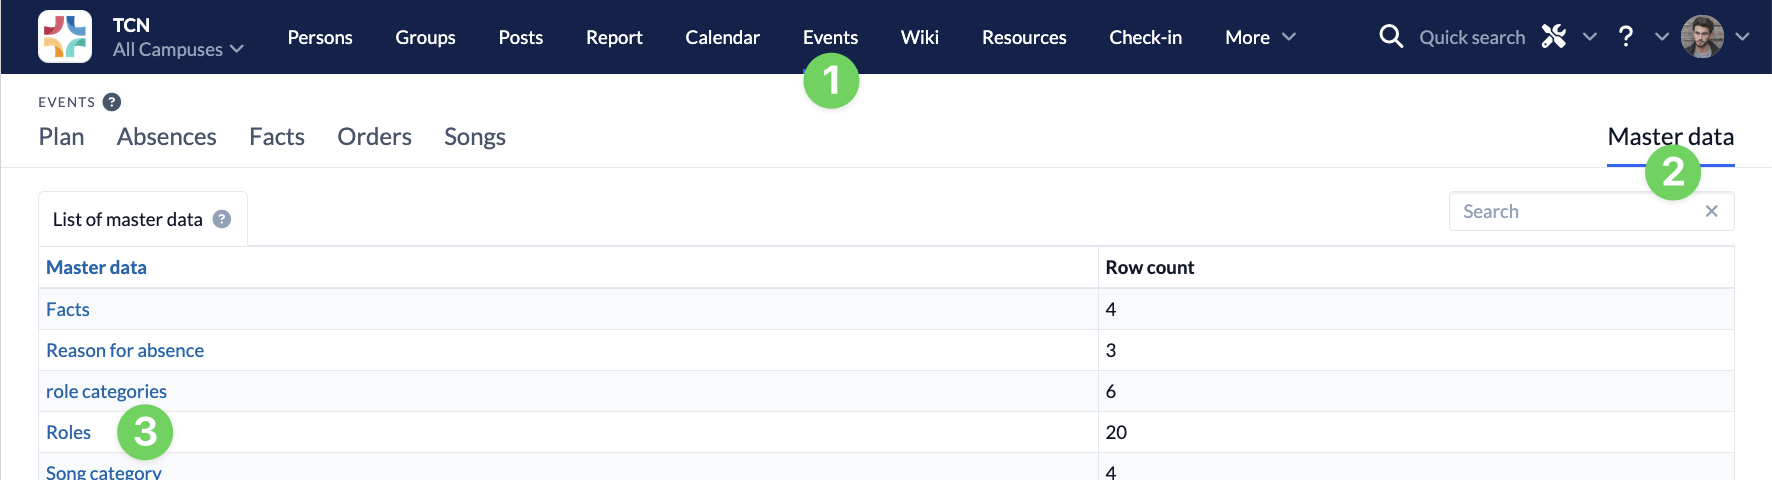
1. Call up Roles in the Events module #
In the Events module (1), call up the master data (2) on the right-hand side and select the Roles (3) here.
2. Create service #
Use the blue plus symbol below the service list to create a new Roles.

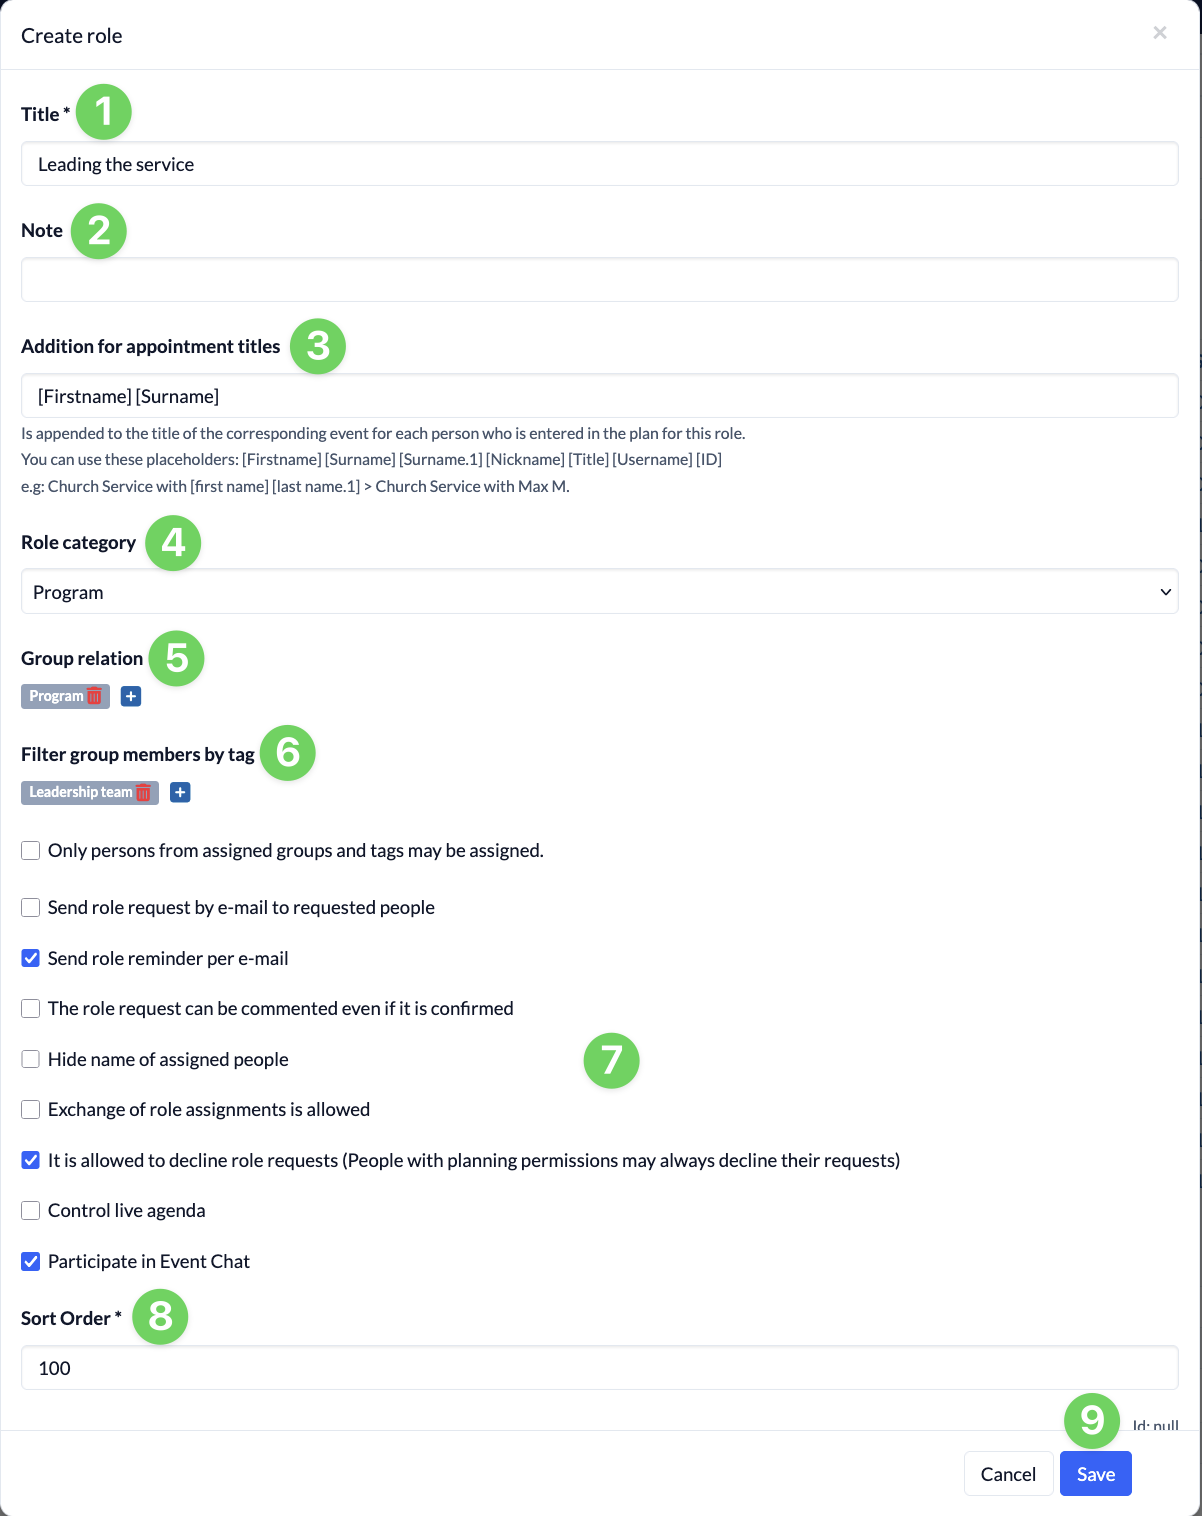
To create a new Roles, fill in the following fields:
- Enter the name (1) of the new Role categories here.
- Under Remarks (2), you have the option of defining the Roles in more detail. The comment is displayed when you move the mouse over the roster and in roster requests by e-mail.
- When adding to the appointment title (3), you can enter placeholders for the name of the assigned person. The stored data is then added to the appointment title and filled in.
- Here you assign the Roles to a Role categorie (4). In the column selected here, the Roles can be added to the roster.
- Under Group assignment (5), you can assign a group of the group type Roles from the Groups module to the service in order to be able to assign its group members to this service.
If you assign several groups here, you can later filter by the members of the individual groups in the service assignment. - If you have assigned groups, you can also filter the group members by tags (6) so that the selection of employees to be assigned can be narrowed down even further. If you set several tags here, the group member only needs to have one of the tags to be displayed.
- Use the checkboxes (7) to define further settings for the people assigned to this service.
- Use the sorting (8) to determine where the Roles should be displayed.
- Click Save (9) to create the new Roles.