
You can use newsletter tools such as MailChimp, CleverReach or Mailjet to send large newsletters. These newsletter tools offer you some additional functions that ChurchTools cannot currently offer, e.g. individual designs or the sending of read receipts.
The assignment to the newsletter tool is done exclusively via groups. You can therefore create a group in ChurchTools, e.g. “Newsletter”, and assign an addressee list to it at the newsletter sender.
All the people you assign to this group are then also created in the newsletter tool of your choice. As soon as a recipient withdraws (from) the newsletter, the newsletter tool remembers the deregistration and ChurchTools cannot assign the person to the newsletter again. This fulfills the legal requirements for newsletters.
Setting up the newsletter integration #
- You activate the newsletter integration for the respective newsletter platform in the system settings under Integrations. To do this, you usually need an API key or other access data for the newsletter tool, which you must enter here.
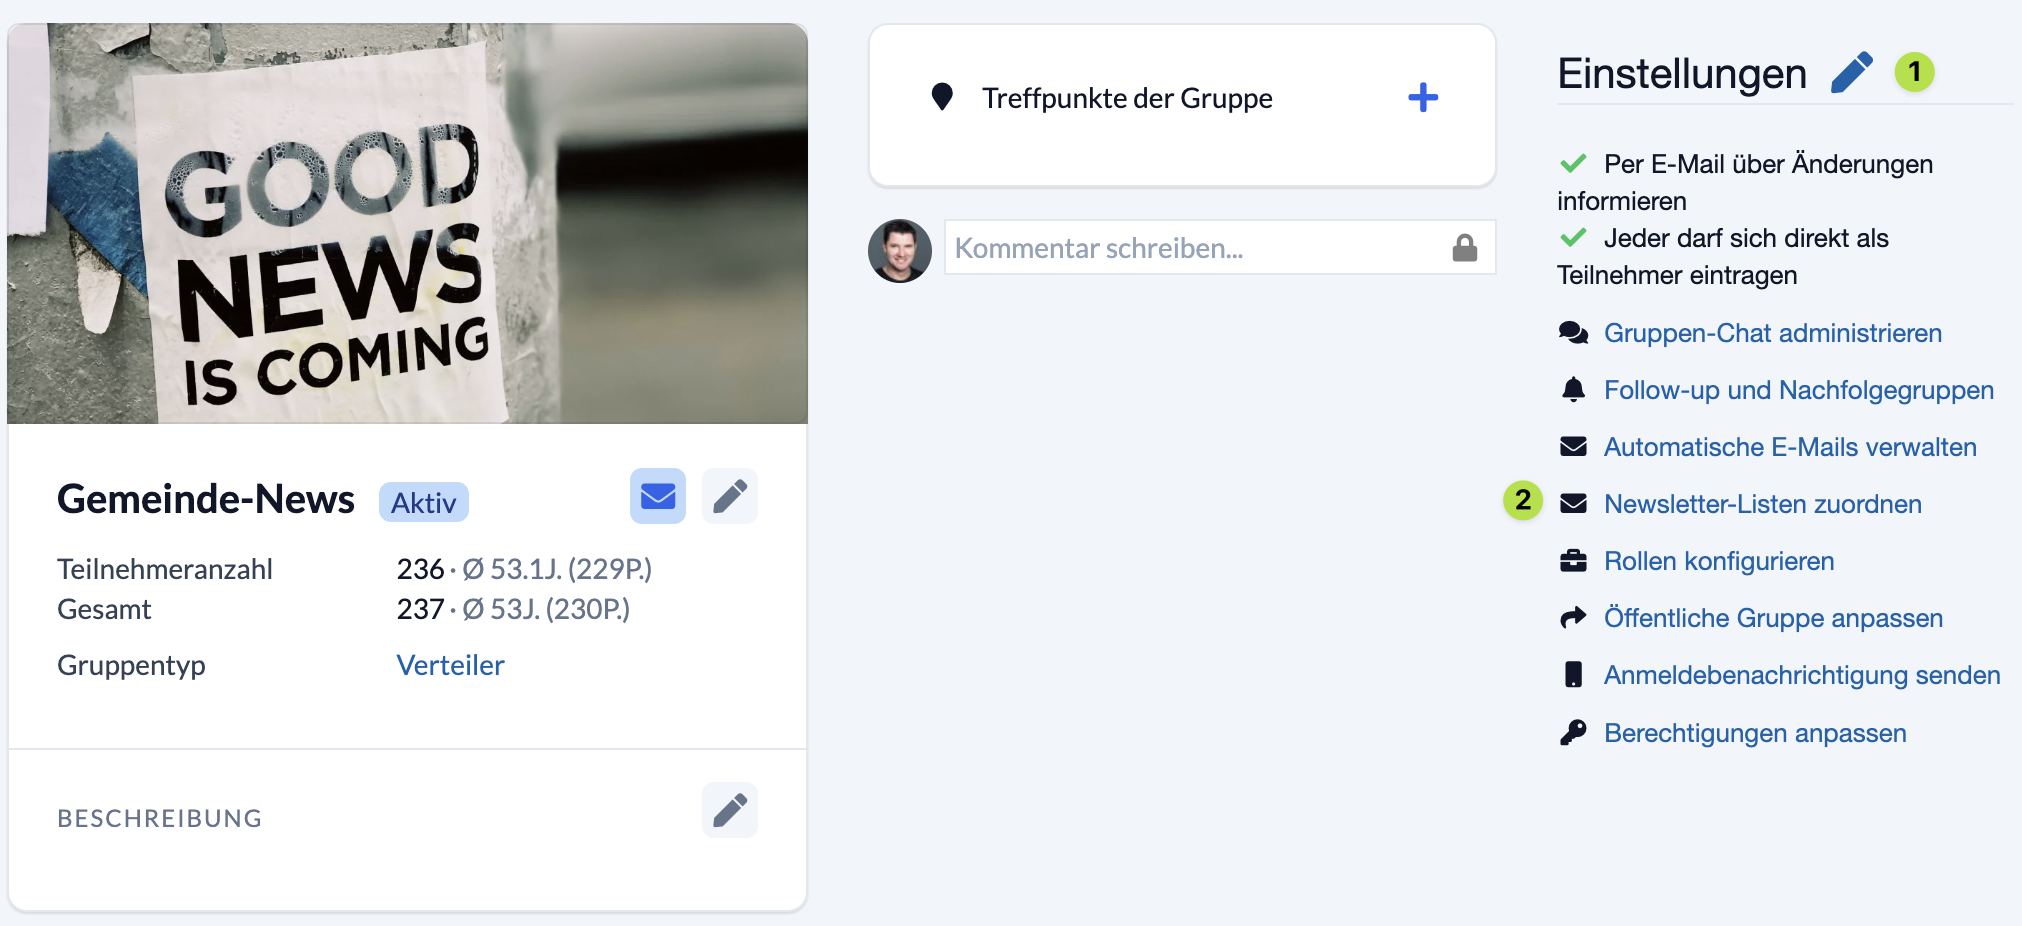
- After activation in the system settings, configure the integration for individual groups in the group settings (via Persons -> Groups (old)). To do this, select Assign newsletter lists (2) to the desired group in the Group module in the settings (1).
Assign newsletter lists #
You can assign any number of newsletter lists to a group. If lists have already been assigned, they will be displayed in the upper area of the dialog window (1).
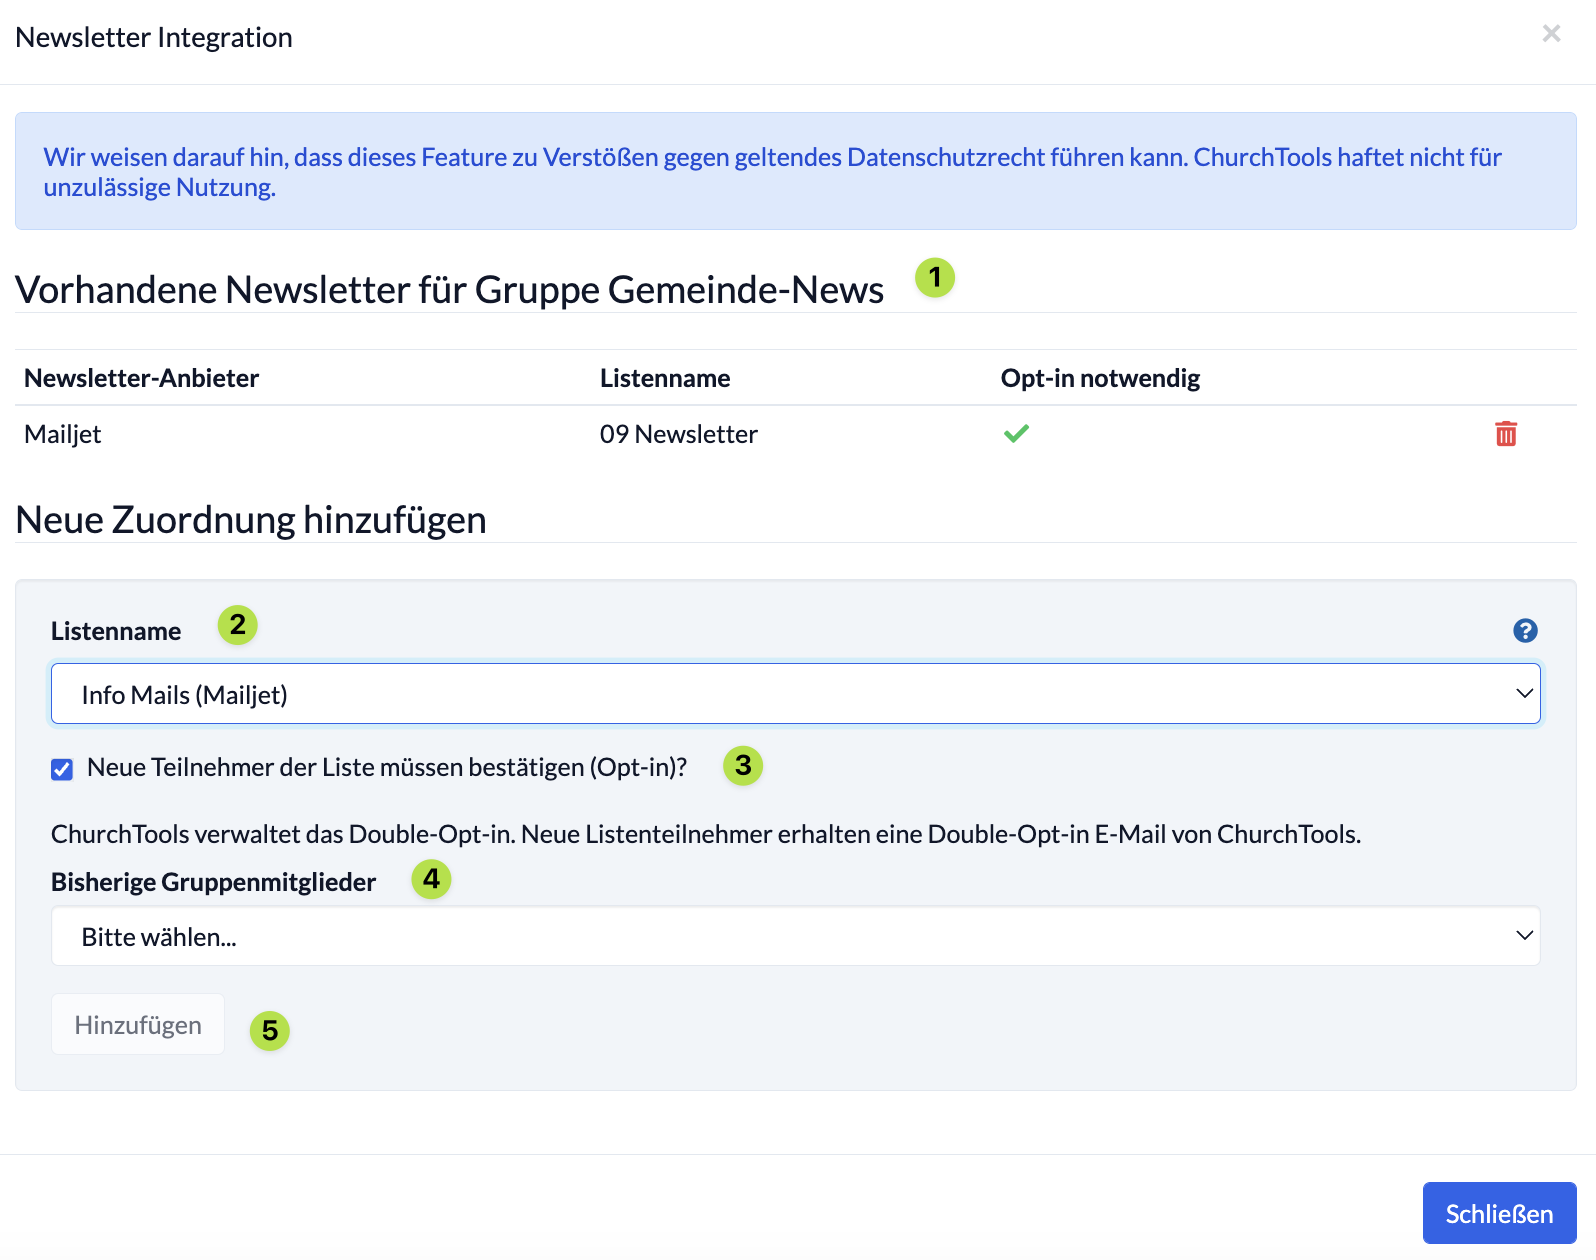
- (2) List name
Here you can select an existing list from your newsletter platform or have ChurchTools create a new list for you. - (3) New subscribers to the list must confirm (opt-in)?
As soon as you activate this, opt-in emails are automatically sent by ChurchTools or the newsletter platform, depending on the newsletter platform. This means that the recipient is asked by e-mail to confirm that they really want to receive the newsletter by clicking on a link. This is required by law. - (4) Previous group members
Here you can set whether previous group members should also receive an opt-in e-mail or not (e.g. because they have already given their opt-in when switching from one newsletter platform to another).

- (5) Finally, click on Add to create the new newsletter list.
Synchronization with the newsletter tool #
Synchronization always takes place when the cron job is executed. By default, this is executed automatically every hour. If it is to be executed manually, you can click on Execute scheduled tasks in the Manage menu at the top right.
During synchronization, there is a comparison between ChurchTools and the newsletter tool and the name and e-mail address are checked. If a user’s e-mail address changes, the user is automatically deleted and recreated in the newsletter tool. In this case, the user must consent again if opt-in is activated.
There is NO synchronization from the newsletter tool to ChurchTools. This means that changes made in the newsletter tool are not transferred to ChurchTools. For example, if you add or delete someone there manually or the user withdraws (from) the newsletter independently.
The current status of the opt-in can be checked for each participant in the participant list.

- Green -> Opt-in confirmed: Participant is added to the newsletter list.
- Brown -> Opt-in confirmed: Participant will be added to the newsletter list with the next cronjob.
- Red -> Opt-in pending: Subscriber is not entered in the newsletter list.
- No checkbox -> Opt-in is deactivated or no valid e-mail address has been entered for the user.