


In your newly requested ChurchTools account, the person with user ID #1 is automatically designated as the super admin. You can identify a super admin by the red “Admin” badge in the permissions management section.
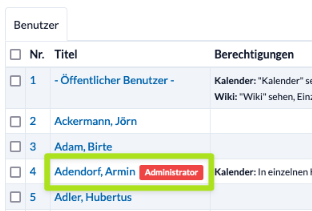
In this step-by-step guide, you’ll learn how to add a new super admin or remove an existing one.
1. Verify the authority to issue instructions #
Check to see if you are listed as an authorized user in your ChurchTools account with your current e-mail address.
If not, please add yourself as an authorized representative in the System settings under Privacy/Security >> , or contact another authorized representative in your congregation and have them add you.
2. Find the Super Admin’s user ID #
To add or remove a user as a super admin in your system, we need the ID of that person’s account. You can find the ID by going to ” People” and viewing the user’s profile. The ID is displayed in blue in the lower-right corner, preceded by a hash symbol.
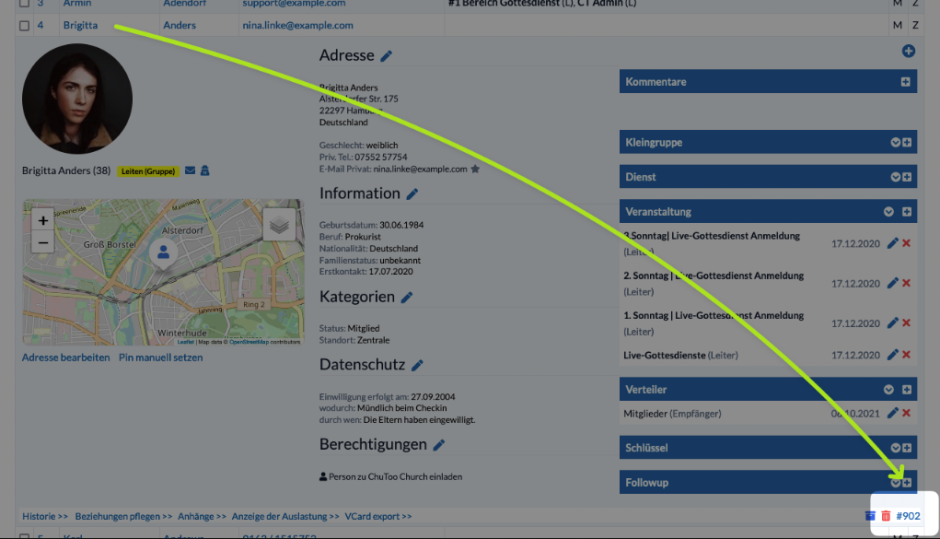
3. Send information to Support #
Once these three points have been clarified, send a message with all the necessary information to our support team via our Super Admin contact form, and they will add another Super Admin or remove an existing one.