Install and use our LabelPrinter tool for printing your labels from the check-in.
1. Install LabelPrinter #
You can find the installation file for Windows here for download.
If your church does not use Windows devices, you could use a Raspberry Pi in your network and install the tool on it. You can then control this over the network, e.g., from devices with Linux or macOS operating systems or from mobile devices.
2. Set Up and Edit ChurchTools Access #
After running the file, under Settings
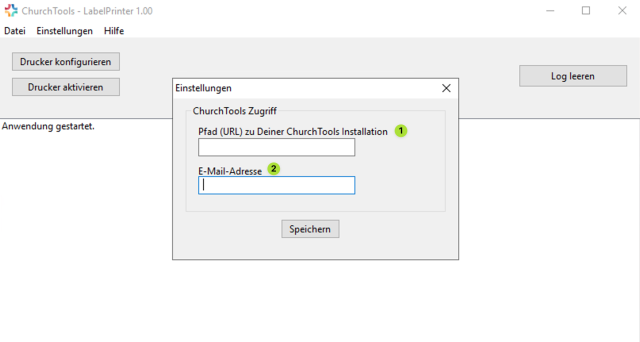
(1) Enter the URL of your installation here. e.g. https://meinegemeinde.church.tools
(2) And here, enter the email address of a user of this installation.
We recommend creating a separate user for this purpose. You should definitely try logging in with this user once to set the password and confirm the consent page if necessary.
You can change this data at any time in the LabelPrinter tool under Settings
3. Configure Printer and Enable for ChurchTools #
Under Configure Printer, select the printer, set it up, test it, and enable it for ChurchTools.
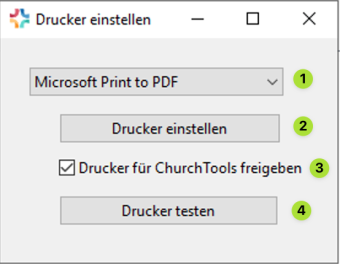
(1) You select the desired printer.
(2) And set the settings for the printer.
(3) In this step, confirm with the checkbox that you want to enable this printer for ChurchTools.
(4) Finally, test the printer and check if your settings are correct.
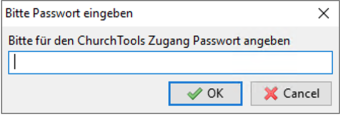
4. Activate Printer #
To activate the configured printer, enter the password for the user chosen in step 2 here.
5. Select Printer in Check-in #
Now that you have connected the printer, a user with the appropriate rights in your ChurchTools installation can select it in the check-in and automatically print the labels for your check-ins.
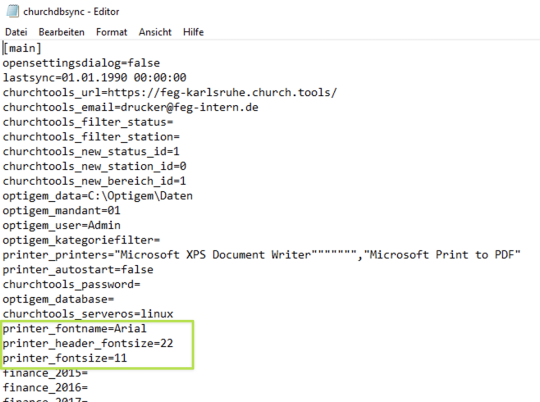
6. Optional: Adjust Font and Size #
To adjust the font and size, make the appropriate settings in the churchdbsync.ini file. This file is located in your user data, in the hidden system directory “AppData”.
6.1 Make System Directory “AppData” Visible #
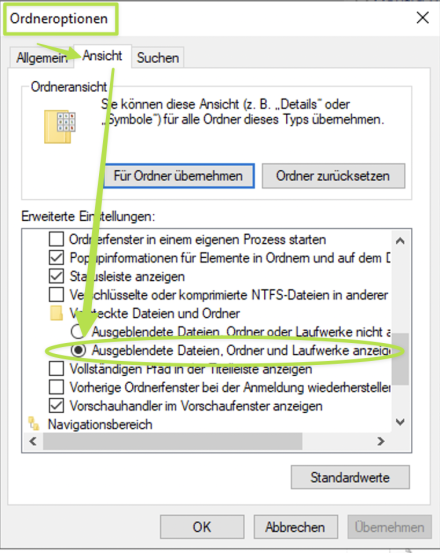
To do this, open your Windows Explorer, switch to the View tab here and click on Change folder and search options in the Options dropdown.

In the Folder Options, switch again to the View tab. Here, scroll down a bit in the list and activate the option Show hidden files, folders, and drives. This will make the hidden system directory “AppData” visible.
6.2 Access and Edit churchdbsync.ini File #
Then select the corresponding folder in Windows Explorer under the following path: This PC > Local Disk > Users > Administrator > AppData > ChurchDBSync. In this folder, you will find the file “ChurchDBSync”.

When you access this file, it opens in an editor. Here you can find the settings for font and size and edit them according to your preferences.