
1. Open calendar module #

2. Create new appointment #
We have a dedicated guide to show you how to create new appointments.
Best check that out first before you continue with this guide.
3. Create registration group #
After you’ve filled in all your appointment information switch to the Registration (1) tab and activate the slider (2) to create a registration group.
Fill in the group type, select if the group is supposed to be created ahead of the appointment and if it is supposed to be automatically deleted at a certain time after.
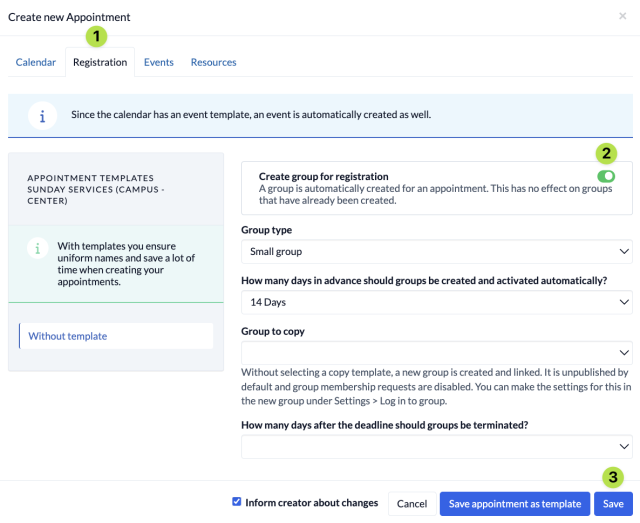
Group to copy
We recommend to create a new group via the Persons & Groups module before you create your appointment and set that group up in advance according to your requirements so you can use this group as a template for your registration group which you want to add to the appointment.