A campus in ChurchTools is a kind of virtual administration room in which all the data collected in it is labeled. This marked data can be filtered and can also be authorized separately. Each person in ChurchTools is always assigned to exactly one campus: the default setting is always the Campus – Center. You can customize this campus for your congregation and of course add more. You can find out how to do this in this article.
You can create a campus profile for each campus, which you can publish in the ChurchTools Finder and the app. With this profile, your congregation can present itself publicly, which can bring more people into your congregation and make it easier for people with a ChurchTools account to Login to your ChurchTools.
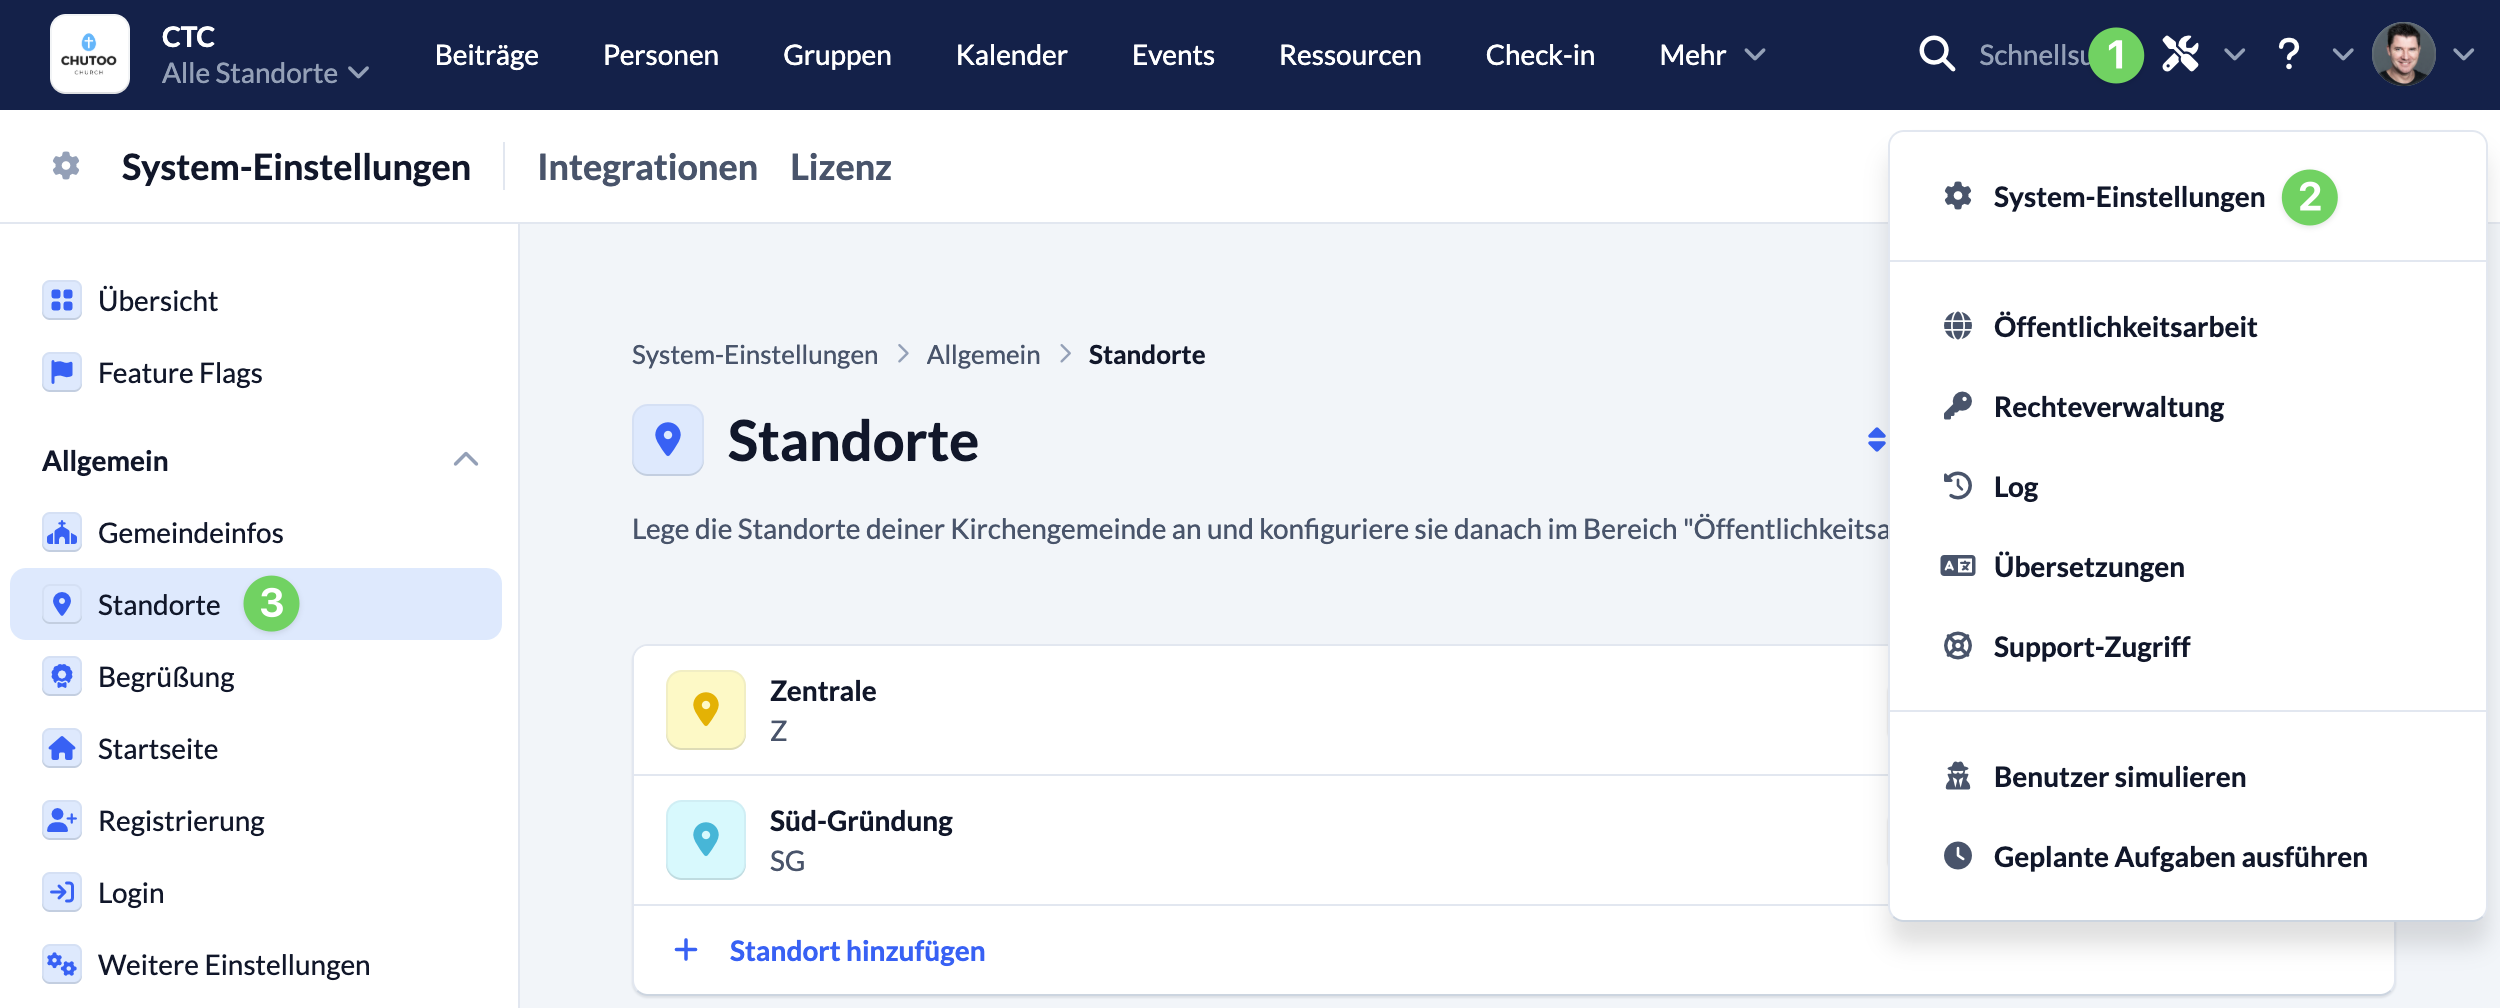
Call up Campus in the System settings #
Use the Manage menu (1) in the blue menu bar to call up the System settings (2). Then click on Campus (3) in the General section.
Adapt existing campuses or create new ones #
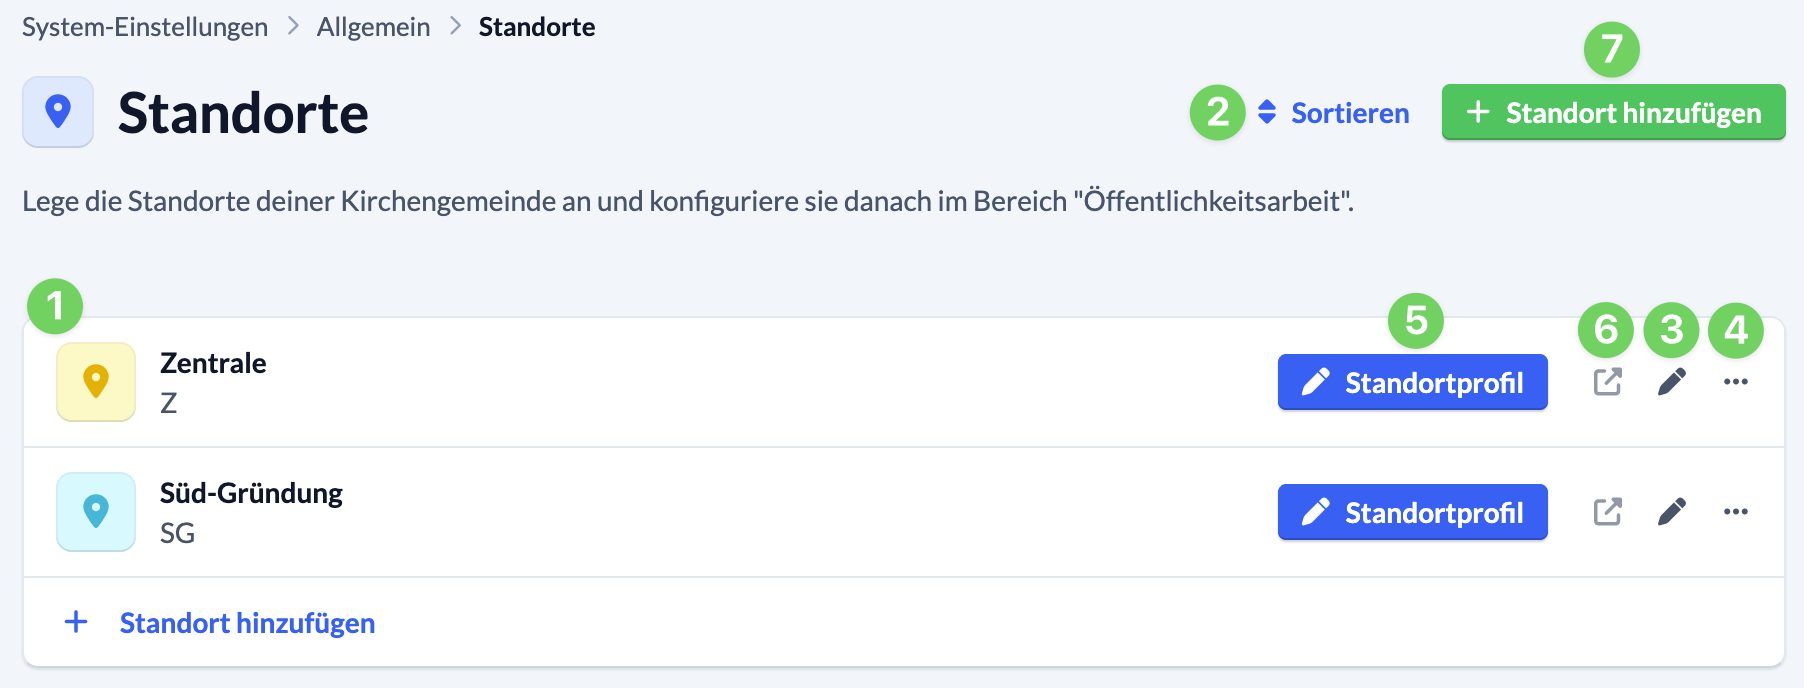
All existing campuses (1) are displayed in the list.
You can adjust the order in which they are listed in different places in your ChurchTools via Sort (2).
You can edit a campus by clicking on the pencil (3). You can customize the name and the campus abbreviation for each campus. You can also enter an abbreviated name for the campus.
You can use the context menu (4) to edit or delete the selected campus or edit its location profile.
You can edit and publish the profile using the Campus profile button (5). Use the link (6) directly next to it to call up the published profile in the Finder.
If you want to create a new campus, click on + Add campus (7).