With the placeholders in ChurchTools, you can not only have individual content replaced in a customized way, but also use so-called control structures and thus personalize your e-mails, templates, etc. even further.
With control structures, you can include conditions and dependencies that define whether and if so, which placeholders should be used. If you use control structures, they are highlighted purple in the editor.
On this page, we would like to show you four examples of different control structures that we think are very useful. You can of course also combine them with each other.
Gender-specific salutation #
You can use if-then conditions with placeholders to ensure that placeholders are only used in certain situations or only when certain characteristics apply.
For example, you can ensure that the salutation in your e-mails is always correctly adapted to the gender of your addressee.
In ChurchTools, you work with the ifEqual control structure, which basically looks like this:
- Start:
{{#ifEqual placeholder}} - End:
{{/ifEqual}}
For the gender-specific salutation, your combination of control structure, placeholder and text looks like this:
- Male:
{{#ifEqual person.sexId 1}} Dear Mr. {{person.lastName}} {{/ifEqual}} - Female:
{{#ifEqual person.sexId 2}} Dear Ms. {{person.lastName}} {{/ifEqual}} - Unknown:
{{#ifEqual person.sexId 0}} Dear {{person.firstName}} {{person.lastName}} {{/ifEqual}} - Diverse:
{{#ifEqual person.sexId 3}} Dear {{person.firstName}} {{person.lastName}} {{/ifEqual}}
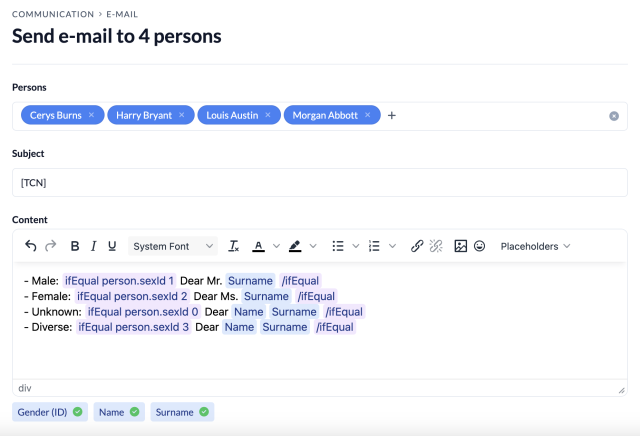
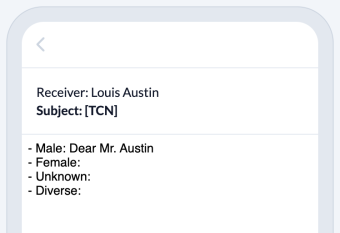
With this control structure, you define which salutation should be used, depending on which gender is stored in the user account of the addressee. The preview shows you that only the salutation that applies to the respective addressee is used and filled in.
Male addressee
Female addressee
If you want to include the gender-specific salutation in your e-mails as shown above, you can simply copy and paste this snippet:
{{#ifEqual person.sexId 1}} Dear Mr. {{person.lastName}} {{/ifEqual}}
{{#ifEqual person.sexId 2}} Dear Ms. {{person.lastName}} {{/ifEqual}}
{{#ifEqual person.sexId 0}} Dear {{person.firstName}} {{person.lastName}} {{/ifEqual}}
{{#ifEqual person.sexId 3}} Dear {{person.firstName}} {{person.lastName}} {{/ifEqual}}
Default values #
You can also use control structures to define default values that should be inserted if a placeholder cannot be filled in because the information is not stored in the addressee’s user account. To do this, you use the control structure default, which basically looks like this:
{{#default placeholder 'default value'}}
For example, if you want to send an e-mail to all donors to match the addresses for sending the donation receipts via mail, your control structure will look like this if you use a default value for the placeholder street:
{{#default person.street 'No street available'}}
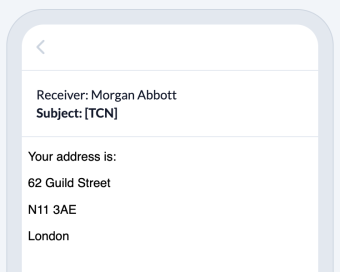
The preview clearly shows the effect of the default value.
If all the information is available for an addressee, it is also filled in according to the placeholders and the default value is not used. If the information is missing, the default value is inserted.
All information available
Some information is missing
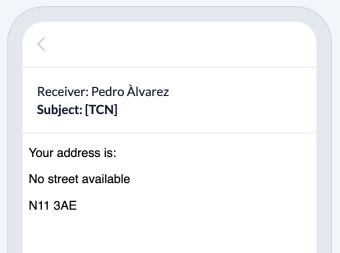
Our example also shows that it can be useful to work with default values to make it clear that information is missing. No default value was used for the placeholder City and the line therefore remains empty in the e-mail text. In contrast to the Street field, which is filled with the default value, it is not clear here that the city is missing. It would therefore make sense to work with a default value here as well.
Context change #
You can use the control structures each and with this to change the context in which a placeholder is used.
The control structures basically look like this:
each
- Start:
{{#each placeholder}} - End:
{{/each}}
with this
- Start:
{{#with this}} - End:
{{/with this}}
You can use this function, for example, if you want to list the names of all the addressees’ children.
In this case, your control structure looks like this:
{{#each relations.parent-child.child.all}} {{#with this}} - Name{{/with}} {{/each}}
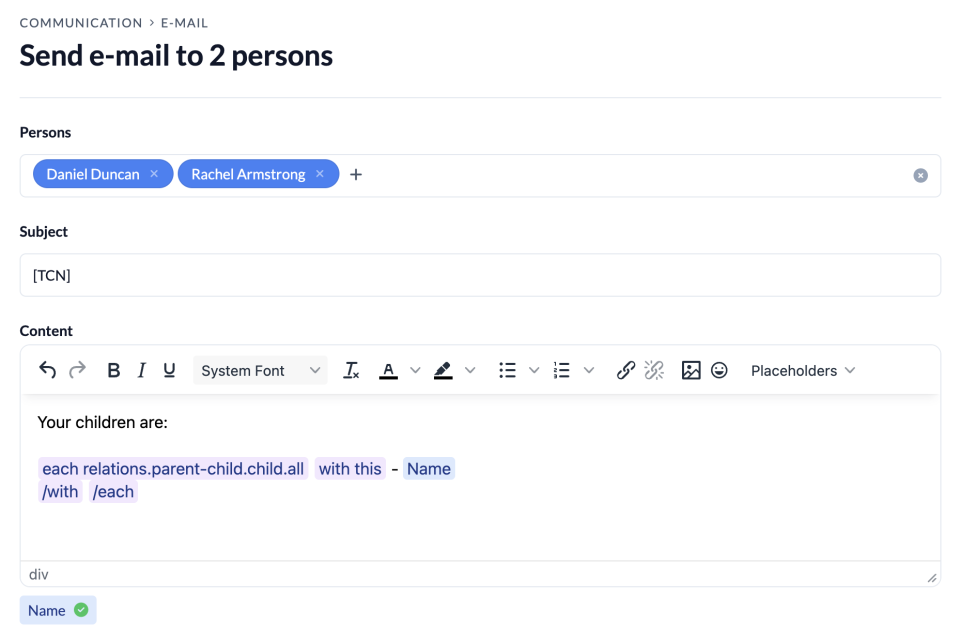
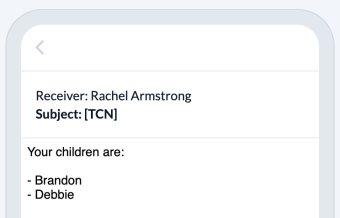
In the preview you can see that the first names of all children (if the relationships are maintained in the user account) are listed.
Generate QR codes #
QR codes can be helpful for a wide variety of situations and you can now generate them yourself with a control structure and determine the content individually.
- Start:
{{#qrcode}} - End:
{{/qrcode}}
Between the start and end of the control structure, you can enter your content, which will be converted into a QR code. This can be the website of your church or a link to display the geographically nearest church in the ChurchTools Finder.
{{#qrcode}}custom content{{/qrcode}}
The generated QR code is displayed in the preview so that you can check directly whether you can scan it and be guided to the desired result.
Link to the church website #
{{#qrcode}}https://www.my-church.de{{/qrcode}}
Link to the ChurchTools Finder #
If you use the placeholder {{person.city}}} within the QR code control structure, you can generate a link that is tailored to the addressee of your e-mail and shows the church in the ChurchTools Finder that is geographically closest to the person’s address.
{{#qrcode}}https://find.church.tools/search?query={{person.city}}{{/qrcode}}