Whenever you use a new file, e.g. an image, on your ChurchTools Website, it is automatically saved in the files of your website. In the admin area of your website you will find the files (Dateien) under the item of the same name in the menu.
You can easily find a specific file via the search field.
If, for example, you want to use an image in several places on the website, you only have to upload it once. This saves storage space!
To make this work as effectively as possible, it can help to organise the files on your website in folders, just like on your hard drive.
Manage files #
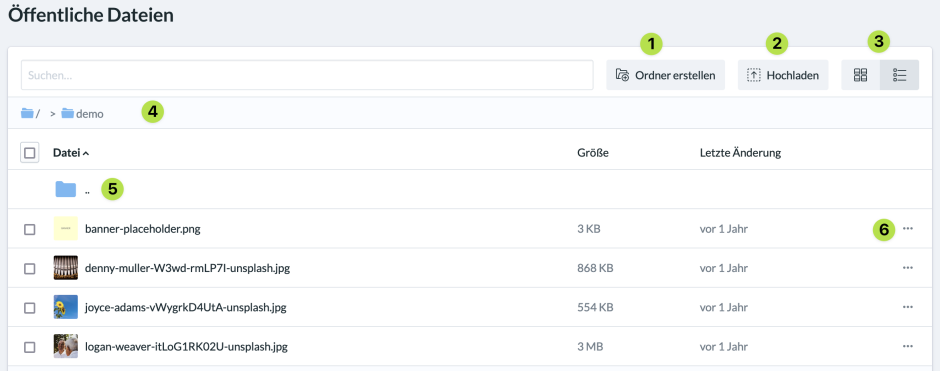
The Files menu works very much like your operating system’s File Explorer.
(1) Create folder #
Create a new folder.
(2) Upload #
Upload a new file
(3) Switch view #
Here you can switch between the list view and the tile view.
(4) Path #
Here you can see which folder you are currently in.
(5) One level up #
If you are in a folder, you always move up one level with this symbol:

(6) File menu #
You can edit a file, copy its URL, duplicate it, rename it, move it or delete it using the “…” button.