1. Select calendar day #
To create an appointment, navigate to the calendar module. There you can use the + symbol (B) or simply click on the calendar day (A) on which you want to create the appointment.

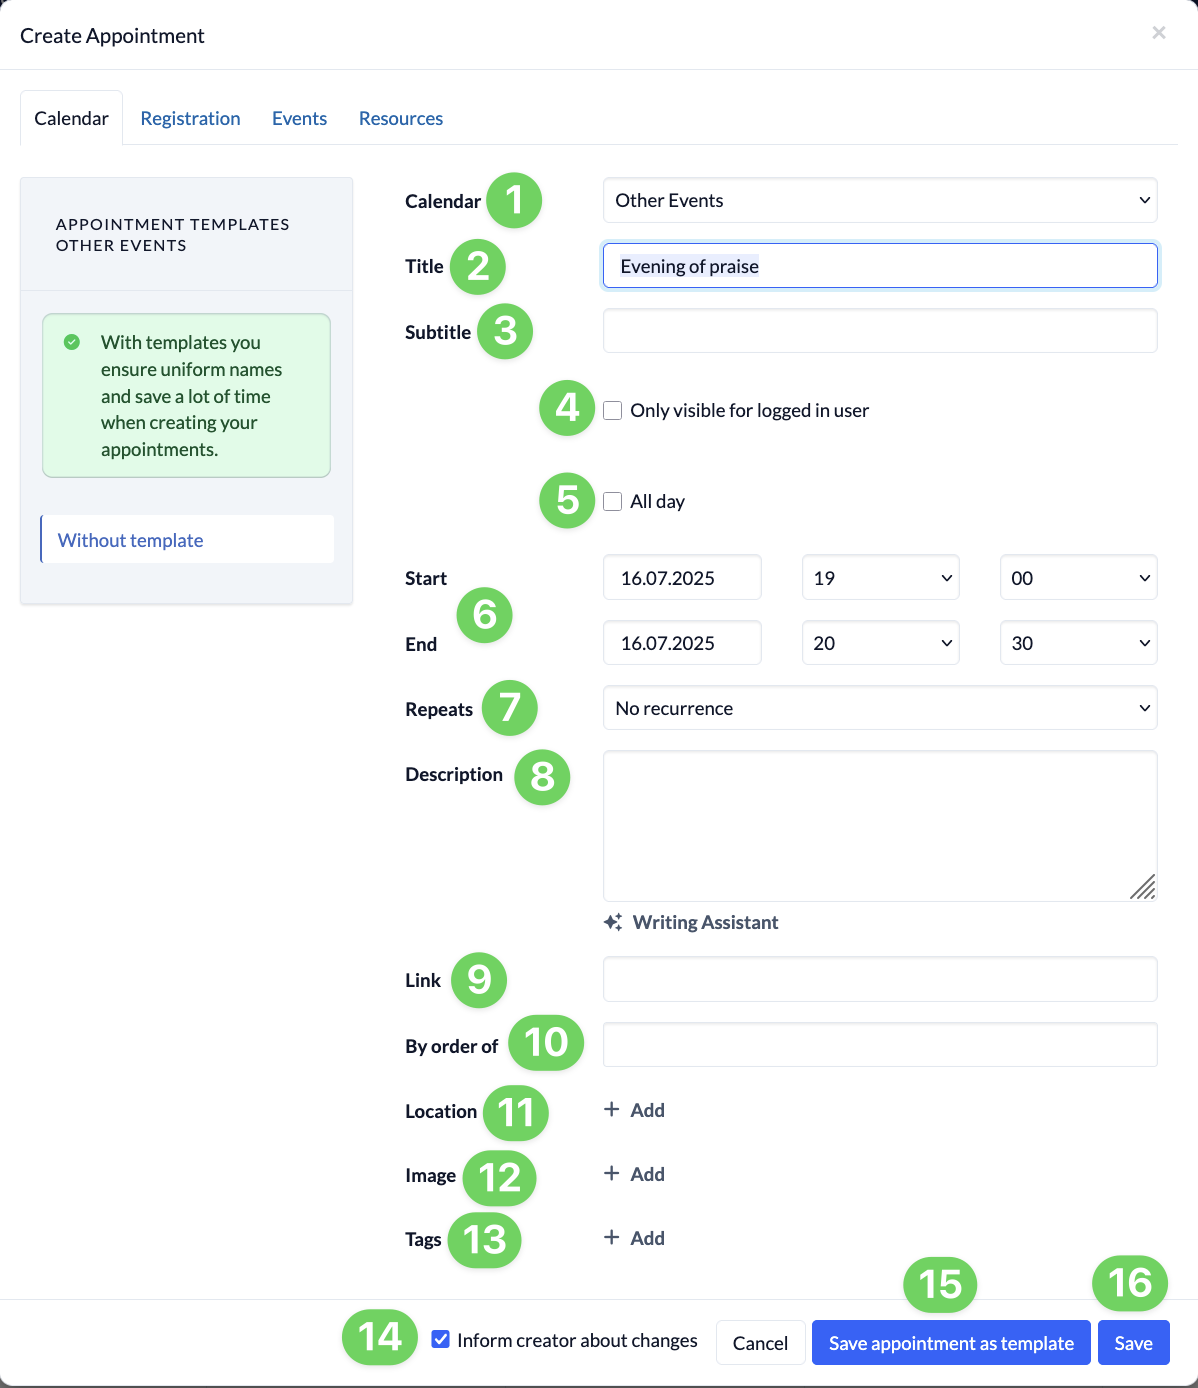
2. Enter appointment information #
- (1) Select the calendar in which you want to create the appointment.
- (2) Give the appointment a title.
- (3) Give a subtitle (optional).
- (4) With this option, you determine whether the appointment should only be visible to logged-in users if you have selected a public calendar.
- (5) Determine whether it is an all-day appointment.
- (6) Define the start and end of the appointment.
- (7) You can select whether it is a recurring appointment. If you want to create such a recurring appointment, you can then enter until when and at what interval your appointment series should be repeated and, if necessary, exclude or add certain appointments from or to the series.
- (8) You can use your own appointment description or use the writing assistant.
- (9) Insert a link (e.g. for video conferences or other websites).
- (10) If you are creating the appointment on behalf of someone else, you can select this person here. To do this, type the name in the field and then select the person from the list.
- (11) Add the location where the appointment will take place.
- (12) You can add a picture that will be displayed in the calendar.
- (13) Add appointment tags which can be filtered and searched for.
- (14) Select whether the creator of the appointment should be informed of your changes. (This setting is only applied if you make changes to an existing appointment).
Once you have entered the required information, you can either save the appointment (15) or save it as a template (16), which you can then use as a appointment template when creating similar appointments (17).