A campus in ChurchTools is a kind of virtual administration room in which all the data collected in it is labeled. This marked data can be filtered and can also be authorized separately. Each person in ChurchTools is always assigned to exactly one campus: the default setting is always the Campus – Center Head Office. You can customize this campus for your congregation and of course add more. You can find out how to do this in this article.
Call up Campus in the System settings #
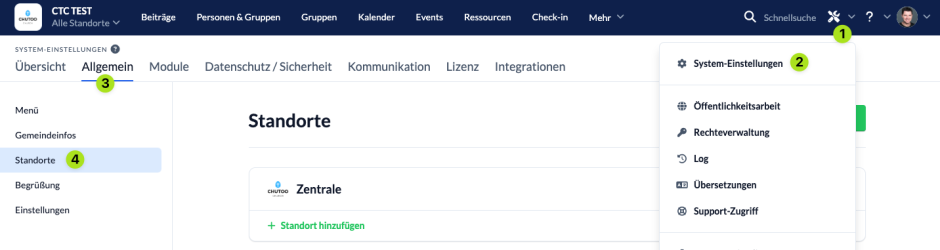
Use the Manage menu (1) in the blue menu bar to call up the System settings (2). Under General (3), call up the Campus (4).
Adapt existing campuses or create new ones #
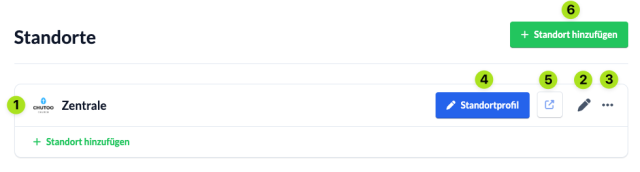
All existing campuses (1) are now displayed in the list. You can customize a campus by clicking on the pencil (2) in the relevant line. Via the … – menu (3) to delete the selected location.
You can create a profile for each campus, which you can publish in the ChurchTools Finder and the app. With this profile, your church can present itself publicly, which can bring more people into your church and make it easier for people with a ChurchTools Account to log into your ChurchTools. You can edit and publish it using the campus profile button (4). Use the link (5) directly next to it to call up the published profile in the Finder.
If you want to create a new campus, click on + Add campus (6).
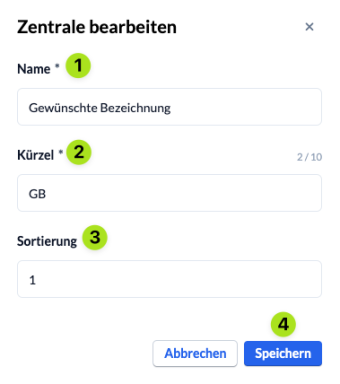
Edit campus #
In the dialog box that opens, enter a name (1) and an abbreviation (2) for your campus. The abbreviation will appear for each person on the right-hand side of the list of people as soon as there is more than one campus.
Sorting (3) determines the position of the campus in selection lists.
Save (4) creates the campus or accepts the change.